Baking chicken tenders might sound simple, but it’s a little dance between crispiness and healthfulness. I’ve always loved that crunch of golden breading, but I don’t want to drown everything in oil. Baking gives me that satisfying bite without the greasy aftermath, especially when I want comfort without feeling sluggish afterward.
This recipe is about more than just health; it’s about reclaiming that childhood favorite with a grown-up twist. The smell of roasting tenders, the way they turn a perfect shade of amber—these little moments make the kitchen feel like a warm hug, even on busy nights. Plus, it’s forgiving enough for a rookie cook, but special enough for when you want to impress.
Focusing on how baking chicken tenders can be a healthier yet still crispy alternative to frying, emphasizing the balance between flavor and wellness.
The inspiration behind this dish
- This recipe was born out of a lazy Sunday craving for something crispy but not greasy. I remember the first time I baked chicken tenders, I was surprised how much better they tasted when baked with a simple seasoned breadcrumb coating—crisp on the outside, juicy inside. It’s become my go-to for quick dinners that feel like a treat without the fried guilt.
- Honestly, I love how this dish reminds me of childhood lunches, but with a bit more finesse. The smell of baking tenders, that warm, toasty aroma mingling with herbs—it’s a small, everyday luxury that makes me smile. Plus, it’s flexible enough to tweak with whatever spices or sides I’m craving, which keeps things interesting.
- heading:
Key ingredients and tips
- Chicken breasts: I prefer skinless, boneless breasts—they stay juicy and cook evenly. If yours are thick, pound them to an even thickness for consistent crispiness.
- Breadcrumbs: I use panko for that extra crunch, but seasoned or whole wheat can add more flavor. Toast them lightly before coating for a nuttier aroma.
- Egg wash: It helps the coating stick better. If you’re out of eggs, a splash of milk or buttermilk works fine—just keep it thick enough to coat the chicken.
- Spices & herbs: I love paprika and garlic powder—they add a smoky, savory kick. Feel free to toss in a pinch of cayenne if you want some heat.
- Oil spray: A quick, even spritz helps crisp up the breading without drowning the tenders in oil. Use a spray bottle or a mister for best results.
- Lemon: Brightens up the flavor and cuts through the richness. Squeeze some over the tenders right after baking for that fresh zing.
- Optional coating: For extra flavor, mix grated Parmesan or chopped herbs into your breadcrumbs. It adds depth and a subtle cheesy aroma.
Spotlight on key ingredients
Chicken breasts:
- I prefer skinless, boneless breasts—they stay juicy and cook evenly. If yours are thick, pound them to an even thickness for consistent crispiness.
- Breadcrumbs: I use panko for that extra crunch, but seasoned or whole wheat can add more flavor. Toast them lightly before coating for a nuttier aroma.
Breadcrumbs:
- I use panko for that extra crunch, but seasoned or whole wheat can add more flavor. Toast them lightly before coating for a nuttier aroma.
- Egg wash: It helps the coating stick better. If you’re out of eggs, a splash of milk or buttermilk works fine—just keep it thick enough to coat the chicken.
Notes for ingredient swaps
- Dairy-Free: Use almond or soy milk instead of eggs for the wash—less rich but still effective for coating.
- Gluten-Free: Swap panko for crushed gluten-free crackers or almond flour—still crispy, just different texture.
- Low-Sodium: Choose unsalted breadcrumbs and skip added salt in the egg wash—control salt levels better.
- Spice Variations: Omit paprika or swap with smoked paprika for a deeper smoky flavor—adds warmth and complexity.
- Herb Boost: Mix chopped fresh herbs like parsley or thyme into breadcrumbs—freshness brightens every bite.
- Oil Type: Use avocado or light olive oil spray for a healthier fat option—still helps crisp without greasiness.
- Sweet Touch: Add a pinch of sugar or honey to breadcrumb mix for a subtle sweet contrast—pairs well with tangy dips.
Equipment & Tools
- Baking sheet: To hold the tenders during baking.
- Wire rack (optional): Elevates tenders for even crisping.
- Shallow dishes: For egg wash and breadcrumb coating.
- Mixing bowls: Prepare ingredients and coatings.
- Kitchen tongs: Handle chicken and coatings hygienically.
- Spray bottle or mister: Apply oil spray evenly.
- Meat thermometer: Check internal doneness.
Step-by-step guide to baked tenders
- Preheat your oven to 200°C (390°F). Line a baking sheet with parchment paper or a silicone mat for easy cleanup.
- Prepare your equipment: a shallow dish for eggs, another for breadcrumbs, and a baking sheet with a wire rack if you have one. The rack helps air circulate for crispiness.
- Slice chicken breasts into strips about 1 inch wide and 3-4 inches long. Pounding them slightly to an even thickness ensures uniform cooking.
- Set up your coating station: in the first dish, beat 2 eggs with a pinch of salt; in the second, mix panko breadcrumbs with your chosen spices like paprika, garlic powder, and a pinch of black pepper.
- Dip each chicken strip into the egg wash, letting excess drip off. then coat thoroughly in the seasoned breadcrumbs. Place on the prepared rack or directly on the lined baking sheet.
- Spritz the coated tenders lightly with oil spray. This helps achieve a golden, crispy surface without deep frying. Bake in the middle rack for 15-20 minutes.
- Halfway through, flip the tenders and spritz again. Keep an eye on the color; they should turn a warm, golden hue with crispy edges. If they brown too quickly, lower the oven temp slightly.
- Once baked, check the internal temperature with a probe thermometer—aim for 75°C (165°F). The coating should be crisp, and the chicken juicy inside.
- Remove from oven and let rest for 3-5 minutes. Resting helps juices redistribute and keeps the tenders tender. Plate and serve with your favorite dipping sauce.
Let the tenders rest on a rack for 3-5 minutes. Serve immediately with sides or dips. For extra crunch, a quick broil for 2 minutes can boost crispness—watch carefully to prevent burning.
How to Know It’s Done
- Color: Golden brown, crispy coating.
- Texture: Firm yet tender when pressed, not rubbery.
- Internal temp: 75°C (165°F) when tested with a meat thermometer.
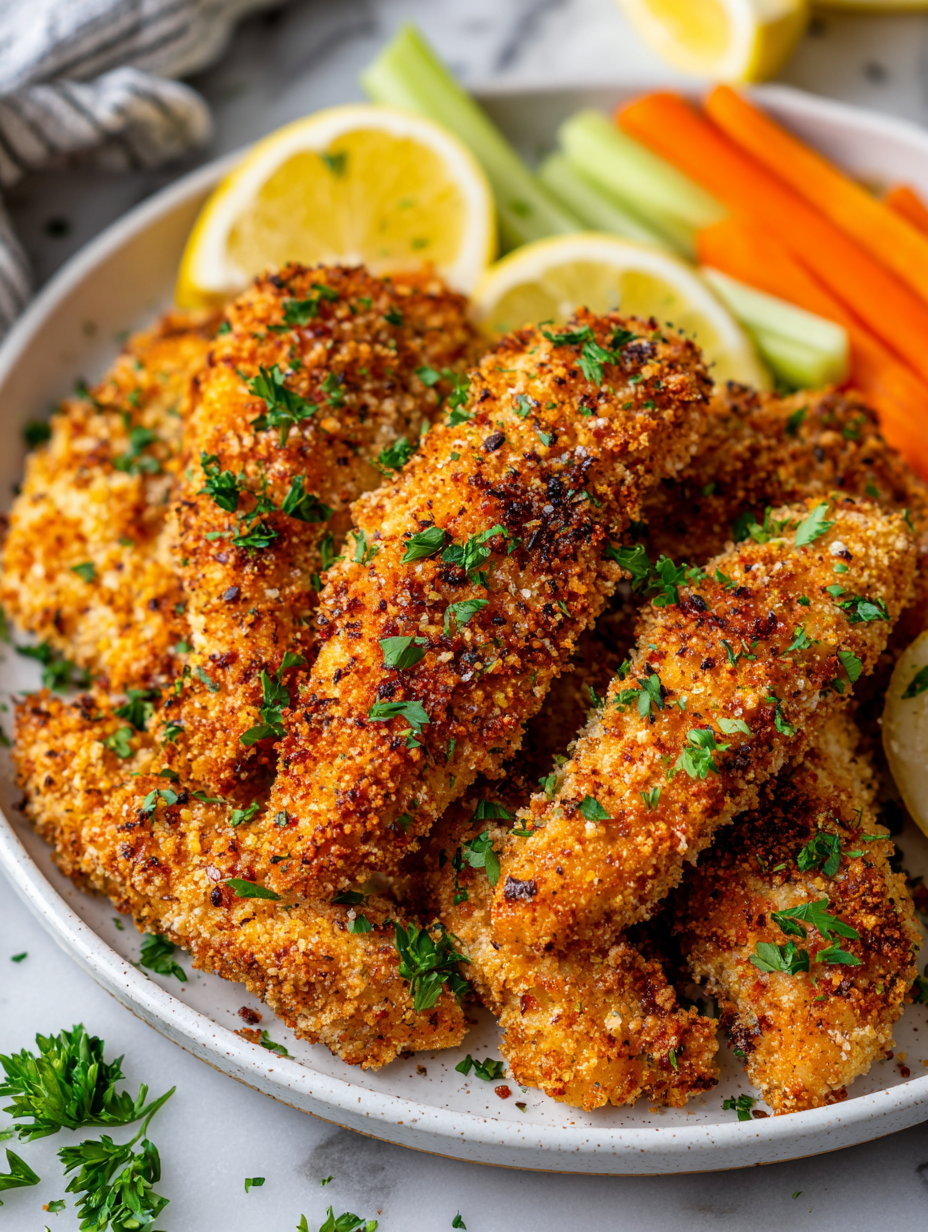
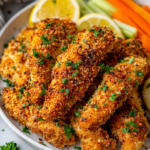
Baked Chicken Tenders
Ingredients
Equipment
Method
- Preheat your oven to 200°C (390°F) and line a baking sheet with parchment paper or a silicone mat to catch any drips and make cleanup easier.
- Slice the chicken breasts into strips about 1 inch wide and 3-4 inches long. If needed, pound them gently between two sheets of plastic wrap until they’re an even thickness—this ensures they cook uniformly and get nice and crispy.
- Set up your breading station: pour beaten eggs into a shallow dish, seasoned with a pinch of salt, and place your toasted panko breadcrumbs mixed with paprika and garlic powder in another dish.
- Dip each chicken strip into the egg wash, letting any excess drip off, then coat it thoroughly in the seasoned breadcrumbs, pressing gently to adhere the coating evenly.
- Place the coated tenders on the prepared baking sheet, arranging them in a single layer. If you have a wire rack, set the tenders on it for even air circulation—this helps them crisp up all over.
- Spritz the tenders lightly with oil spray—this creates that golden, crispy exterior without the need for frying. Bake for 15-20 minutes, flipping or turning them halfway through, until they turn a warm, golden hue and the coating feels firm and crispy.
- Check the internal temperature with a meat thermometer; it should register at least 75°C (165°F), ensuring the chicken is cooked through and safe to eat.
- Once done, remove the tenders from the oven and let them rest for a few minutes. Squeeze fresh lemon over the tenders for a bright, tangy finish that cuts through the richness.
- Serve your crispy baked chicken tenders hot with your favorite dipping sauces or sides—enjoy that satisfying crunch and tender bite!
Pro tips for perfect tenders
- & even: Use a gentle tap on the chicken to ensure uniform thickness for even cooking.
- & crispy: Spray the coated tenders with oil just before baking to boost crunchiness.
- & golden: Bake on a wire rack to allow air circulation and achieve a more uniform crisp.
- & fragrant: Toast breadcrumbs lightly in a dry skillet before coating for extra aroma.
- & precise: Check internal temperature with a probe thermometer—75°C (165°F) means done, juicy, not dry.
- & neat: Keep your breading station organized to avoid clumping and uneven coating.
- & quick: Rotate tenders halfway through baking for even color and crispness.
Common mistakes and how to fix them
- FORGOT to pat chicken dry → Results in soggy coating; pat thoroughly for crispness.
- DUMPED the seasoning into breadcrumbs → Mix spices evenly for balanced flavor.
- OVER-TORCHED the tenders → Reduce oven temp or bake longer at lower heat for even crisp.
- MISSED flipping halfway → Flip tenders for uniform browning and crispy coating.
Quick fixes and pantry swaps
- When chicken sticks to the pan → Splash hot water to loosen.
- If coating isn’t sticking → Dampen chicken slightly before breading.
- DUMPED too much oil → Use a paper towel to absorb excess after baking.
- Over-baked tenders → Reduce oven temperature and bake longer for even crisp.
- Splash with lemon or herbs → Brighten flavors if tenders turn bland during reheating.
Prep, store, and reheat tips
- Prep the chicken tenders: Cut and coat them with breadcrumbs up to a day in advance, kept covered in the fridge—crispness stays intact if kept dry and chilled.
- Store cooked tenders: Keep leftovers in an airtight container in the fridge for up to 3 days. Reheat in the oven at 180°C (350°F) for 8-10 minutes until crispy and warmed through, with a slight shimmer of oil and a snap when bitten.
- Freezing: Freeze unbaked coated tenders on a tray, then transfer to a zip-top bag. They keep well for up to 2 months. Bake directly from frozen, adding 5-7 minutes to the cooking time.
- Reheating tips: To revive crispiness, spritz with a little oil and bake until crackling and golden. Avoid microwaving if you want to preserve crunch; it turns soggy fast.
- Flavor shifts: Refrigeration dulls the fresh breading slightly, but reheating with a spritz of oil restores some of that original crisp. Expect a softer bite but still satisfying.
Top questions about baked chicken tenders
1. Can I use chicken thighs instead?
Use chicken breasts, pounded to even thickness, for juiciness and quick cooking. Thinner strips cook faster and stay tender.
2. Are chicken thighs suitable for this recipe?
Yes, but thighs are juicier and take a bit longer to cook. Adjust your baking time to around 20-25 minutes.
3. Can I substitute the breadcrumbs?
Yes, using panko breadcrumbs creates a crunchier coating, but regular breadcrumbs work if you prefer a softer bite.
4. Is oil spray necessary?
Spraying with oil helps the coating crisp up without deep frying. Use a light, even mist for best results.
5. How do I know when they’re done?
Bake at 200°C (390°F) for about 15-20 minutes. Check for a golden color and internal temp of 75°C (165°F).
6. How can I prevent uneven coating?
Coat the tenders thoroughly and evenly to avoid uneven cooking or soggy spots. Use tongs for a neater process.
7. Can I bake without a rack?
For extra crispness, place tenders on a wire rack during baking to allow hot air to circulate around them.
8. Can I make these in advance?
You can prepare coated tenders a day ahead, keeping them covered in the fridge. Reheat in the oven to restore crispness.
9. How do I reheat leftovers?
Reheat leftovers in a 180°C (350°F) oven for 8-10 minutes until crispy. Avoid microwaving to keep texture.
10. My coating isn’t sticking, what can I do?
If coating isn’t sticking well, dampen the chicken slightly or add a second egg wash for better adhesion.
These baked chicken tenders are the kind of dish you turn to when you want comfort without fuss. The smell of toasted breadcrumbs and the crisp bite make me feel like I’ve captured a little bit of childhood, but with a healthier twist. They’re simple enough for a weeknight, yet satisfying enough to serve to friends.
In the end, it’s all about those small wins—perfectly crispy, juicy tenders that don’t leave you feeling sluggish. They remind me that good food doesn’t have to be complicated or greasy. Just honest flavors, a few good techniques, and a bit of patience.

Hi, I am Elias William Carter! The cook, writer, and self-proclaimed flavor enthusiast behind Dramatically Stirring. Food has always been my love language- my way of showing care, curiosity, and creativity all at once. I grew up in the heart of North Carolina, in a house where the kitchen was always alive with noise and aroma


Leave a Reply