Baking vegetable cutlets might not be the first method that comes to mind, but it’s a game changer for busy nights. No fuss, no standing over a hot stove, just simple, hands-off oven magic that leaves you with crispy, golden edges and tender insides. Plus, it’s a bit more forgiving—less oil splattering, fewer burnt spots—the kind of cooking that feels like a small win every time.
This approach celebrates the rustic charm of humble vegetables, transforming what could be everyday leftovers into something satisfying and cozy. It’s perfect if you’re craving comfort food but want to keep things straightforward, without sacrificing flavor or texture. And honestly, once you get the hang of it, you’ll wonder why you ever fussed with frying.
type: “array”, “items”: {“type”: “string”}, “description”: “2–3 warm, human paragraphs introducing the recipe from the chosen angle.”} }
Focusing on how baking simplifies the process, this recipe embraces the imperfect, rustic charm of vegetable cutlets, making them accessible for busy weeknights or those new to vegetarian cooking. It’s about celebrating the humble, transforming everyday ingredients into something crispy, cozy, and satisfying without fuss.
The story behind this recipe
This recipe was born out of a lazy Sunday afternoon when I had a fridge full of odds and ends—carrots, potatoes, a lone zucchini. I wanted something nourishing but easy, no fuss, no frying. Baking seemed like the perfect way to keep that crispy texture without turning my kitchen into a greasy mess. Plus, I love how it transforms humble vegetables into something almost indulgent, with that satisfying crunch and cozy warmth.
One day, I accidentally left a batch in the oven a little longer than planned, and I was worried they’d burn. But that slight over-baking gave them an extra crunch that everyone loved, and now I swear I prefer them that way. It’s a recipe born from improvisation, and I keep coming back to it whenever I want a simple, honest meal that’s both comforting and a little bit special.
Ingredient breakdown
- Carrots: I love their natural sweetness that caramelizes beautifully in the oven, making each bite subtly smoky and rich. Feel free to swap in parsnips if you want an earthier tone.
- Potatoes: They act as the binder, giving the cutlets a hearty, tender crumb. Russet potatoes work best for fluffiness, but sweet potatoes add a lovely color and subtle sweetness.
- Zucchini: Adds moisture and a fresh, slightly grassy flavor. Squeeze out excess water thoroughly or the mixture might be too loose—think of that bright, veggie freshness when you bite in.
- Breadcrumbs: I prefer panko for extra crunch, but regular ones work fine—just toast them lightly if they seem dull. They should give a satisfying crispness after baking.
- Egg: Keeps everything together, but if you’re vegan, a flaxseed or chia seed egg works, though the texture will be slightly softer. Whisk until frothy for better binding.
- Spices & herbs: I keep it simple with cumin and coriander, but a pinch of smoked paprika or fresh cilantro can really elevate the flavor. Adjust to your mood.
- Oil: Just a light spray or brush before baking helps develop that golden, crispy exterior. Avocado oil is my favorite for its neutral flavor and high smoke point.
Spotlight on key ingredients
Carrots & Potatoes:
- Carrots: Their natural sweetness caramelizes in the oven, adding a smoky, rich flavor. Feel free to use parsnips for earthiness.
- Potatoes: They bind everything together with a tender, fluffy crumb. Russet works best for that classic texture, but sweet potatoes add color and subtle sweetness.
Zucchini & Breadcrumbs:
- Zucchini: Adds moisture and a fresh, grassy note. Squeeze out excess water thoroughly—wet mixture can be too loose and tricky to shape.
- Breadcrumbs: Panko give an extra crunch, but regular ones work fine—toast lightly if dull. They help achieve that satisfying crispness after baking.
Notes for ingredient swaps
- Dairy-Free: Use mashed avocado or nutritional yeast instead of cheese for creaminess and umami flavor.
- Gluten-Free: Swap traditional breadcrumbs for almond meal or gluten-free panko for a crunchy exterior without gluten.
- Vegan: Replace egg with a flaxseed or chia seed mixture—about 1 tablespoon seeds soaked in 3 tablespoons water until gel-like.
- Lower Sodium: Use herbs and spices liberally instead of salt to keep flavor punchy without the extra salt.
- Extra Zest: Add lemon zest or a splash of vinegar for brightness, especially if your vegetables are on the mild side.
Equipment & Tools
- Oven: To bake the cutlets evenly and gently.
- Baking sheet with parchment or silicone mat: To prevent sticking and facilitate cleanup.
- Grater or knife: To prepare the vegetables uniformly.
- Mixing bowl: To combine all ingredients thoroughly.
- Spoon or hands: To shape the cutlets.
- Brush or spray bottle: To lightly oil the cutlets for crisping.
Step-by-step guide to baking cutlets
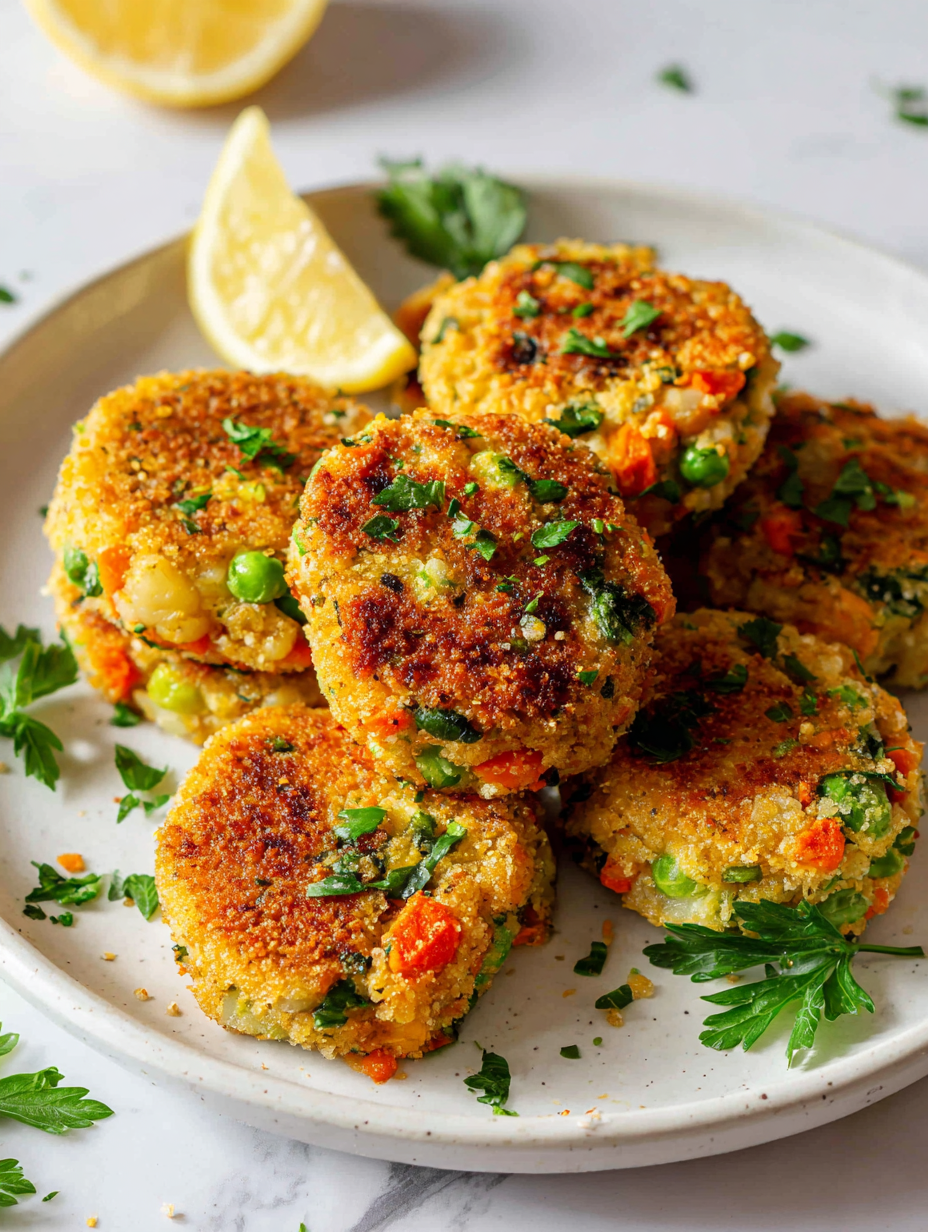
- Preheat your oven to 200°C (390°F). Line a baking sheet with parchment paper or a silicone mat for easy cleanup.
- Prepare your vegetables: grate or finely chop about 1 cup each of carrots, zucchini, and potatoes. Squeeze out excess moisture from zucchini using a clean cloth.
- In a large mixing bowl, combine the grated vegetables. Add 1 cup breadcrumbs, 1 beaten egg, 1 teaspoon cumin, 1/2 teaspoon coriander, and a pinch of salt and pepper. Mix well until you get a sticky, moldable mixture.
- Shape the mixture into small, flat patties about 1/2 inch thick and 3 inches across. Use wet hands if the mixture is too sticky.
- Place the cutlets on the prepared baking sheet. Lightly spray or brush with oil to promote crispness.
- Bake in the oven for 20-25 minutes. Turn the cutlets halfway through baking. They should turn golden and crisp around the edges.
- Check for doneness: the edges should be golden brown, and the cutlets should feel firm but not hard. The smell should be fragrant and slightly roasted.
- Remove from oven and let rest for 3-5 minutes. Serve warm, garnished with herbs or a squeeze of lemon if desired.
Let the cutlets rest for a few minutes on a cooling rack to retain crispness. Serve warm with your favorite dipping sauce or a fresh salad.
How to Know It’s Done
- Edges are crispy and golden brown.
- Cutlets feel firm but not hard when pressed.
- Vegetables inside are tender and cooked through.
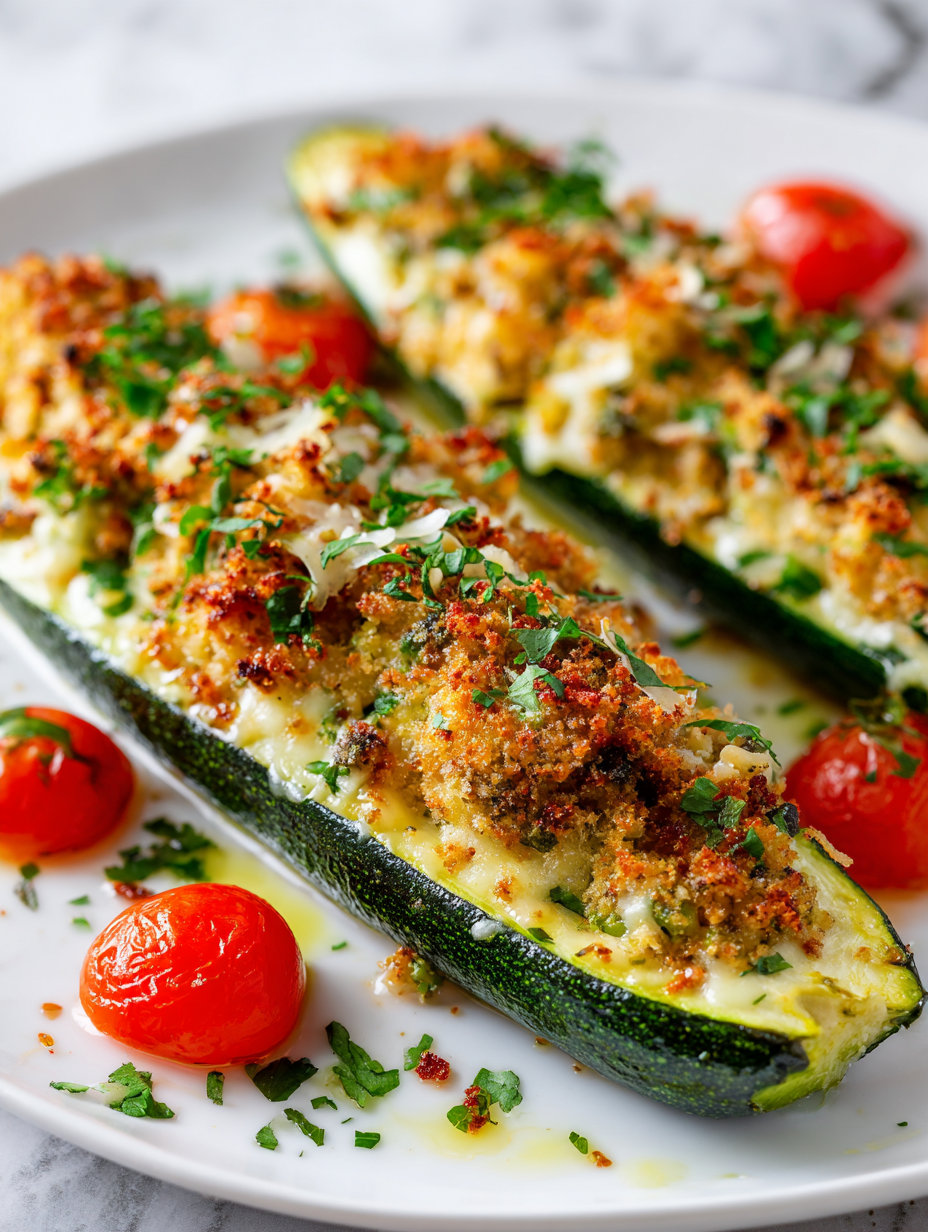
Baked Vegetable Cutlets
Ingredients
Equipment
Method
- Preheat your oven to 200°C (390°F) and line a baking sheet with parchment paper or a silicone mat. Gather your grated carrots, potatoes, and zucchini, squeezing out excess moisture from the zucchini—this prevents sogginess.
- In a large mixing bowl, combine the grated vegetables. Add the breadcrumbs, beaten egg, cumin, coriander, and a pinch of salt and pepper. Mix thoroughly until the mixture is sticky and holds together, feeling slightly firm but pliable.
- With wet hands, shape the mixture into flat patties about half an inch thick and three inches wide. The mixture should hold its shape easily; add more breadcrumbs if it feels too loose.
- Place the shaped cutlets on the prepared baking sheet, spacing them out evenly. Lightly spray or brush the tops with oil to help them crisp up nicely in the oven.
- Bake in the oven for about 20-25 minutes, flipping them halfway through. You’ll notice the edges turning golden and crispy, and the aroma becoming fragrant and roasted.
- Once golden brown and firm around the edges, remove the cutlets from the oven. Let them rest for 3-5 minutes on a cooling rack to settle and retain their crispness.
- Serve the vegetable cutlets warm, garnished with herbs or a squeeze of lemon if desired. Enjoy their crispy exterior and tender, flavorful interior with your favorite dipping sauce or fresh salad.
Pro tips for crispy cutlets
- Bolded mini-head: Use a light spray of oil before baking—this helps develop a crisp, golden crust without greasiness.
- Bolded mini-head: Chill the mixture for 10 minutes—this firms it up, making shaping easier and less sticky.
- Bolded mini-head: Shape the cutlets with wet hands—keeps the mixture from sticking and maintains a smooth surface.
- Bolded mini-head: Bake on the middle rack—ensures even heat distribution and uniform browning.
- Bolded mini-head: Turn the cutlets halfway—this promotes crispness on both sides and prevents burning.
- Bolded mini-head: Rest the baked cutlets for 5 minutes—allows moisture to settle, keeping them tender inside.
- Bolded mini-head: Serve immediately for best crunch—stale after 15 minutes, so enjoy while hot and crispy.
Common mistakes and how to fix them
- FORGOT to preheat oven → Always preheat to ensure even baking and crisp edges.
- DUMPED too much oil → Use a light spray or brushing to avoid soggy cutlets.
- OVER-TORCHED or burnt edges → Check at 20 minutes; reduce temperature if browning too quickly.
- FAILED to squeeze excess water from zucchini → Water makes mixture loose; squeeze thoroughly for firm cutlets.
Quick fixes and pantry swaps
- If the cutlets stick, splash a little more oil on the baking sheet before baking.
- When mixture feels too loose, dump in a bit more breadcrumbs to absorb excess moisture.
- Patch over cracks with a bit of mixture—press gently to seal, then return to oven.
- Shield edges with foil if they brown too quickly, to prevent burning while centers cook through.
- Rescue over-baked cutlets with a quick drizzle of lemon juice—brightens flavor and adds moisture.
Prep, store, and reheat tips
- Prepare the vegetable mixture and shape the cutlets a day ahead; keep covered in the fridge—flavors meld, and they stay firm.
- Store baked cutlets in an airtight container in the fridge for up to 3 days; they retain a good texture, but may lose some crispness.
- Reheat in a 180°C (350°F) oven for about 10 minutes until warm and crispy again—smell should be inviting, with a slight crackle.
- For longer storage, freeze unbaked cutlets for up to 1 month; bake directly from frozen, adding an extra 5-7 minutes for crispness.
- Reheat baked cutlets from frozen in the oven; expect a slight moisture loss, so serve immediately for the best crunch.
Top questions about baked vegetable cutlets
1. Can I use other vegetables instead?
Use firm vegetables like carrots and potatoes, which hold shape and texture after baking. Soft veggies might turn mushy.
2. Can I substitute sweet potatoes?
Yes, you can swap in sweet potatoes or parsnips for a sweeter, earthier flavor. Just adjust cooking time slightly.
3. What type of breadcrumbs should I use?
Using panko breadcrumbs gives a crunchier exterior, but regular breadcrumbs will still work—just toast them for extra crispness.
4. How do I make it vegan?
You can replace the egg with a flaxseed or chia seed mixture—about 1 tablespoon seeds soaked in 3 tablespoons water until gel-like.
5. How do I know when they’re done?
Bake until the cutlets are golden and crispy around the edges, about 20-25 minutes, flipping halfway for even browning.
6. What’s the best way to shape and bake the cutlets?
Preheat your oven to 200°C (390°F). Use a lined baking sheet. Shape your mixture into flat patties, then bake and turn halfway.
7. What if the cutlets stick or burn?
If they stick, lightly spray or brush with oil before baking. For uneven browning, turn them halfway through baking.
8. How do I store and reheat leftovers?
Store baked cutlets in an airtight container in the fridge for up to 3 days. Reheat in the oven at 180°C (350°F) for 10 minutes.
9. What if the mixture is too loose or dry?
If mixture is too loose, add more breadcrumbs. If the mixture is too dry, add a teaspoon of water or oil to moisten.
10. Any tips for shaping or handling the mixture?
Use a gentle touch when shaping to keep the mixture intact. Rest the cutlets for a few minutes before baking for better texture.
Baked vegetable cutlets are a humble dish that somehow feels like a small victory in the kitchen. Their crispy edges and tender insides make for a satisfying bite, especially when fresh herbs and a squeeze of lemon brighten the flavors. It’s a recipe that reminds me how simple ingredients can turn into comfort food with just a bit of oven time.
Whenever I make these, I think about how forgiving baking is—no hot oil splatters, just patience and a watchful eye. They’re perfect for busy nights or when I want to sneak more veggies into a meal without fuss. And honestly, that slight crunch and roasted aroma lingering in the kitchen is what keeps me coming back for more.

Hi, I am Elias William Carter! The cook, writer, and self-proclaimed flavor enthusiast behind Dramatically Stirring. Food has always been my love language- my way of showing care, curiosity, and creativity all at once. I grew up in the heart of North Carolina, in a house where the kitchen was always alive with noise and aroma


Leave a Reply