Category: Desserts

  • The Strawberry Pie That Close Your Kitchen Door for Minutes

    The Strawberry Pie That Close Your Kitchen Door for Minutes

    Why I Make This When Everything Else Feels Off

    There’s an odd rush you get when a pie fills the room with this bright, almost electric smell of fresh strawberries and warm butter. It’s like the fruit’s fighting the rest of the world. I don’t make this to impress anyone. It’s because sometimes, the simplest fix is layering sweet strawberries over a flaky crust and pretending that the world paused for a moment. No fancy tricks, no gadgets, just a spatula and a moment of silence. When the strawberries start to die down and turn into jam-like pools in the pie, I forget whatever I thought mattered before. During these months, making this feels like reclaiming a little bit of normal. Trust me, the secret is in the juice. Once that starts to bubble, it’s kind of like a little rebellion.

    Strawberry Pie

    This strawberry pie features a flaky pie crust filled with fresh, sliced strawberries that release their juices as they cook. The filling transforms into a jam-like consistency with a glossy, vibrant appearance, surrounded by a tender crust that cradles the fruit. The dish is assembled with simple techniques, highlighting the bright flavor and juicy texture of the strawberries.
    Prep Time 30 minutes
    Cook Time 40 minutes
    Total Time 1 hour 10 minutes
    Servings: 8
    Course: Main Course
    Cuisine: American
    Calories: 250

    Ingredients
      

    • 1 pre-made or homemade pie crust thawed if frozen
    • 4 cups fresh strawberries hulled and sliced
    • 1 cup granulated sugar
    • 2 tablespoons cornstarch
    • 1 tablespoon fresh lemon juice
    • 1 egg egg yolk beaten, for brushing crust

    Equipment

    • Rolling pin
    • Pie dish
    • Mixing bowls
    • Saucepan
    • Spatula
    • Knife

    Method
     

    1. Preheat the oven to 375°F (190°C). Roll out the pie crust on a lightly floured surface and fit it into a 9-inch pie dish. Trim excess crust and prick the bottom with a fork. Bake blind with pie weights for 15 minutes until lightly golden, then remove weights and set aside.
    2. While the crust bakes, prepare the strawberry filling. In a mixing bowl, combine sliced strawberries with sugar, cornstarch, and lemon juice. Toss gently until all strawberries are coated evenly. Let sit for 10 minutes to allow juices to release.
      1 pre-made or homemade pie crust
    3. Pour the strawberry mixture into a saucepan and cook over medium heat. As the mixture heats, stir continuously with a spatula until the juices thicken and begin to boil softly. Watch for the mixture to become glossy and jam-like, about 5-7 minutes.
      1 pre-made or homemade pie crust
    4. Remove the saucepan from heat and let the filling cool for 10 minutes. Once cooled slightly, pour the filling into the pre-baked pie crust, spreading it evenly to fill the shell completely. Chill in the refrigerator for at least 30 minutes to set.
      1 pre-made or homemade pie crust
    5. Preheat the oven to 400°F (200°C). Brush the exposed crust edges with the beaten egg yolk for a golden finish. Bake the assembled pie for 15-20 minutes until the crust is golden brown and the filling is bubbling around the edges. Remove from oven and cool before serving.
      1 pre-made or homemade pie crust
    6. Slice and serve the strawberry pie with fresh cream or ice cream if desired. The filling should be glossy and thick, with a vibrant red color, and the crust tender but crisp.

    Why bother with store-bought when this comes together in so few steps? I think that’s part of it. It’s a reminder that simple things, real things, still matter. The scent alone might convince you it’s too easy, but then again, that’s probably the point—something worth stealing a quiet afternoon for.

  • The Quiet Miracle of a Pendulum Swing: Pecan Pie Turns Personal

    The Quiet Miracle of a Pendulum Swing: Pecan Pie Turns Personal

    Why I’m Thinking About Pecan Pie Differently

    Ever notice how some memories sneak up on you just as you’re rolling out pie dough? Last week, I caught a whiff of roasted pecans — that sweet, nutty aroma mixed with a hint of caramel—and it really took me somewhere. Pecan pie isn’t just about Thanksgiving or dessert bars. Today, I realized, it’s about the little moments you forget to cherish—like that sticky, crunchy top crackling under your spoon or the way the filling stays warm on your tongue long after you’ve swallowed. It’s not trendy or fancy; it’s about that quiet, perfect balance between the toasted nuts, the butter-rich filling, and that *sharp* burst of vanilla. Right now, I think pecan pie matters because it’s honesty in a crust—simple, real, baked memories. And honestly, sometimes that’s all I really want from a slice.

    Classic Pecan Pie

    Pecan pie is a baked dessert featuring a flaky crust filled with a sweet, sticky mixture of pecans, eggs, sugar, and butter. The filling sets into a rich, caramelized consistency with a crunchy, toasted pecan topping. The finished pie has a golden-brown crust and a glossy, nut-studded surface that is both inviting and indulgent.
    Prep Time 20 minutes
    Cook Time 50 minutes
    Total Time 1 hour 10 minutes
    Servings: 8
    Course: Main Course
    Cuisine: American
    Calories: 550

    Ingredients
      

    • 1 pre-made Pie crust store-bought or homemade
    • 1 cup granulated sugar
    • 1 cup light corn syrup
    • 4 large eggs beaten lightly
    • 4 tbsp unsalted butter melted
    • 1.5 cups raw pecan halves
    • 1 tsp vanilla extract
    • 1/4 tsp salt

    Equipment

    • 9-inch Pie Pan
    • Mixing bowls
    • Whisk
    • Saucepan
    • Rolling pin
    • Oven

    Method
     

    1. Preheat the oven to 350°F (175°C). Roll out the pie crust on a floured surface and fit it into a 9-inch pie pan, trimming the edges as needed. Crimp the edges decoratively and set aside.
    2. In a mixing bowl, combine sugar, corn syrup, and salt. Whisk together until fully blended, creating a smooth, lucent mixture.
    3. Add the eggs, one at a time, to the sugar mixture, whisking after each addition until the mixture becomes thick and slightly frothy.
    4. Stir in the melted butter, vanilla extract, and a pinch of salt; mix until the filling is smooth and shiny.
    5. Sprinkle half of the pecan halves evenly over the bottom of the pie crust. Pour the filling gently over the pecans, spreading to distribute evenly.
    6. Arrange the remaining pecan halves on top of the filling in a decorative pattern. Place the pie on the middle rack and bake for 50 minutes, or until the filling is set and the top is golden brown with toasted pecans.

    Maybe it’s strange to tie so much feeling to something as small as a dessert, but that’s how a good pie sneaks into your day. It’s not always about making it look perfect, just about how it tastes and sticks with you a little longer than expected.

  • Why I Keep a Jar of Caramelized Apples in the Freezer (And You Should Too)

    Why I Keep a Jar of Caramelized Apples in the Freezer (And You Should Too)

    I started doing this years ago, after a messy apple picking trip gone wrong. Instead of tossing half-eaten apples, I’d slice them thin, sprinkle a little cinnamon, sugar, and a pinch of salt, then bake until they turn golden and smell like fall in a jar. Now, I keep a small stash tucked in the freezer. Graze your spoon through it and it’s like biting into a baked apple with a whisper of warmth and a jammy sweetness.

    This season’s about leaning into comfort, even if it’s just a simple crumble. No fancy ingredients needed. Just those frozen caramelized slices, a crumble topping, and vanilla ice cream that hits all your soft, rich notes. It’s honest, it’s straightforward, and honestly–it’s better than I expected. Still, every time I think I’ve nailed the perfect scoop, I remember how much I love turning my “mistakes” into something I can’t wait to eat.

    Caramelized Apple Slice Crumble

    This dessert features thinly sliced, caramelized apples that are frozen for convenience, then baked with a crumbly topping until golden. The finished dish has a warm, tender apple base with a crunchy, buttery topping, served alongside vanilla ice cream for added richness.
    Prep Time 10 minutes
    Cook Time 25 minutes
    Total Time 35 minutes
    Servings: 4
    Course: Main Course
    Cuisine: American
    Calories: 320

    Ingredients
      

    • 3 cups frozen apple slices thinly sliced and caramelized
    • 1 teaspoon ground cinnamon
    • 2 tablespoons granulated sugar
    • 1 pinch salt
    • 1 cup all-purpose flour for crumble topping
    • 1/2 cup unsalted butter cold and cubed
    • 1/2 cup brown sugar for crumble topping
    • vanilla ice cream for serving

    Equipment

    • Baking sheet
    • Mixing bowls
    • Knife
    • Cutting board
    • Spatula
    • Oven

    Method
     

    1. Preheat the oven to 375°F (190°C). Line a baking sheet with parchment paper. Spread the frozen apple slices evenly over the sheet, then sprinkle with cinnamon, sugar, and salt. Bake for 10-12 minutes until the edges are golden and caramelized, then remove and let cool slightly.
      3 cups frozen apple slices, 1 teaspoon ground cinnamon, 2 tablespoons granulated sugar, 1 pinch salt
    2. While the apples cool, prepare the crumble topping. In a mixing bowl, combine flour, brown sugar, and cold cubed butter. Use a pastry cutter or your fingers to work the butter into the dry ingredients until the mixture resembles coarse crumbs with some pea-sized pieces.
      1 cup all-purpose flour, 1/2 cup unsalted butter, 1/2 cup brown sugar
    3. Spoon the caramelized apple slices into a baking dish, spreading them out evenly. Cover the apples with the prepared crumble mixture, pressing lightly to adhere.
      3 cups frozen apple slices, 1 cup all-purpose flour, 1/2 cup unsalted butter, 1/2 cup brown sugar
    4. Bake the assembled crumble at 375°F (190°C) for 20-25 minutes, or until the topping is golden brown and the mixture is bubbling around the edges.
    5. Remove from oven and let rest for 5 minutes. Serve warm, topped with a scoop of vanilla ice cream. Observe the contrast between the crispy topping and soft, jammy apples.
      vanilla ice cream for serving

    Sometimes, I wonder what it’d be like if I just baked the apples straight from the freezer without defrosting. Probably a mess, but maybe not. Either way, this has become my go-to for a quick treat that feels indulgent but is really just smart planning. Might have to put that jar on the counter now, see if it calls to me again tomorrow.

  • Espresso Chai Cookies: When Coffee Meets Spiced Comfort

    Espresso Chai Cookies: When Coffee Meets Spiced Comfort

    I’ve been thinking about how mornings sometimes feel like a quiet war. Coffee? Tea? Both? Neither? I crave something that can hold its own against that chaos but still feels like a secret escape.

    Enter these cookies — not just any cookie, but a little rebellion in bakery form. They smell like a blend of roasted espresso beans and warm chai spices, those notes swirling in the air long before your first bite. The texture is chewy but a little grainy; it’s like scooping up a secret handshake of sugar, butter, and caffeine. 

    This isn’t just a treat; it’s a tiny ritual for those mornings when even your favorite mug isn’t enough. Because right now, it’s about craving something grounded — an unexpected, quiet little moment to themselves in a world that never stops.

    Espresso Chai Cookies

    These cookies combine the bold flavors of roasted espresso and warm chai spices, baked until chewy with a slightly grainy texture. The dough involves creaming butter and sugar, then mixing in flavoring ingredients before shaping and baking. They have a rustic appearance with uneven edges and a golden-brown surface, offering a chewy bite with audible crispness on the edges.
    Prep Time 15 minutes
    Cook Time 12 minutes
    Total Time 27 minutes
    Servings: 12
    Course: Main Course
    Calories: 220

    Ingredients
      

    • 1 cup unsalted butter softened
    • 1 cup granulated sugar
    • 1 large egg
    • 2 teaspoons vanilla extract
    • 2 tablespoons instant espresso powder dissolved in 1 tablespoon hot water
    • 1 1/2 cups all-purpose flour
    • 1/2 cup chai spice blend can be a mix of cinnamon, cardamom, ginger, cloves
    • 1/2 cup rolled oats adds texture and chewiness

    Equipment

    • Mixing bowls
    • Electric mixer or whisk
    • Baking sheet
    • Parchment paper
    • Cookie scoop or spoon
    • Cooling rack

    Method
     

    1. Preheat your oven to 350°F (175°C). Line a baking sheet with parchment paper for easy removal of cookies.
    2. In a large mixing bowl, cream together the softened butter and granulated sugar using an electric mixer or whisk until the mixture is light and fluffy, about 2-3 minutes. Look for a pale, airy consistency with no visible lumps of butter.
    3. Add the egg, vanilla extract, and the dissolved espresso powder to the creamed mixture. Mix on medium speed until well combined, and the mixture looks smooth and slightly increased in volume, with a fragrant aroma of coffee and spices.
    4. In a separate bowl, whisk together the all-purpose flour, chai spice blend, and rolled oats. Gradually add this dry mixture to the wet ingredients, mixing on low speed or folding until just combined. The dough should be crumbly but hold together when pressed.
    5. Use a cookie scoop or teaspoon to portion out the dough onto the prepared baking sheet, spacing cookies about 2 inches apart. Slightly flatten each cookie with the back of a spoon or your fingers for even baking.
    6. Bake in the preheated oven for 10-12 minutes, until the edges are golden brown and the surface is set but still slightly chewy. The cookies will have a rustic, uneven appearance with a slightly cracked surface. Remove from the oven and allow to cool on the baking sheet for 5 minutes before transferring to a cooling rack.

    Some days, I think about how food is just a way to keep going, little bursts of flavor and comfort that sneak up when you least expect it. Maybe that’s all these cookies are — a reminder to take a pause, breathe, and enjoy the weird little harmony of coffee and spice.

  • Forget the Plate: Mini Cheesecakes in Jelly Jars

    Forget the Plate: Mini Cheesecakes in Jelly Jars

    Ever try to squeeze a whole cheesecake slice into your mouth and end up with crumbs all over your lap? Been there. I really wanted to skip the whole fork-and-plate thing, especially for a summer picnic or a quick dessert when I’m feeling lazy but still crave that silky creaminess.

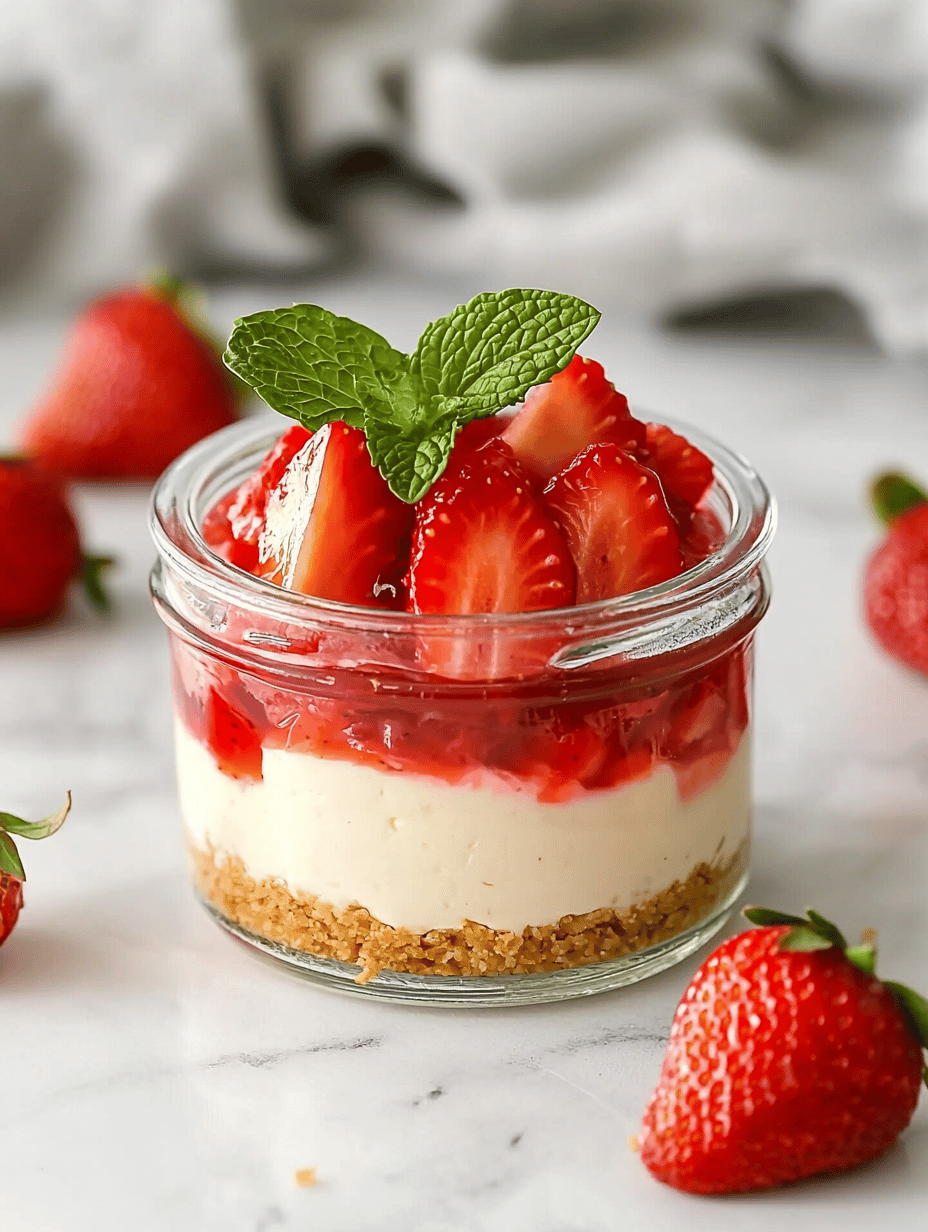
    These little jars of strawberry cheesecake happiness are like the rebellious cousin of the traditional dessert. No baking, no fuss—just graham cracker crumbs, cream cheese, and fresh strawberries layered in clear jars. You get to see every layer, every swirl of pink and white. They’re perfect to stash in the fridge, grab one when you need something sweet, and not feel guilty about the snacking part.
    Sometimes I think the best recipes are the ones you can eat directly from the jar. It’s messy, honest, and surprisingly freeing.

    No-Bake Strawberry Cheesecake Jars

    This dessert features layers of graham cracker crumbs, creamy cheesecake filling, and fresh strawberries arranged in small jars. It is assembled without baking, resulting in a smooth, layered texture with a visually appealing presentation of vibrant pink and white layers.
    Prep Time 15 minutes
    Total Time 15 minutes
    Servings: 4
    Course: Main Course
    Cuisine: American
    Calories: 350

    Ingredients
      

    • 1 1/2 cups graham cracker crumbs about 10 full sheets crushed
    • 1/4 cup sugar
    • 1/2 cup unsalted butter melted
    • 16 oz cream cheese softened
    • 1/2 cup powdered sugar
    • 1 teaspoon vanilla extract
    • 1 1/2 cups fresh strawberries hulled and sliced

    Equipment

    • Measuring cups and spoons
    • Mixing bowls
    • Whisk
    • Small jars or glasses
    • Spoon or spatula

    Method
     

    1. Combine graham cracker crumbs and sugar in a mixing bowl. Pour in melted butter and stir until the mixture resembles wet sand. Divide evenly among jars and press down firmly with the back of a spoon to form a firm base.
      1 1/2 cups graham cracker crumbs, 1/4 cup sugar, 1/2 cup unsalted butter
    2. In a separate bowl, beat softened cream cheese, powdered sugar, and vanilla extract with a whisk until smooth and creamy, about 2-3 minutes. Check for a consistent, lump-free texture.
      16 oz cream cheese, 1/2 cup powdered sugar, 1 teaspoon vanilla extract
    3. Divide the cream cheese filling evenly over the graham cracker crusts in each jar, smoothing the top with a spoon or spatula for an even layer. Chill the jars in the fridge for at least 30 minutes to set slightly.
      16 oz cream cheese, 1/2 cup powdered sugar, 1 teaspoon vanilla extract
    4. Arrange sliced strawberries on top of the cheesecake layer in each jar, creating a colorful, layered appearance. Press gently to embed the strawberries slightly into the filling if needed.
      1 1/2 cups fresh strawberries
    5. Serve immediately or refrigerate for up to 2 hours to allow flavors to meld. When ready, garnish with additional strawberries if desired, and serve chilled.
      1 1/2 cups fresh strawberries

    Honestly, I might never go back to the traditional slice after these. Just a little spoonful from the jar is enough to remind me how simple ingredients make a real treat. And if I can do it with my eyes closed and no oven, so can you.

  • The Unexpected Magic of Rhubarb and Strawberries for Your Summer Cake

    The Unexpected Magic of Rhubarb and Strawberries for Your Summer Cake

    Why This Pair Gets Me

    I don’t know how I never thought to combine these two. Rhubarb’s sharp tang—like biting into a crisp apple, only with more edge—and strawberries that smell like summer days drifting into late evening. I’ve eaten this cake at midnight and woke up craving that jolt of sweetness.

    It’s the kind of thing that feels almost rebellious. Like sneaking a piece of fresh garden dirt when you’re a kid—silly, a little dirty, but so worth it.

    It’s not just about the fruit. It’s about that smell. That pleasing combination of sour and sweet that hits your nose as soon as you unwrap it. Today, it feels especially relevant—rhubarb’s tartness cuts through the heat, strawberries remind you of childhood, and I swear it’s more than dessert. It’s a moment to pause, breathe, and remember that simple things matter.

    Rhubarb and Strawberry Crumble

    This dish features a combination of fresh rhubarb and strawberries baked under a buttery, crumbly topping. The fruit mixture is simmered until tender, creating a vibrant filling, while the topping forms a golden, crispy crust that contrasts the soft, saucy fruit underneath.
    Prep Time 20 minutes
    Cook Time 40 minutes
    Total Time 1 minute
    Servings: 8
    Course: Main Course
    Cuisine: American
    Calories: 280

    Ingredients
      

    • 4 cups fresh rhubarb, chopped about 4-5 sticks
    • 2 cups strawberries, sliced hulled and sliced
    • 1 cup granulated sugar
    • 2 tablespoons cornstarch to thicken the filling
    • 1 cup all-purpose flour
    • 1/2 cup rolled oats
    • 1/2 cup brown sugar
    • 1/2 cup unsalted butter, cold cut into small cubes
    • pinch of salt

    Equipment

    • Chef’s knife
    • Mixing bowls
    • Saucepan
    • Baking Dish
    • Pastry cutter or forks
    • Measuring cups and spoons

    Method
     

    1. Preheat the oven to 375°F (190°C). Measure and chop the rhubarb; hull and slice the strawberries. Place the chopped rhubarb and sliced strawberries in a large mixing bowl and add sugar, cornstarch, and a pinch of salt. Toss until the fruit is evenly coated, then transfer to a baking dish.
      4 cups fresh rhubarb, chopped, 2 cups strawberries, sliced, 1 cup granulated sugar, 2 tablespoons cornstarch, pinch of salt
    2. In a separate mixing bowl, combine flour, oats, and brown sugar. Add the cold, cubed butter. Use a pastry cutter or forks to cut the butter into the dry ingredients until the mixture resembles coarse crumbs with some pea-sized pieces.
      1 cup all-purpose flour, 1/2 cup rolled oats, 1/2 cup brown sugar, 1/2 cup unsalted butter, cold
    3. Sprinkle the crumble topping evenly over the fruit filling in the baking dish, covering all the fruit without pressing down too tightly.
      1 cup all-purpose flour, 1/2 cup rolled oats, 1/2 cup brown sugar, 1/2 cup unsalted butter, cold
    4. Bake in the preheated oven for about 40 minutes, or until the topping is golden brown and the filling is bubbling around the edges. The kitchen should fill with a sweet, fruity aroma.
    5. Remove from the oven and allow to cool slightly before serving. The topping will be crisp, and the filling should be thick and glossy with visible steam or bubbling.

    If you’re into the smell of baking, this will get you. If you like your sweets with a little edge, this is it. And honestly, if I could eat this every day, I might. Or maybe I should. We’ll see.

  • The Unexpected Magic of Old Fridge Strawberries in Shortcake

    The Unexpected Magic of Old Fridge Strawberries in Shortcake

    I found myself staring at a carton of strawberries that had spent a little too long in my fridge. The kind of soft, slightly wrinkled ones I usually toss. But this time, I chopped ‘em up anyway. Sometimes the junk drawer of fruit leftovers has its own charm—less bright and perky, more a little muted with a whisper of honey and old lavender. It struck me how often we toss what’s not picture-perfect. But now I think about how those berries, past their prime, hold stories. They remind me that good food isn’t about perfection. Just about a little bit of care, a splash of sugar, and maybe forgiving stuff that’s lost its sparkle. Watching those berries soak into whipped cream, I realized shortcake isn’t just summer or nostalgia. It’s about seeing value in what we’ve almost given up on.

    Strawberry Shortcake with Muddled Berries

    This dish features a soft, crumbly shortcake layered with whipped cream and muddled strawberries. The strawberries are gently crushed to release their juices, which combine with a splash of honey and lavender, creating a sweet, slightly tangy filling. The final dessert has a tender texture with vibrant berry juices soaking into the cream and cake layers.
    Prep Time 15 minutes
    Cook Time 20 minutes
    Total Time 35 minutes
    Servings: 4
    Course: Main Course
    Cuisine: American
    Calories: 420

    Ingredients
      

    • 1 cup all-purpose flour for shortcake
    • 1/4 cup granulated sugar for shortcake dough
    • 1/2 cup unsalted butter cold, cubed
    • 1/2 cup heavy cream for shortcake
    • 2 cups strawberries hulled and chopped, including slightly soft berries
    • 2 tbsp honey for berry mixture
    • 1 tsp dried lavender optional, for flavor
    • 1 cup heavy whipping cream for whipped cream

    Equipment

    • Mixing bowls
    • Baking sheet
    • Pastry cutter or fork
    • Whisk
    • Sharp knife
    • Cutting board
    • Glass or bowl for muddling
    • Electric mixer or hand whisk
    • Serving plates

    Method
     

    1. Preheat the oven to 400°F (200°C). In a mixing bowl, combine the flour and sugar. Use a pastry cutter or fork to cut in the cold, cubed butter until the mixture resembles coarse crumbs with some pea-sized pieces. Pour in the heavy cream and gently mix until just combined. Turn the dough onto a lightly floured surface and pat into a 1-inch thick slab. Cut into rounds using a floured biscuit cutter or glass. Place shortcake rounds on a baking sheet lined with parchment paper.
    2. Bake the shortcakes for 15-18 minutes or until golden brown on top. Remove from the oven and let cool slightly on a wire rack.
    3. While the shortcakes cool, combine the strawberries, honey, and dried lavender in a glass or bowl. Use a muddler or the back of a spoon to gently crush the strawberries, releasing their juices and mixing in the honey and lavender. Continue until the berries are softened and juice is released, about 2-3 minutes.
      1 cup all-purpose flour
    4. In a separate bowl, whip the heavy cream until soft peaks form using a whisk or electric mixer. Be careful not to overbeat; the cream should be fluffy and hold gentle peaks.
      1 cup all-purpose flour
    5. To assemble, slice the slightly cooled shortcakes in half horizontally. Spoon a layer of muddled strawberries with their juices onto the bottom half. Top with a generous layer of whipped cream, then place the top half of the shortcake over the cream. Repeat with remaining shortcakes and serve immediately.

    Notes

    You can adjust the sweetness of the berries by adding more honey. For added flavor, sprinkle fresh lavender or mint leaves atop the whipped cream before serving.

    Sometimes, I think the best desserts are the ones that actually surprise you—that’s what makes them worth making again. No recipe needed, just a handful of strawberries and a little bit of patience. And maybe a laugh when your fridge throws you a curveball. That’s what this no-fuss shortcake is all about.

  • The Surprisingly Therapeutic Art of Making Strawberry Shortcake from Scratch

    The Surprisingly Therapeutic Art of Making Strawberry Shortcake from Scratch

    Why I Keep Coming Back to This

    I didn’t plan on writing about shortcake today. It’s one of those recipes that’s been around forever, yeah, but there’s this strange thing it does. It forces me to slow down. I sit there slicing strawberries, smelling that bright, almost citrus-y fragrance. I fold flour into butter with my hands, feeling the cool, crumbly texture slip through my fingers. It’s messy and honest, no fancy gadgets needed. Lately, after a long day, I’ve realized I need something tactile—something that requires a bit of patience. Making this shortcake feels like reclaiming a little part of myself, outside of screens, outside of deadlines. It’s not just dessert. It’s a tiny act of care, somehow, secretly grounding. That’s what matters right now — real simple comfort, something I can actually do that makes me stop and breathe. All that in a sweet, flaky bite.

    Simple Strawberry Shortcake

    This shortcake features a flaky, tender biscuit made from flour, butter, and milk, layered with fresh sliced strawberries. The final dish has a crumbly, golden-brown exterior with moist, juicy fruit inside, assembled as a classic dessert with a rustic appeal.
    Prep Time 15 minutes
    Cook Time 20 minutes
    Total Time 35 minutes
    Servings: 4
    Course: Main Course
    Cuisine: American
    Calories: 350

    Ingredients
      

    • 2 cups all-purpose flour plus extra for dusting
    • 1 tablespoon granulated sugar
    • 1 tablespoon baking powder
    • 1/2 teaspoon salt
    • 1/2 cup cold unsalted butter cut into small cubes
    • 2/3 cup milk plus extra for brushing
    • 1 pint strawberries hulled and sliced
    • 2 tablespoons granulated sugar for strawberries
    • 1 teaspoon vanilla extract

    Equipment

    • Mixing bowls
    • Pastry cutter or forks
    • Baking sheet
    • Cooling rack
    • Knife
    • Cutting board
    • Whisk or Fork
    • Measuring cups and spoons
    • Stand mixer or hand mixer (optional)

    Method
     

    1. Preheat the oven to 425°F (220°C). Line a baking sheet with parchment paper. In a mixing bowl, combine the flour, sugar, baking powder, and salt. Use a pastry cutter or forks to cut the cold butter into the dry ingredients until the mixture resembles coarse crumbs with some pea-sized pieces.
      2 cups all-purpose flour, 1 tablespoon granulated sugar, 1 tablespoon baking powder, 1/2 teaspoon salt, 1/2 cup cold unsalted butter
    2. Gradually pour in the milk, stirring gently with a whisk or fork until the dough just comes together. Do not overmix. Lightly dust a clean surface with flour, turn out the dough, and gently knead a few times to incorporate any stray bits.
      2/3 cup milk
    3. Pat the dough into an approximately 1-inch thick disk. Use a floured biscuit cutter or glass to cut out rounds, about 3 inches in diameter. Place the shortcakes on the prepared baking sheet, spacing them apart. Brush the tops with a little milk for a golden finish.
    4. Bake in the preheated oven for 15-20 minutes, or until the shortcakes are golden brown and risen. Remove from the oven and transfer to a cooling rack. Let cool slightly while you prepare the strawberries.
    5. In a bowl, toss the sliced strawberries with sugar and vanilla extract. Let sit for about 10 minutes until juices release and mixture thickens slightly. The strawberries should look glossy and juicy.
      1 pint strawberries, 2 tablespoons granulated sugar, 1 teaspoon vanilla extract
    6. Slice the shortcakes in half horizontally. Spoon a generous amount of strawberries and their juices over the bottom half, then top with the remaining biscuit. Serve immediately, optionally with additional strawberries or whipped cream.

    Maybe it’s silly. Or maybe it’s exactly what we need. A reminder that real joy can be in the messy, imperfect moments, not just the perfect picture. I’m not making it look cute on Instagram, just making it for myself. Not every recipe has to be a showstopper. Sometimes, it’s just about taking that first messy step.

  • The Unexpected Power of a Yard Sale Find: Strawberry Rhubarb Cake

    The Unexpected Power of a Yard Sale Find: Strawberry Rhubarb Cake

    Why I Chose This Recipe Today

    This cake isn’t about perfect ingredients or fancy techniques. It’s about that bag of sad-looking rhubarb I found at a garage sale last summer—faded pinks and greens, no more than a dollar. I almost ignored it. But something about the smell—sharp, grassy edges with this weird sweet undertone—got me thinking. Rhubarb can be so temperamental, kind of like the people in your life. Some days sweet, some days tart. Honestly, it’s the unpredictability that makes it special.
    Now, late spring is here, and everything feels like it’s waking up—like my garden, my mood, even my kitchen. Rhubarb’s bright, tangy punch is what I want to taste right now, even if I wasn’t planning on baking. It’s weird how one little find can flip your whole day around. That’s what I love about cooking—finding surprises in the least expected places.

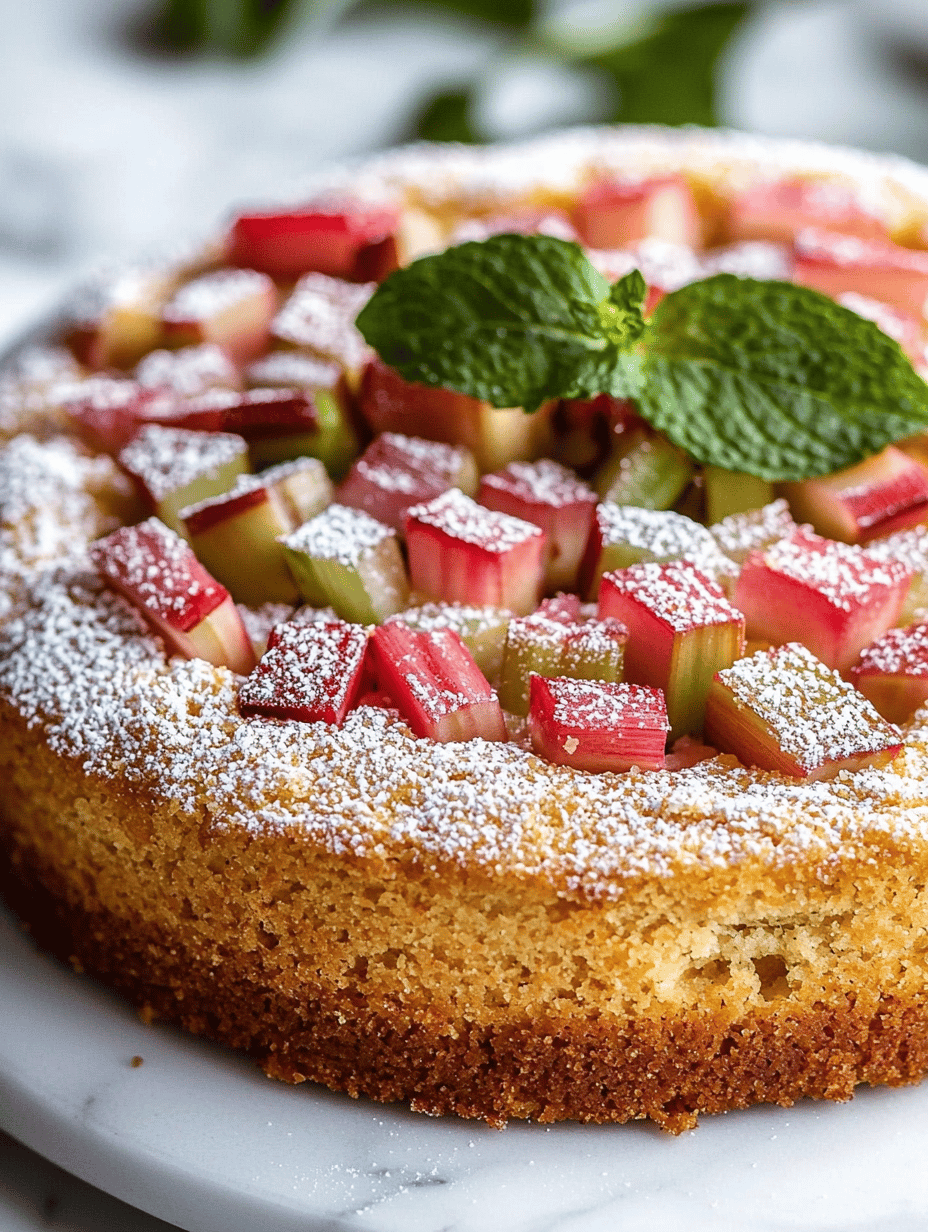
    Rhubarb Cake

    This rhubarb cake is made by mixing chopped rhubarb into a batter and baking it until golden and bubbly. The dish features a moist, tender crumb with vibrant pink and green streaks of cooked rhubarb throughout, creating a balance of tartness and sweetness with a slightly crispy top crust.
    Prep Time 15 minutes
    Cook Time 45 minutes
    Total Time 1 hour
    Servings: 8
    Course: Main Course
    Cuisine: baking
    Calories: 320

    Ingredients
      

    • 1 cup granulated sugar
    • 1/2 cup unsalted butter melted
    • 2 large eggs beaten
    • 1.5 cups all-purpose flour
    • 1 teaspoon baking powder
    • 1/2 teaspoon salt
    • 1 cup fresh rhubarb chopped into 1/2-inch pieces

    Equipment

    • Mixing bowls
    • Measuring cups and spoons
    • Chef’s knife
    • Cutting board
    • Cake pan
    • Spatula
    • Oven

    Method
     

    1. Preheat the oven to 350°F (175°C). Grease a cake pan with butter or non-stick spray and set aside.
    2. In a mixing bowl, combine the granulated sugar and melted butter until well blended and creamy, showing a smooth, pale mixture.
      1 cup granulated sugar
    3. Add the beaten eggs to the sugar-butter mixture gradually, whisking until the mixture is smooth and slightly thickened, with a glossy appearance.
      1 cup granulated sugar
    4. Sift together the flour, baking powder, and salt in a separate bowl. Gradually fold the dry ingredients into the wet mixture using a spatula until just combined, avoiding overmixing for a tender crumb.
      1 cup granulated sugar
    5. Gently fold the chopped rhubarb into the batter, distributing evenly without breaking the pieces, until all rhubarb is incorporated.
      1 cup granulated sugar
    6. Pour the batter into the prepared cake pan, spreading evenly with a spatula. Bake in the preheated oven for 40-45 minutes, or until the top is golden brown and a toothpick inserted into the center comes out clean.
    7. Remove the cake from the oven and allow it to cool in the pan for 10 minutes before transferring to a wire rack to cool completely. The finished cake should have a moist crumb with vibrant rhubarb streaks visible throughout.

    Maybe it’s just me, but this cake feels like a little rebellion—like, ‘Yeah, I’ll bake with that scrappy rhubarb and make something worth eating.’ Sometimes it’s about trusting the little things, the odd bits and pieces, and turning them into something that sticks with you. Or maybe I just like that it’s imperfect and honest—kind of like us.

  • The Quiet Miracle of a Pendulum Swing: Pecan Pie Turns Personal

    The Quiet Miracle of a Pendulum Swing: Pecan Pie Turns Personal

    Why I’m Thinking About Pecan Pie Differently

    Ever notice how some memories sneak up on you just as you’re rolling out pie dough? Last week, I caught a whiff of roasted pecans — that sweet, nutty aroma mixed with a hint of caramel—and it really took me somewhere. Pecan pie isn’t just about Thanksgiving or dessert bars. Today, I realized, it’s about the little moments you forget to cherish—like that sticky, crunchy top crackling under your spoon or the way the filling stays warm on your tongue long after you’ve swallowed. It’s not trendy or fancy; it’s about that quiet, perfect balance between the toasted nuts, the butter-rich filling, and that *sharp* burst of vanilla. Right now, I think pecan pie matters because it’s honesty in a crust—simple, real, baked memories. And honestly, sometimes that’s all I really want from a slice.

    Classic Pecan Pie

    Pecan pie is a baked dessert featuring a flaky crust filled with a sweet, sticky mixture of pecans, eggs, sugar, and butter. The filling sets into a rich, caramelized consistency with a crunchy, toasted pecan topping. The finished pie has a golden-brown crust and a glossy, nut-studded surface that is both inviting and indulgent.
    Prep Time 20 minutes
    Cook Time 50 minutes
    Total Time 1 hour 10 minutes
    Servings: 8
    Course: Main Course
    Cuisine: American
    Calories: 550

    Ingredients
      

    • 1 pre-made Pie crust store-bought or homemade
    • 1 cup granulated sugar
    • 1 cup light corn syrup
    • 4 large eggs beaten lightly
    • 4 tbsp unsalted butter melted
    • 1.5 cups raw pecan halves
    • 1 tsp vanilla extract
    • 1/4 tsp salt

    Equipment

    • 9-inch Pie Pan
    • Mixing bowls
    • Whisk
    • Saucepan
    • Rolling pin
    • Oven

    Method
     

    1. Preheat the oven to 350°F (175°C). Roll out the pie crust on a floured surface and fit it into a 9-inch pie pan, trimming the edges as needed. Crimp the edges decoratively and set aside.
    2. In a mixing bowl, combine sugar, corn syrup, and salt. Whisk together until fully blended, creating a smooth, lucent mixture.
    3. Add the eggs, one at a time, to the sugar mixture, whisking after each addition until the mixture becomes thick and slightly frothy.
    4. Stir in the melted butter, vanilla extract, and a pinch of salt; mix until the filling is smooth and shiny.
    5. Sprinkle half of the pecan halves evenly over the bottom of the pie crust. Pour the filling gently over the pecans, spreading to distribute evenly.
    6. Arrange the remaining pecan halves on top of the filling in a decorative pattern. Place the pie on the middle rack and bake for 50 minutes, or until the filling is set and the top is golden brown with toasted pecans.

    Maybe it’s strange to tie so much feeling to something as small as a dessert, but that’s how a good pie sneaks into your day. It’s not always about making it look perfect, just about how it tastes and sticks with you a little longer than expected.