Cheese balls have this goofy, nostalgic charm that never really goes out of style. Growing up, they were always at family gatherings, just crispy enough on the outside and gooey on the inside, making them impossible to resist. There’s something about rolling those little bites in crunchy breadcrumbs that feels like a small act of joy, especially when everyone’s waiting to dive in.
I’ve tinkered with this recipe over the years, trying to get that perfect balance of crunch and cheesy melt. It’s not about fancy ingredients, really. It’s about capturing that childhood moment of biting into something crispy and cheesy that’s just a little bit messy and totally satisfying. These cheese balls are perfect for casual nights or whenever you need a quick, nostalgic snack to brighten up the table.
Focusing on the nostalgic charm of cheese balls, this recipe explores the art of creating perfectly crispy, bite-sized bites that evoke childhood memories, with tips for customizing flavors and textures to suit modern tastes.
Nostalgic Crispy Cheese Bites
- Making cheese balls takes me back to my grandmother’s kitchen, where the smell of melted cheese and fried breadcrumbs filled the air, wrapping us in warmth.
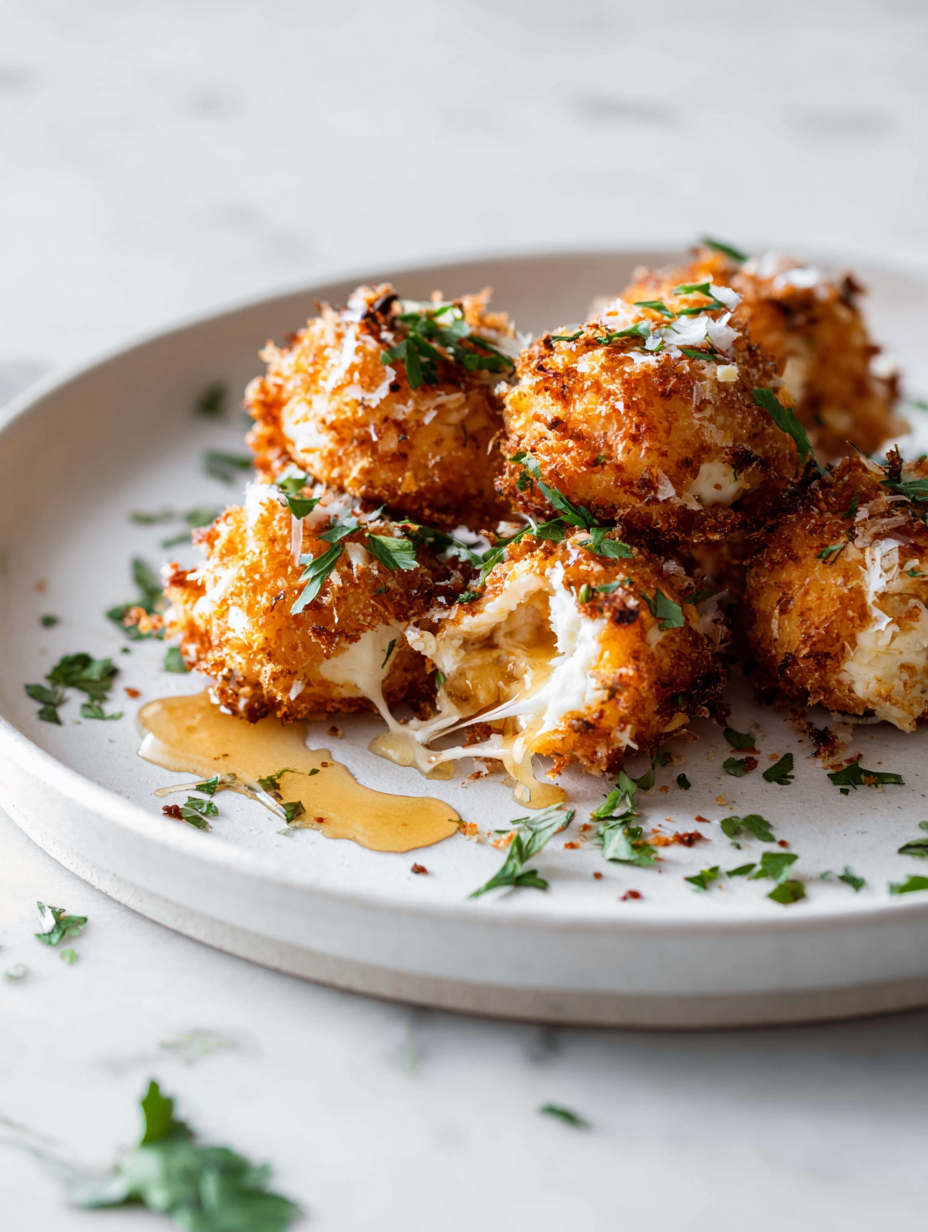
- I love how these cheese balls are a chaos of texture—crisp outside, gooey inside—and each bite sparks a little burst of joy and nostalgia.
- There’s a quiet pride in rolling each little ball, knowing I’ve kept a simple, messy tradition alive, even on busy weeknights.
The story behind this recipe
- This recipe for cheese balls was born out of a lazy weekend craving for something crispy and cheesy, but with a twist of nostalgia. I wanted to recapture that childhood joy without all the fuss, so I kept it simple—just good cheese, a few pantry staples, and a hot fryer. The moment I rolled those little bites in breadcrumbs and fried them until golden, I felt like a kid again, watching my family gather around with greasy fingers and big smiles.
- What keeps me coming back to this recipe is how adaptable it is—change the cheese, add herbs, or spice it up. But mostly, it’s the memory of that crunch, the oozy melt inside, and the pure mess of it all that makes these cheese balls special. They’re imperfect, fun, and honest—a little bit sloppy, just like good comfort food should be.
- heading
- The story behind this recipe
Cheese Balls Trivia and Origins
- Cheese balls originated in the mid-20th century as a savory party snack, quickly gaining popularity at potlucks and gatherings.
- They were initially made with processed cheese and coated in crushed crackers or nuts, aiming for easy, no-fuss finger food.
- During the 1970s, cheese balls became a staple in American snack culture, often appearing on holiday tables and family buffets.
- The tradition of rolling cheese mixtures into balls and frying them traces back to European snack and appetizer customs, adapted for American tastes.
Ingredient breakdown: key components
- Cheddar cheese: I love how it melts into a gooey, savory core that’s both sharp and comforting; swap for Monterey Jack if you want milder, but keep the richness.
- Cream cheese: It binds everything together with its silky texture, making the balls tender inside. If you’re out, ricotta can work but will change the chewiness.
- Breadcrumbs: I use panko for that extra crunch and lightness, but regular dried breadcrumbs will do if you prefer a denser bite. Toast them lightly for a nuttier flavor.
- Seasonings: Just a pinch of paprika and pepper adds warmth and color. Feel free to toss in a little cayenne if you like a spicy kick—just a splash!
- Oil for frying: Neutral oil like vegetable or canola gives a crisp exterior without interfering with the cheese’s flavor. Keep it hot—around 180°C (355°F)—for that perfect crackle.
- Optional herbs: Chopped parsley or chives bring freshness, especially if you want a more herbaceous note. Use fresh for the best aroma, but dried works in a pinch.
- Egg (if used): It helps with binding if you decide to roll these a second time in breadcrumbs for extra crunch. Just a beaten egg, no fuss—dip, then fry.
Spotlight on key ingredients
Cheddar cheese:
- I love how it melts into a gooey, savory core that’s both sharp and comforting; swap for Monterey Jack if you want milder, but keep the richness.
- Cream cheese: It binds everything together with its silky texture, making the balls tender inside. If you’re out, ricotta can work but will change the chewiness.
Breadcrumbs and oil:
- Breadcrumbs: I use panko for that extra crunch and lightness, but regular dried breadcrumbs will do if you prefer a denser bite. Toast them lightly for a nuttier flavor.
- Oil for frying: Neutral oil like vegetable or canola gives a crisp exterior without interfering with the cheese’s flavor. Keep it hot—around 180°C (355°F)—for that perfect crackle.
Notes for ingredient swaps
- Dairy-Free: Use a blend of dairy-free cheeses like cashew-based cheese or nutritional yeast for a cheesy flavor. Expect a different melt and texture, slightly firmer and less gooey.
- Low-Sodium: Opt for low-sodium cheese to control salt levels. It might be milder, so consider adding a pinch more seasoning.
- Vegan Cheese: Swap with vegan cheese shreds or homemade nut-based cheese. The flavor will be milder, and the texture slightly firmer.
- Gluten-Free: Use crushed gluten-free crackers or gluten-free panko instead of traditional breadcrumbs. The crunch stays good, just a different flavor profile.
- Herb Variations: Fresh herbs like dill or basil can replace or complement parsley or chives. This adds freshness and a different aromatic punch.
- Cheese Options: Swap cheddar for Monterey Jack or mozzarella for a milder, creamier inside. Different cheeses melt uniquely, affecting ooze and stretch.
- Oil for Frying: Use avocado or light olive oil for a healthier option. These oils have different smoke points and flavors but fry just as well.
Equipment & Tools
- mixing bowl: Combine ingredients and mix thoroughly.
- shallow dish: Coat the cheese balls evenly with breadcrumbs.
- thermometer: Monitor oil temperature for perfect frying.
- slotted spoon: Remove fried cheese balls from oil gently.
- baking sheet with parchment: Hold prepared cheese balls before frying.
Step-by-step guide to cheese balls
- Equipment ready: get a medium mixing bowl, a shallow dish for coating, a slotted spoon, a thermometer, and a baking sheet lined with parchment.
- In the bowl, combine 1 cup shredded cheddar, 4 oz cream cheese, 1/2 cup panko breadcrumbs, 1/2 teaspoon paprika, 1/4 teaspoon black pepper, and a pinch of salt. Mix well until fully blended, using a spoon or spatula.
- Chill the mixture in the fridge for 15-20 minutes until firm enough to handle. This makes rolling easier and helps shape the balls.
- While chilling, heat about 2 inches of vegetable oil in a deep pan or wok to 180°C (355°F). Use a thermometer to keep the temp steady.
- Once chilled, scoop about a tablespoon of mixture, roll between your palms into a small ball, about 2.5 cm (1 inch) diameter. Repeat with remaining mixture, placing the balls on the prepared baking sheet.
- Carefully lower the cheese balls into hot oil, frying in batches to avoid overcrowding. Cook for 3-4 minutes, turning occasionally, until golden brown and crispy.
- Use a slotted spoon to transfer the cooked cheese balls onto paper towels to drain excess oil. Watch for a crackling sound and golden hue as signs of doneness.
- Let them rest for 2 minutes, then serve hot with your favorite dipping sauce or just on their own.
Allow the cheese balls to rest briefly on paper towels to drain excess oil. Serve immediately while warm and gooey, or keep warm in a low oven for up to 10 minutes before serving.
How to Know It’s Done
- Golden, crispy exterior with a slight crackle when pressed.
- Internal cheese is oozy and melted, not runny or doughy.
- Oil temperature remains steady at 180°C (355°F) during frying.
Nostalgic Crispy Cheese Bites
Ingredients
Equipment
Method
- Combine shredded cheddar, softened cream cheese, paprika, and black pepper in a mixing bowl. Stir thoroughly until the mixture is smooth, creamy, and uniform in color.
- Chill the mixture in the refrigerator for 15-20 minutes until it firms up slightly, making it easier to shape.
- Preheat the vegetable oil in a deep pan or wok to 180°C (355°F). Use a thermometer to ensure the temperature is steady.
- Once chilled, scoop about a tablespoon of the cheese mixture and gently roll it between your palms to form a small, round ball about 2.5 cm (1 inch) in diameter. Place each formed ball on a parchment-lined baking sheet.
- Carefully lower a batch of cheese balls into the hot oil using a slotted spoon. Fry in batches, turning occasionally, for 3-4 minutes until they are golden brown and crispy on the outside.
- Using the slotted spoon, transfer the cooked cheese balls to paper towels to drain excess oil. Let them rest for 2 minutes.
- Serve the cheese balls hot, with your favorite dipping sauce or just on their own for an irresistible, cheesy snack.
Tips for perfect cheese balls
- Bold coating: Use panko breadcrumbs for a light, airy crunch that contrasts beautifully with the gooey cheese inside.
- Temperature check: Keep oil at 180°C (355°F); too hot and the outside burns, too cool and the balls will be greasy and dull.
- Chill first: Refrigerate the cheese mixture for at least 15 minutes; this helps when rolling and prevents sticking during frying.
- Gentle handling: Roll the cheese balls softly to avoid cracking the exterior, which preserves their oozy interior.
- Monitor color: Fry until golden-brown; the right hue signals crispy perfection without over-torched edges.
- Drain well: Rest the cheese balls on paper towels immediately after frying to remove excess oil and maintain crunch.
- Serve hot: These cheese balls are best enjoyed right out of the fryer, while they’re still warm and melty inside.
Common mistakes and how to fix them
- FORGOT to preheat oil → Ensure oil reaches 180°C (355°F) before frying.
- DUMPED mixture too early → Chill for full 20 minutes to firm up for easier rolling.
- OVER-TORCHED the cheese balls → Fry until golden, not dark brown, for perfect crunch.
- MISSED resting time → Let cooked cheese balls sit 2 minutes to set before serving.
Quick fixes and pantry swaps
- If oil smokes, splash in a small piece of bread to test heat and adjust accordingly.
- When mixture is too sticky, dump in a little more breadcrumbs and chill again for easier shaping.
- Patch cracked cheese balls by gently pressing edges back together before frying.
- Shield over-torched cheese balls with a paper towel to absorb excess heat and prevent burning.
- Splash a little lemon juice or vinegar if cheese mixture tastes flat, brightening the flavor in seconds.
Prep, store, and reheat tips
- Prepare the cheese mixture and chill for at least 15 minutes; it firms up, making rolling easier and cleaner.
- Assemble and shape the cheese balls ahead of time, then refrigerate for up to 24 hours—they’ll stay fresh and firm.
- Store cooked cheese balls in an airtight container in the fridge for up to 2 days. Reheat in a hot oven or air fryer until crispy, about 5 minutes, and check for that satisfying crackle.
- Reheating may soften the cheese inside; for best texture, reheat just until hot and crispy on the outside, avoid overcooking.
- Froz en cheese balls can be kept for up to a month. Bake directly from frozen at 200°C (390°F) for 8–10 minutes, until golden and crispy, with a warm, gooey center.
Top questions about cheese balls
1. Can I use different cheese varieties?
Use a sharp, tangy cheddar for that classic cheesy flavor and meltiness. Milder cheeses will be less pronounced, so consider mixing in a bit of Parmesan for depth.
2. Can cheese balls be baked instead of fried?
Yes, you can bake these instead of frying. Bake at 200°C (390°F) for about 12-15 minutes until golden and crispy.
3. How do I keep cheese balls crispy after cooking?
Serve them immediately for the best gooey, crispy experience. If needed, reheat in a 180°C (355°F) oven for 5 minutes until warm and crunchy.
4. Should the mixture be chilled before shaping?
Chill the mixture for at least 15 minutes before shaping. This helps it firm up, making rolling easier and less messy.
5. Can I substitute the breadcrumbs?
Use panko breadcrumbs for a light, airy crunch. Regular breadcrumbs work, but they’ll give a denser, less crisp exterior.
6. What’s the ideal oil temperature?
Keep oil at around 180°C (355°F). Too hot, and the outside burns before the inside melts; too cool, and they become greasy.
7. Can I freeze cheese balls for later?
Freeze shaped balls for up to a month. Bake directly from frozen at 200°C (390°F) for 8-10 minutes until golden.
8. Can I add herbs or spices?
Yes, you can add herbs like parsley or chives for extra freshness. Fresh herbs provide a brighter flavor, dried ones are more concentrated.
9. How do I prevent the mixture from becoming tough?
Over-mixing can make the cheese mixture tough. Mix just until combined for tender, melt-in-your-mouth balls.
10. What if the cheese leaks during frying?
If cheese oozes out during frying, chill the mixture longer or handle the balls gently. Proper chilling helps keep the shape intact.
These cheese balls might seem simple, but they carry a pocket of nostalgia and honest flavor. Each bite offers that perfect crunch paired with gooey, cheesy warmth that feels like a small, messy celebration. They’re a reminder that some of the best comfort food is just a handful of ingredients and a little bit of chaos.
In a world full of fancy snacks, sometimes it’s the unpolished, familiar bites that stick around the longest. Whether for a casual night in or a spontaneous gathering, these cheese balls are a little messy, totally satisfying, and worth every greasy, cheesy moment.

I’m Mahek Manchanda, the curious heart behind Dramatically Stirring. Before this space existed, my life revolved around kitchens that were loud, demanding, and endlessly alive. I didn’t arrive at cooking through a single dramatic moment.
