Chicken lollipops are one of those dishes that make me want to get my hands dirty right from the start. There’s something almost primal about shaping chicken into these little, manageable bites—kind of like crafting tiny trophies for your dinner table. The process is messy, yes, but it turns into a tactile, almost meditative routine that I look forward to every time I make them.
Once the chicken’s shaped and coated, the real fun begins—frying until crispy and golden, the smell filling the kitchen with a smoky, savory aroma that’s hard to resist. It’s a dish that celebrates the chaos of cooking, the crackle of oil, and the joy of biting into something that’s both comfortingly familiar and a little bit playful. This recipe isn’t just about eating; it’s about the process, the mess, and the small, satisfying victory of each perfectly cooked lollipop.
Focusing on the messy, hands-on process of shaping and frying chicken lollipops, I want to share how this dish transforms from a simple idea into a tactile, satisfying experience that’s almost meditative. It’s a recipe that celebrates the joy of getting your hands dirty, the crackle of oil, and the smell of crispy chicken filling the kitchen, making it feel like a small, chaotic celebration.
Messy, tactile chicken magic
- Shaping these chicken lollipops is oddly soothing, like crafting tiny, edible sculptures after a long day.
- The smell of crispy batter sizzling in hot oil always sparks a childhood memory of family gatherings.
- Getting my hands messy with marinade and coating feels almost rebellious in a kitchen full of gadgets.
- There’s a quiet pride in mastering the perfect fry—crispy outside, tender inside—no shortcuts needed.
- Sharing these with friends turns a simple snack into a small, chaotic celebration of flavor and texture.
Messy, tactile chicken magic
Making chicken lollipops started as a way to turn a simple chicken wing into something a bit more playful and satisfying to eat with your hands. I remember the first time I tried shaping them, feeling a bit clumsy but oddly hooked on the tactile process. It’s a messy kind of fun, pressing the batter onto the chicken and watching it fry into that irresistibly crispy crust. For me, these lollipops are a reminder that sometimes, the best bites come from embracing the chaos of cooking.
Historical and Cultural Tidbits
- Chicken lollipops originated in Chinese-American cuisine, often seen at dim sum or street food stalls in the U.S.
- The shape mimics lollipops, but they’re actually made from chicken drumettes or wings, offering a playful twist.
- This dish gained popularity in the early 2000s, especially among fried chicken enthusiasts seeking a fun, finger-food experience.
Key ingredients and their quirks
- Chicken drumettes: I prefer these because they have a meaty, manageable size that’s perfect for shaping—plus, they stay juicy even after frying. Swap with chicken thighs if you want more flavor, but be mindful of adjusting cooking time.
- Flour: I use all-purpose flour for a light, crisp coating. For a gluten-free version, rice flour works well, giving a slightly crunchier bite. Keep an eye on the batter’s consistency—should be thick enough to adhere but not gloopy.
- Egg wash: The classic binder that helps the batter stick. I like adding a splash of buttermilk for tang and added tenderness. Skip if you’re dairy-free—just use a little water or plant-based milk, but expect less richness.
- Breadcrumbs: Panko creates a super crisp exterior. I crush them slightly for a coarser texture that crackles with each bite. For a softer crust, seasoned or flavored breadcrumbs can add a fun twist.
- Seasonings: Garlic powder, paprika, salt, and pepper are my go-tos—simple but flavor-packed. Feel free to add a pinch of cayenne for heat or cumin for earthiness. Remember, seasoning the flour well makes all the difference.
- Oil: Neutral oils like vegetable or canola are best for frying—hot enough to crisp without smoking. If you want less mess, use a deep-fry thermometer to keep it steady at about 180°C (350°F).
- Optional glaze: Sweet chili or soy sauce mixed with honey adds a sticky, glossy finish. I brush it on right after frying while they’re still hot—just enough to make each bite shine and shimmer.
Spotlight on key ingredients
Chicken drumettes:
- I prefer these for their manageable size and juicy meat—swap with chicken thighs if you want more flavor, but adjust cooking time.
- Flour: All-purpose flour gives a light crisp, but rice flour makes for a crunchier, gluten-free option—watch the batter’s consistency, it should be thick but not gloopy.
- Egg wash: Adds binder and tenderness—try a splash of buttermilk for tang, or use water or plant-based milk for dairy-free, though it’s less rich.
Breadcrumbs and seasonings:
- Breadcrumbs: Panko provides a super crisp exterior—crush slightly for more crunch, or use seasoned breadcrumbs for extra flavor.
- Seasonings: Classic mix of garlic powder, paprika, salt, and pepper—add cayenne for heat or cumin for earthiness, but season the flour well.
- Oil: Vegetable or canola work best for frying—keep oil steady at 180°C (350°F) with a thermometer to avoid smoking or sogginess.
Notes for ingredient swaps
- Chicken drumettes: I prefer these for their manageable size and juicy meat—swap with chicken thighs if you want more flavor, but adjust cooking time.
- Flour: All-purpose flour gives a light crisp, but rice flour makes for a crunchier, gluten-free option—watch the batter’s consistency, it should be thick but not gloopy.
- Egg wash: Adds binder and tenderness—try a splash of buttermilk for tang, or use water or plant-based milk for dairy-free, though it’s less rich.
- Breadcrumbs: Panko provides a super crisp exterior—crush slightly for more crunch, or use seasoned breadcrumbs for extra flavor.
- Seasonings: Classic mix of garlic powder, paprika, salt, and pepper—add cayenne for heat or cumin for earthiness, but season the flour well.
- Oil: Vegetable or canola work best for frying—keep oil steady at 180°C (350°F) with a thermometer to avoid smoking or sogginess.
- Optional glaze: Honey-soy or chili sauce brushed on hot adds gloss and sticky sweetness—brush right after frying for best shine.
Equipment & Tools
- Deep-fryer or heavy-bottomed pot: To fry the chicken evenly and safely at high heat.
- Tongs: To carefully lower and turn the chicken during frying.
- Wire rack: To drain excess oil and keep the coating crispy.
- Thermometer: To monitor oil temperature and ensure proper frying heat.
Step-by-step guide to chicken lollipops
- Gather your equipment: a deep-fryer or heavy-bottomed pot, tongs, a wire rack, and a thermometer. Fill the fryer with about 5 cm (2 inches) of oil, heat to 180°C (350°F).
- Prepare the chicken: take drumettes, pat dry, then season lightly with salt and pepper. Set aside.
- Make the batter: in a bowl, whisk together flour, a pinch of salt, garlic powder, paprika, and an egg. Add cold water gradually until the batter is thick but pourable, about 1/2 cup (120 ml).
- Coat the chicken: dip each drumette into the batter, ensuring an even coating. Let excess drip off slightly.
- Coat with breadcrumbs: roll the batter-coated chicken in panko breadcrumbs, pressing gently to adhere. Shape the tip of the chicken to create a ‘lollipop’ handle—press the meat to one side, leaving the bone exposed.
- Fry in batches: carefully lower the chicken into the hot oil, using tongs. Fry for about 8-10 minutes, turning occasionally, until golden brown and crispy.
- Check for doneness: the chicken should be cooked through (internal temp 75°C/165°F), and the coating crisp. The exterior should be a deep, golden hue with crackling sound as you fry.
- Remove and rest: transfer to a wire rack to drain excess oil. Let rest for 2-3 minutes to settle the juices.
- Optional glaze: brush with a mixture of honey and soy sauce or your favorite sticky sauce while still warm for added gloss and flavor.
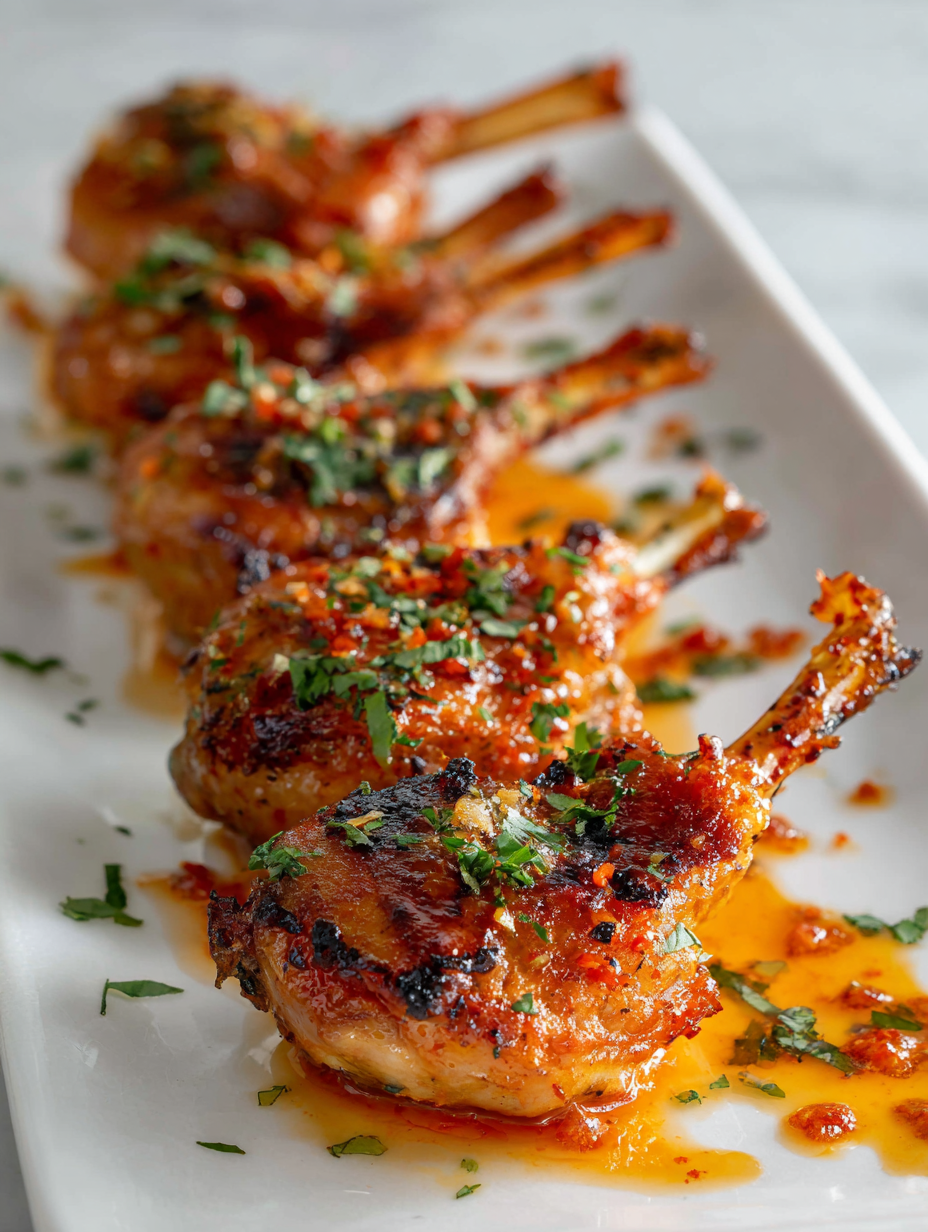
- Serve hot: plate the lollipops upright, garnished with chopped herbs or sesame seeds if desired. Enjoy the crackle and tender bite.
Let the chicken lollipops rest on the rack for a few minutes. Serve immediately while crispy, with your favorite dipping sauces. The residual heat will keep them warm and crunchy.
How to Know It’s Done
- The crust is deep golden and crackles when pressed.
- Internal temperature reaches 75°C (165°F).
- Juices run clear when pierced at the thickest part.
Chicken Lollipops
Ingredients
Equipment
Method
- Begin by prepping your oil in a deep-fryer or heavy-bottomed pot, heating it to 180°C (350°F).
- Pat the chicken drumettes dry with paper towels, then season lightly with salt and pepper for flavor.
- In a mixing bowl, whisk together the flour, garlic powder, paprika, and egg. Gradually add cold water, stirring until the batter is thick but smooth, similar to pancake batter.
- Dip each chicken piece into the batter, ensuring it’s evenly coated, then let the excess drip off.
- Next, roll the battered chicken in panko breadcrumbs, pressing gently to adhere the crumbs firmly. Shape the tip of each drumette to create a lollipop handle, pressing the meat down slightly on one side to expose the bone.
- Carefully lower the shaped chicken into the hot oil using tongs, working in small batches to avoid overcrowding.
- Fry the chicken for 8–10 minutes, turning occasionally, until the outside is deep golden and crispy, and the internal temperature reaches 75°C (165°F).
- Use tongs to remove the chicken from the oil and place on a wire rack to drain excess oil, letting them rest for a few minutes.
- If desired, brush the hot chicken lollipops with a mixture of honey and soy sauce or your favorite glaze for extra shine and sweetness.
- Serve immediately while crispy and hot, with your preferred dipping sauces and enjoy the satisfying crunch and tender meat.
Pro Tips for Perfect Chicken Lollipops
- Bolded tip: Keep oil temperature steady at 180°C (350°F) for crispy, non-greasy chicken.
- Bolded tip: Dip chicken quickly into batter—prolonged immersion can lead to thick, uneven coating.
- Bolded tip: Shape lollipops with firm pressure, ensuring the batter adheres well to the meat for even frying.
- Bolded tip: Use a wire rack to drain excess oil—this keeps the coating crisp instead of soggy.
- Bolded tip: Fry in small batches—overcrowding drops the oil temperature and results in greasy bites.
- Bolded tip: Rest fried chicken for 2-3 minutes—this helps juices settle and keeps the coating crunchy.
- Bolded tip: If batter feels too thick, add a splash of cold water—aim for a coating that’s clingy but not gloopy.
Common mistakes and how to fix them
- FORGOT to dry the chicken: results in soggy coating—pat dry thoroughly before battering.
- DUMPED batter into hot oil: causes splatter—test with a small drop first, adjust heat if needed.
- OVER-TORCHED the crust: turns bitter—reduce heat if it browns too quickly, fry in batches.
- MISSED resting time: leads to greasy texture—rest fried chicken for 2-3 minutes before serving.
Quick Fixes and Pantry Swaps
- If oil shimmers but doesn’t crackle, increase heat to reach proper frying temperature.
- When coating feels too thin, add a little more flour to thicken the batter quickly.
- Splash of water can fix batter that’s too gloopy—add gradually for the right consistency.
- Patch soggy spots by pressing breadcrumbs firmly onto the chicken for better crunch.
- Shield your hands with a towel when frying to avoid splatter and keep oil from popping.
Prep, store, and reheat tips
- Pre-shape the chicken lollipops up to a day ahead; keep them covered in the fridge to maintain freshness and prevent drying out.
- Store the coated, raw chicken in an airtight container in the fridge for up to 24 hours; the coating stays crispy if kept dry and cold.
- Fried chicken lollipops are best enjoyed fresh, but can be stored in a single layer in the fridge for 1-2 days; reheat in an oven at 180°C (350°F) until crispy, about 8-10 minutes, until crackling resumes and internal temp hits 75°C (165°F).
- Avoid microwaving, as it will make the coating soggy and lose that satisfying crunch; instead, use a hot oven or air fryer for reheating.
- The flavors can dull slightly after storage, so a quick brush of sauce or sprinkle of fresh herbs before serving can revive their appeal.
Top questions about chicken lollipops
1. Can I use chicken thighs instead of drumettes?
Use drumettes—they hold shape well and stay juicy. You can try chicken thighs but expect longer cooking.
2. Can I add a glaze or sauce?
Yes, a simple mix of soy sauce and honey brushed on hot chicken gives a sticky, flavorful glaze.
3. What’s the best oil temperature for frying?
Deep-fry in at least 5 cm (2 inches) of oil at 180°C (350°F). Use a thermometer for accuracy.
4. How do I prevent the chicken from becoming greasy?
Keep the oil steady at 180°C (350°F) for crispy, evenly cooked lollipops without greasiness.
5. How do I shape the chicken into lollipops?
Shape the chicken with firm pressure, pressing the meat to one side and leaving the bone exposed as a handle.
6. How many chicken lollipops should I fry at once?
Fry in small batches to keep the oil temperature stable and ensure crisp, golden coating.
7. How do I know when they’re done?
Cook until the crust is deep golden and crackles when pressed, and the internal temp hits 75°C (165°F).
8. Should I rest the chicken after frying?
Let the fried lollipops rest for 2-3 minutes on a wire rack to keep the coating crispy.
9. Can I prepare these ahead of time?
Store raw shaped chicken in the fridge for up to 24 hours; reheat in oven for best crispness.
10. What if the oil starts smoking?
If oil smokes, lower the heat or add a splash of water to cool it down quickly.
These chicken lollipops are a messy, tactile adventure, but they turn into a satisfying bite every time. The crackle of the crisp coating and the juicy interior make putting them together worth every splash of oil and hand-pressing moment.
In a world of quick snacks, this dish is a reminder that embracing a little chaos in the kitchen can lead to something truly memorable. Plus, it’s just fun to get your hands dirty and create something crispy, savory, and totally irresistible.

I’m Mahek Manchanda, the curious heart behind Dramatically Stirring. Before this space existed, my life revolved around kitchens that were loud, demanding, and endlessly alive. I didn’t arrive at cooking through a single dramatic moment.
