These chicken nuggets are not about perfection or crispiness that shatters under the bite. Instead, they’re about the warm, familiar feeling of biting into something rustic, homemade, and just a little imperfect. I like to think of them as a tiny, messy hug for your taste buds, made with honest ingredients and a simple approach that anyone can do in their own kitchen.
Growing up, I remember how my grandma’s nuggets weren’t perfectly uniform, but they had this undeniable charm. The coating was rough and flaky, the chicken juicy inside, and the smell of seasoned oil always made the whole house feel cozy. Making these at home brings back that nostalgic rush, but with the freedom to tweak and make it your own.
Focusing on a nostalgic, home-cooked approach that emphasizes simple, honest ingredients and a rough, imperfect coating that feels more like a comforting hug than a restaurant-style crunch.
Embracing Imperfection in Homemade Nuggets
- Making homemade nuggets feels like reclaiming a childhood joy, messy batter and all.
- There’s a small thrill in flipping each piece and watching the coating turn golden in the pan.
- I love how these nuggets smell when frying—rich, savory, with a hint of garlic and seasoned oil—so inviting.
- Nothing beats the imperfect, flaky crust that crackles just right, even if it’s not picture-perfect.
- Sharing these with family always sparks a little chaos, but the messy, warm bites make it worth it.
The story behind this recipe
- Making chicken nuggets from scratch is my way of reclaiming a childhood favorite that’s often too perfect or processed in stores. I wanted something with a rough, forgiving crust that feels homey, not fussy. The kind of nuggets that crackle a little when you bite, with juicy chicken inside that’s seasoned just right. It’s about embracing imperfection and the messy joy of cooking something familiar, but with your own twist.
- • I remember my mom tossing bits of chicken into seasoned flour while the oil heated up; the smell of warm spices and sizzling oil filled the kitchen with a nostalgic buzz.
- • There’s a small thrill in flipping these nuggets, watching the battered bits turn golden and flaky, like little rustic treasures.
- • The best part is the smell—rich, savory, and just a hint garlicky—that hits you as soon as they’re ready to eat.
Trivia and origins of chicken nuggets
- Chicken nuggets as we know them debuted in the 1950s, quickly becoming a fast-food staple worldwide.
- Originally, they were a way to make leftover chicken more appealing and easy to eat with fingers.
- The crispy coating has roots in Southern fried chicken traditions, adapted for quick, mass production.
- Homemade nuggets gained popularity in the 2000s as a healthier, customizable alternative to store-bought versions.
- Many cultures have their own version, like Japanese karaage or Indian spiced chicken bites, showing global love for fried chicken chunks.
Key ingredients and tips
- Chicken breasts: I prefer skinless, boneless breasts—lean, tender, and easy to cut into chunks. If you only have thighs, go for them, but reduce the cooking time slightly.
- Flour: Use all-purpose for the coating, but a bit of cornstarch can make it extra flaky and light—think of it as a gentle crunch protector.
- Eggs: They help the coating stick, but if you’re out, a splash of milk or buttermilk works fine—just make sure it’s enough to coat the chicken evenly.
- Breadcrumbs: Rustic, coarse breadcrumbs give that imperfect, chunky crust I love. Skip fine panko for a more homemade, uneven look and feel.
- Seasonings: I go heavy on garlic powder, paprika, and a pinch of cayenne—these give a smoky, slightly spicy burst that’s memorable. Adjust to your heat tolerance.
- Oil: Go for a neutral oil with a high smoke point like vegetable or canola. It gives that savory smell and crispy exterior without overpowering the chicken’s natural flavor.
- Optional extras: A dash of lemon juice in the batter or a sprinkle of fresh herbs can brighten up the flavor—think of it as a little surprise in each bite.
Spotlight on key ingredients
Chicken breasts:
- I prefer skinless, boneless breasts—lean, tender, and easy to cut into chunks. If you only have thighs, go for them, but reduce the cooking time slightly.
- Flour: Use all-purpose for the coating, but a bit of cornstarch can make it extra flaky and light—think of it as a gentle crunch protector.
- Eggs: They help the coating stick, but if you’re out, a splash of milk or buttermilk works fine—just make sure it’s enough to coat the chicken evenly.
Breadcrumbs:
- Rustic, coarse breadcrumbs give that imperfect, chunky crust I love. Skip fine panko for a more homemade, uneven look and feel.
- Seasonings: I go heavy on garlic powder, paprika, and a pinch of cayenne—these give a smoky, slightly spicy burst that’s memorable. Adjust to your heat tolerance.
- Oil: Go for a neutral oil with a high smoke point like vegetable or canola. It gives that savory smell and crispy exterior without overpowering the chicken’s natural flavor.
Notes for ingredient swaps
- Dairy-Free: Swap eggs for a mixture of water and a teaspoon of cornstarch to help coatings stick without dairy, though expect a slightly less tender crust.
- Gluten-Free: Use a gluten-free all-purpose flour blend and coarse rice or cornmeal instead of traditional flour and breadcrumbs for a crunchy, gluten-free bite.
- Low-Sodium: Opt for unsalted or lightly salted breadcrumbs and reduce added spices to keep sodium in check without losing flavor.
- Vegetarian: Replace chicken with firm tofu or store-bought plant-based chicken pieces, but note the coating might be slightly less crispy.
- Spicy Kick: Add a pinch of cayenne or hot sauce to the batter or breadcrumb mixture for an extra fiery punch that hits your taste buds.
- Herb Variations: Mix dried herbs like thyme or oregano into the flour or breadcrumbs for a fragrant, herbal twist that feels fresh.
- Extra Crunch: Incorporate crushed cornflakes or crispy rice cereal into your breadcrumbs for an even more rustic, crackly exterior.
Equipment & Tools
- Medium bowl: For beaten eggs and coating prep.
- Shallow dish: For flour and spice mixture.
- Slotted spoon: To handle hot nuggets safely.
- Deep-fry thermometer: To monitor oil temperature accurately.
- Paper towels: For draining excess oil.
- Deep pan or pot: For frying the nuggets.
Step-by-step guide to chicken nuggets
- Equipment: Use a medium-sized bowl for coating, a shallow dish for flour, and a deep-fry thermometer to monitor oil temperature. A slotted spoon helps handle hot nuggets, and paper towels for draining.
- Cut chicken breasts into roughly 2-inch pieces. Keep the sizes uneven for that rustic look. Pat dry to remove excess moisture.
- Prepare the coating station: In one bowl, beat 2 eggs. In a shallow dish, mix 1 cup flour with spices. In another dish, spread out 1 to 1.5 cups coarse breadcrumbs.
- Dip each chicken piece into the flour mixture, coating thoroughly. Shake off excess.
- Next, dip into the beaten eggs, letting excess drip off.
- Finally, coat in breadcrumbs, pressing lightly to adhere. Don’t worry if some areas are uneven; that’s part of the charm.
- Heat oil in a deep pan or pot to 180°C (355°F). To test, drop a small piece of bread—if it sizzles and floats, it’s ready.
- Carefully add nuggets in batches, avoiding overcrowding. Fry for about 4-5 minutes, turning occasionally, until golden and crisp.
- Check for doneness: Nuggets should be deep golden, with a slight crackle when you tap them. Inside, the chicken should be juicy and white.
- Remove with a slotted spoon, drain on paper towels, and rest for 2 minutes before serving to keep them crispy.
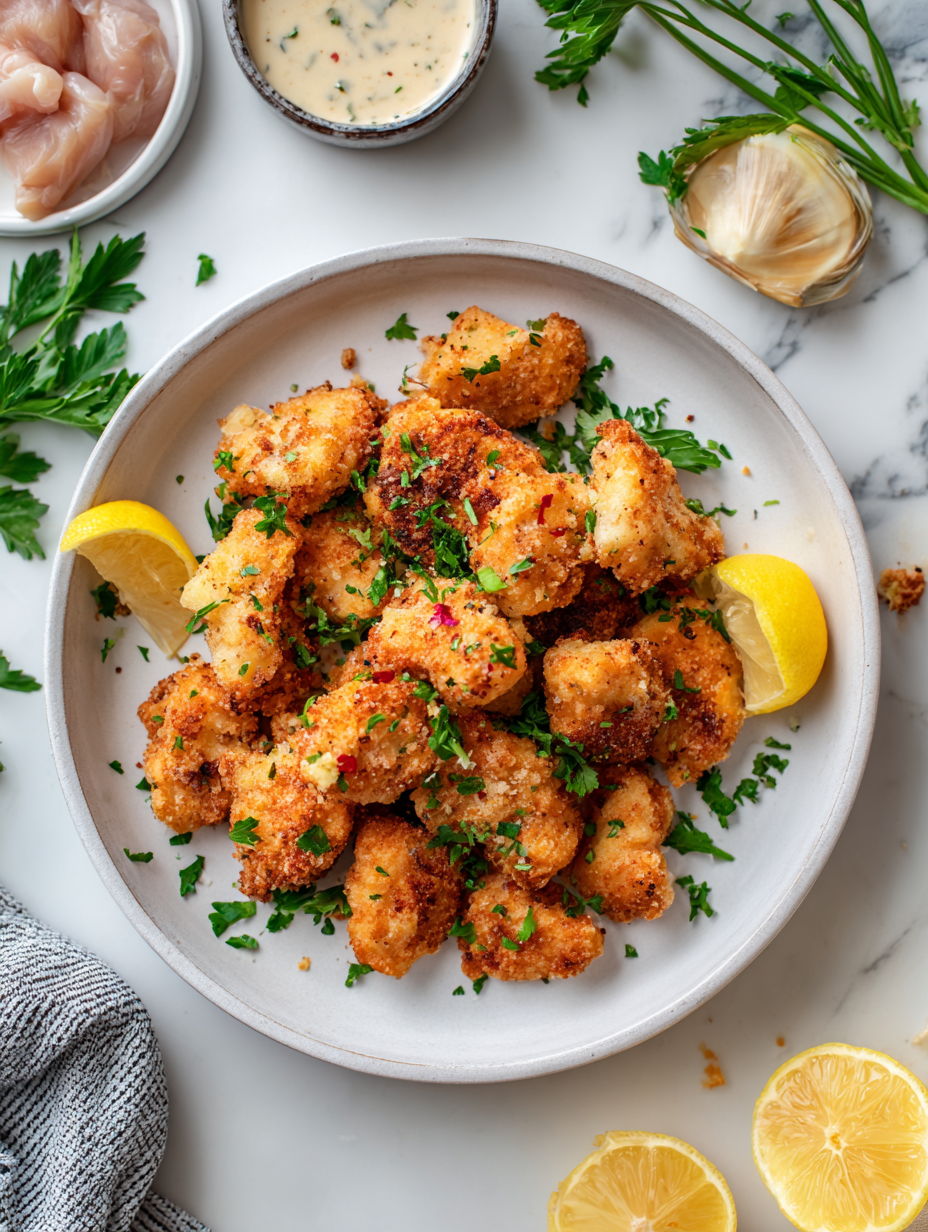
- Serve hot with your favorite dip. The coating should crackle gently as you bite in, with fragrant, savory chicken inside.
Let the nuggets rest on paper towels for 2 minutes. Serve immediately while crispy, with dips of your choice. For extra flavor, sprinkle with a little salt or herbs right after frying.
How to Know It’s Done
- Oil temperature steady at 180°C (355°F).
- Nuggets turn golden brown within 4-5 minutes.
- Inside chicken is opaque and juicy, not pink.
Rustic Homemade Chicken Nuggets
Ingredients
Equipment
Method
- Start by cutting the chicken breasts into roughly 2-inch uneven chunks, giving each piece a rustic, homemade look. Pat them dry to remove excess moisture, which helps the coating stick better.
- In a medium bowl, beat the eggs until blended. In a shallow dish, combine the flour with garlic powder, paprika, and cayenne pepper to add flavor and a bit of smoky spice.
- Pour the coarse breadcrumbs into another shallow dish, spreading them out evenly. This will be your final coating station for the chicken.
- Dip each chicken piece into the seasoned flour mixture, pressing gently to ensure an even coat. Shake off any excess flour.
- Next, dip the floured chicken into the beaten eggs, allowing the excess to drip off lightly for a smooth coating.
- Finally, roll each piece in the coarse breadcrumbs, pressing gently so the crumbs adhere unevenly, creating that rustic, flaky crust. Let the coated chicken rest briefly on a tray.
- Heat vegetable oil in a deep pan or pot to about 180°C (355°F). You can test the temperature by dropping a small piece of bread—if it sizzles and rises to the surface, the oil is ready.
- Carefully add the coated chicken pieces into the hot oil in small batches, avoiding overcrowding. Fry each batch for about 4-5 minutes, turning occasionally, until they turn a deep golden brown and smell savory and inviting.
- Use a slotted spoon to remove the nuggets, then drain them on paper towels to absorb excess oil. Rest for a couple of minutes to keep them crispy and warm.
- Serve the nuggets hot with your favorite dips. The exterior should crackle gently with each bite, revealing juicy, tender chicken inside—perfect for sharing and enjoying that rustic, imperfect charm.
Pro tips for perfect nuggets
- Bolded mini-head: Use a gentle, steady heat to prevent the coating from burning before the chicken is cooked through.
- Bolded mini-head: Keep the oil at a consistent 180°C (355°F) to ensure even, golden frying without greasing the kitchen.
- Bolded mini-head: Press breadcrumbs lightly onto the chicken for better adhesion and an uneven, rustic crust.
- Bolded mini-head: Fry in small batches to avoid overcrowding, which can cause sogginess and uneven browning.
- Bolded mini-head: Let fried nuggets rest on paper towels to drain excess oil, preserving their crackly exterior.
- Bolded mini-head: Turn nuggets gently during frying to achieve an even, rustic coating that crackles just right.
- Bolded mini-head: Use coarse breadcrumbs for a chunkier, more rustic crust that holds up well during frying.
Common mistakes and how to fix them
- FORGOT to monitor oil temperature → Use a thermometer for consistent frying results.
- DUMPED too many nuggets at once → Fry in batches to prevent soggy, uneven cooking.
- OVER-TORCHED the coating → Lower heat slightly if coating darkens too fast, avoid bitter flavors.
- UNDERCOATED chicken pieces → Press breadcrumbs gently onto chicken for better adhesion.
Quick fixes and pantry swaps
- When oil shimmers, splash a tiny bit of water to check for crackling and shimmer.
- If nuggets stick together, gently separate with a fork or spoon when frying.
- Splash a little lemon juice into the batter for a zesty bright flavor.
- Patch over burnt coating with more breadcrumbs and fry briefly again.
- Shield fragile nuggets with a splatter guard to prevent oil splatters and keep oil clean.
Prep, store, and reheat tips
- Prep the chicken and coat it up to a day ahead; keep refrigerated in an airtight container for up to 24 hours, maintaining freshness and ease on busy days.
- Fry or bake the nuggets ahead of time, then cool completely before storing in a single layer in the fridge for up to 2 days—reheat in the oven for best crispness, until they shimmer with a slight crackle.
- Reheating in a hot oven (around 180°C/355°F) for 8-10 minutes restores some of the original crunch, with a fragrant, savory aroma filling the kitchen again.
- Avoid freezing cooked nuggets, as their texture can become soggy or rubbery upon thawing. If freezing raw coated chicken, do so for up to a month, then fry directly from frozen for convenience.
Top questions about chicken nuggets
1. Can I use chicken thighs instead of breasts?
Use chicken breasts for tender, lean chunks that hold up well during frying. Thighs work too, but cook slightly less time.
2. How can I make the coating crispier?
Coating can be made crispier with panko breadcrumbs or crushed cornflakes. For softer, rustic crust, stick with coarse breadcrumbs.
3. How long should I fry the nuggets?
Fry in batches, about 4-5 minutes each, until golden brown and cooked through. Use a thermometer to keep oil at 180°C (355°F).
4. What if the oil is too hot or too cold?
If oil is too hot, coating burns before chicken cooks inside. Too cool, and nuggets soak up oil and turn soggy. Maintain steady heat around 180°C.
5. How should I store and reheat leftovers?
Store cooked nuggets in an airtight container in the fridge for up to 2 days. Reheat in a hot oven for a crispy finish, about 8-10 minutes at 180°C.
6. Can I make these without eggs?
Use a mixture of water and cornstarch or a flax egg as a substitute for eggs. These help the coating stick without dairy or eggs.
7. Can I customize the seasoning?
Adjust seasonings to taste—more paprika for smokiness, cayenne for heat. Keep it simple or spice it up based on your preference.
8. What type of breadcrumbs should I use?
Coarse breadcrumbs give a rougher, rustic crust. For a finer, more uniform coating, use panko or crushed crackers.
9. How do I know when the nuggets are done?
The coating should crackle gently when bitten, and the chicken inside should be opaque and juicy. Check the internal temp—75°C (165°F).
10. What if the coating burns or the nuggets are soggy?
If coating darkens too fast, lower the heat slightly. Overcrowding the pan causes sogginess—fry in small batches for best results.
Making these chicken nuggets at home reconnects me with a simpler time, a little chaotic but full of honest flavors. The smell of seasoned oil and crispy coating always pulls me back to childhood kitchens, where messes meant fun and flavor mattered more than perfection.
Even in their rustic, imperfect glory, these nuggets remind me that good food doesn’t have to be fancy—just honest, cooked with care, and enjoyed with a little chaos on the side.

I’m Mahek Manchanda, the curious heart behind Dramatically Stirring. Before this space existed, my life revolved around kitchens that were loud, demanding, and endlessly alive. I didn’t arrive at cooking through a single dramatic moment.
