Potato croquettes seem simple, but nailing that perfect crispy shell and tender inside is all about patience and technique. It’s a quiet kind of art that rewards you with a satisfying crunch and a warm, comforting bite every time. I’ve learned that rushing the frying stage just makes the exterior soggy or uneven, so I take my time, adjusting heat and resting the croquettes properly.
This recipe isn’t just about frying; it’s about mastering the balance between golden exterior and soft, fluffy interior. It’s a process that demands attention to detail—every step influences how the final croquettes turn out. When done right, they’re a little bit addictive, crispy on the outside, and melt-in-your-mouth on the inside. That patience transforms humble potatoes into something special, perfect for sharing or savoring solo.
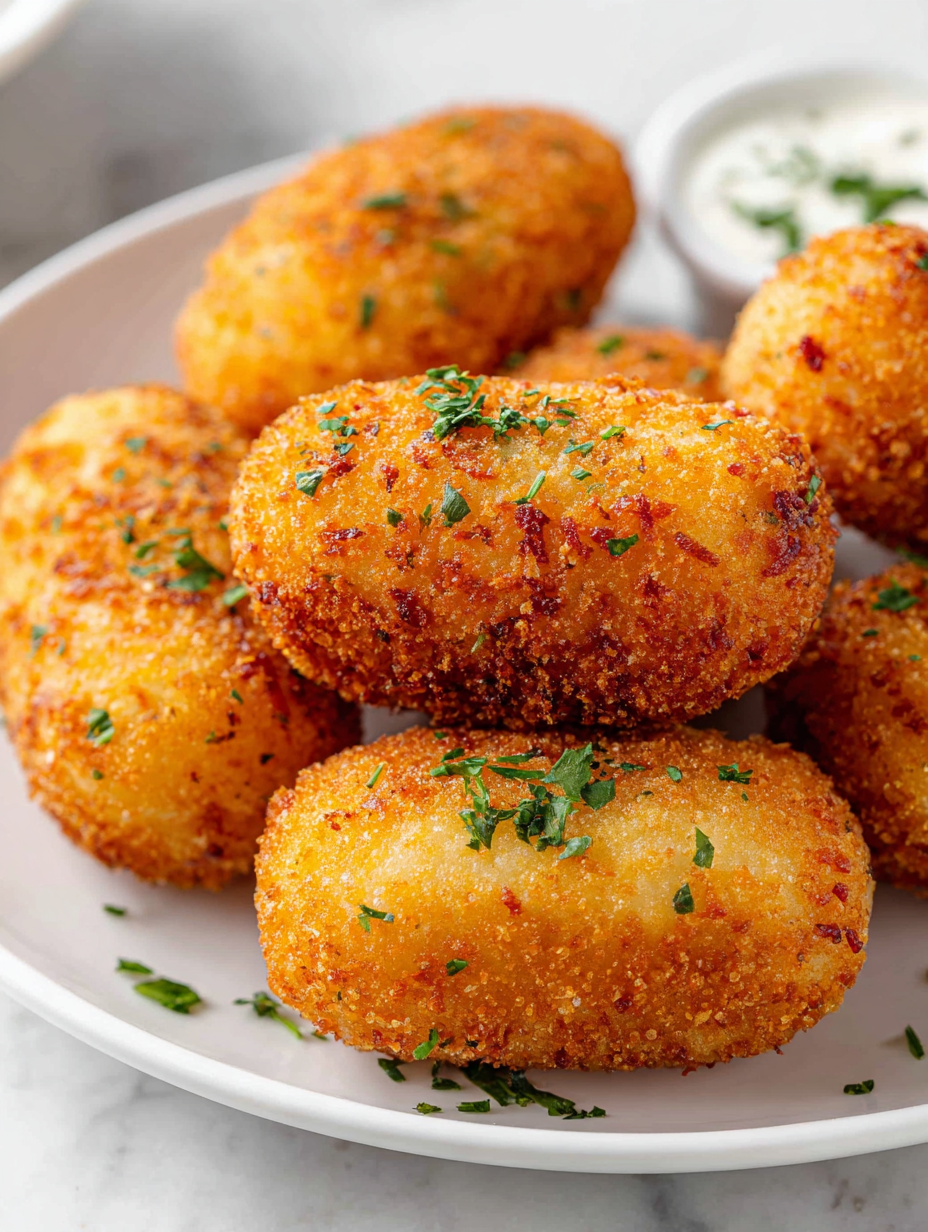
Focusing on achieving the perfect crispy exterior while maintaining a soft, melt-in-your-mouth interior, emphasizing the importance of technique and patience over quick frying.
Crispy on the outside, soft inside
- I love how the aroma of frying croquettes fills the kitchen, making everyone gather around.
- There’s a quiet pride in nailing that perfect golden crust after many tries.
- These croquettes remind me of childhood weekends at my grandma’s house, full of warmth and simple joys.
- Achieving that melt-in-your-mouth interior feels like a small personal victory every single time.
The story behind this recipe
- This recipe for potato croquettes came from a moment of kitchen chaos. I was trying to make something quick for guests, but kept burning the first batch. Instead of giving up, I slowed down and focused on the technique—patience paid off. That crispy exterior with a tender, almost creamy inside became my go-to comfort snack, especially on rainy weekends when I crave something warm and satisfying.
- Over the years, I’ve tweaked the process, but that initial lesson stuck—good things happen when you respect the cooking process. Now, every batch reminds me that even humble ingredients like potatoes can turn into something memorable with a little care and quiet attention.
- heading: Short personal story
Historical tidbits about potato croquettes
- Potato croquettes originate from French cuisine, where they’re called ‘croquettes de pomme de terre,’ dating back to the 19th century.
- They became popular across Europe, especially in Spain and France, often served as tapas or street food, emphasizing their comforting, portable nature.
- Traditionally, croquettes were a clever way to use leftover mashed potatoes, turning humble ingredients into crispy bites of satisfaction.
Key ingredients and tips
- Russet potatoes: I prefer starchy potatoes—they mash smoothly and give that fluffy interior. Swap with Yukon Gold if you want a slightly creamier feel.
- Butter: I use real butter for richness and flavor, but margarine can work in a pinch, though the taste will be less lush.
- Eggs: They bind everything together and add a tender crumb. Skipping them might make the croquettes fall apart, so don’t skip this step.
- Breadcrumbs: I like panko for extra crunch, but regular fine breadcrumbs will do if you want a softer shell. Toast them lightly for even browning.
- Oil for frying: I prefer neutral oils like vegetable or canola for a clean, crisp finish. Sesame or flavored oils can add an interesting twist, but keep it subtle.
- Nutmeg: Just a pinch adds depth and warmth. If you don’t have it, a hint of cinnamon can mimic that cozy aroma.
- Salt & pepper: Essential for seasoning, but I always taste the mashed potatoes before forming the croquettes—they need that flavorful punch.
Spotlight on key ingredients
Russet potatoes:
- I prefer starchy potatoes—they mash smoothly and give that fluffy interior. Swap with Yukon Gold if you want a slightly creamier feel.
- They absorb flavors well and become tender quickly during boiling, making them ideal for a light, airy mash.
Breadcrumbs:
- I like panko for that extra crunch, but regular fine breadcrumbs work too. Toast them lightly for an even golden shell.
- They create that satisfying crispy exterior, and their texture influences how well the croquettes hold shape during frying.
Notes for ingredient swaps
- Dairy-Free: Use plant-based butter or margarine, though the flavor won’t be as rich or creamy.
- Gluten-Free: Replace breadcrumbs with crushed gluten-free crackers or almond meal for a nutty crunch.
- Vegan: Swap eggs for flaxseed meal mixed with water, but expect a slightly denser texture.
- Low-Starch Potatoes: Yukon Golds or reds will give a creamier interior but might be less fluffy than Russets.
- Herb Variations: Add fresh herbs like parsley or chives instead of nutmeg for a bright, garden-fresh flavor.
- Oil Choices: Use avocado oil for a milder taste and higher smoke point, especially if frying at high heat.
- Seasoning Tweaks: Incorporate smoked paprika or cayenne for a smoky or spicy kick, adjusting to your taste.
Equipment & Tools
- Peeler: Remove potato skins easily and quickly.
- Large saucepan: Boil potatoes evenly and efficiently.
- Potato masher or ricer: Achieve a smooth, lump-free mash.
- Mixing bowl: Combine ingredients thoroughly.
- Spoon: Shape and portion the croquettes.
- Small plate of breadcrumbs: Coat croquettes for crispiness.
- Deep-frying pan or pot: Cook croquettes evenly in hot oil.
- Thermometer: Maintain precise oil temperature.
- Kitchen paper towels: Drain excess oil after frying.
Step-by-step guide to potato croquettes
- Equipment & tools: Peelers for potatoes, a large saucepan for boiling, a potato masher or ricer for smooth mash, a mixing bowl, a spoon for mixing, a small plate for breadcrumbs, a slotted spoon for frying, a paper towel-lined plate for draining.
- Boil potatoes: Peel and cut potatoes into equal chunks, about 2-3 cm. Boil in salted water at 100°C (212°F) for 15-20 minutes until very tender. Test with a fork, it should slide in easily.
- Mash potatoes: Drain well, then mash until completely smooth. If you see lumps, pass through a ricer. Let cool slightly, about 5 minutes.
- Mix ingredients: In the bowl, combine mashed potatoes, a pinch of salt, freshly grated nutmeg, 1 beaten egg, and 2 tbsp of melted butter. Mix until uniform and creamy. Taste and adjust seasoning.
- Shape croquettes: Take about 2 tbsp of mash, roll into a ball, then flatten into a small oval or cylinder, about 3 cm long. Repeat until all mash is used. Chill for 15 minutes to firm up.
- Prepare for frying: Spread breadcrumbs on a small plate. Dip each croquette in beaten egg, then coat evenly in breadcrumbs. Place on a tray. Keep chilled until ready to fry.
- Fry croquettes: Heat oil in a deep pan to 180°C (356°F). Use a thermometer for accuracy. Fry in batches, about 3-4 minutes, turning gently until golden brown and crispy. Adjust heat as needed to prevent burning.
- Check doneness: They should be evenly golden, with a crackling exterior. Inside should be hot and tender, with no raw potato visible. If too pale, fry a bit longer. If greasy, drain on paper towels.
- Rest & serve: Let croquettes rest for 2 minutes on paper towels. Serve hot with your favorite dipping sauce or simply seasoned salt. Perfect for sharing or solo munching.
Allow croquettes to rest briefly after frying to settle. Serve immediately with sauces or seasonings of your choice. They’re best enjoyed hot for that contrast of crispy exterior and soft interior.
How to Know It’s Done
- Golden brown exterior with a crackling shell
- Inside hot, soft, and creamy when tested with a fork
- Oil bubbling steadily around croquettes during frying
Potato Croquettes
Ingredients
Equipment
Method
- Peel the potatoes with a peeler, then cut them into even chunks for quick, uniform boiling.
- Place the potatoes in a large saucepan, cover with salted water, and bring to a boil. Cook for 15-20 minutes until very tender and a fork easily slides in.
- Drain the potatoes well, then mash them thoroughly until smooth and lump-free. Use a ricer if you want extra fluffiness. Let the mash cool slightly for about 5 minutes.
- In a mixing bowl, combine the warm mashed potatoes with a pinch of salt, freshly grated nutmeg, a beaten egg, and the melted butter. Fold everything together until smooth and well incorporated.
- Shape the mixture into small ovals or cylinders, about 3 cm long, using your hands. Place the shaped croquettes on a tray and chill in the fridge for 15 minutes to help them hold their shape.
- Spread the breadcrumbs on a small plate. Dip each chilled croquette into the beaten egg, then roll in the breadcrumbs until evenly coated. Place the coated croquettes on a tray until ready to fry.
- Heat vegetable oil in a deep pan or pot to 180°C, using a thermometer to maintain accurate temperature. Carefully add a batch of croquettes, frying for 3-4 minutes until golden brown and crispy.
- Use a slotted spoon to turn the croquettes gently as they fry, ensuring even browning. Once golden and crisp, transfer them to a paper towel-lined plate to drain excess oil.
- Repeat the frying process in batches, maintaining the oil temperature and avoiding overcrowding. Rest the fried croquettes briefly for 2 minutes to settle the texture.
- Serve the croquettes immediately while hot and crispy, optionally with your favorite dipping sauce or just a sprinkle of sea salt. Enjoy the contrast of crunchy exterior and tender interior in every bite!
Notes
Pro tips for crispy croquettes
- Use cold oil: Starting with colder oil helps prevent croquettes from browning too fast before cooking through.
- Maintain consistent oil temp: Keep it steady at 180°C (356°F) for even crisping and prevent sogginess.
- Chill before frying: Rest shaped croquettes in the fridge for 15 minutes; it firms them up for better shape and texture.
- Don’t overcrowd: Fry in batches; overcrowding drops the oil temperature and leads to greasy, uneven croquettes.
- Test for doneness: They should be golden, crackling, and sound hollow when tapped. Inside must be hot and tender.
- Use a slotted spoon: Carefully lift croquettes from oil to drain excess and keep them crispy longer.
- Serve immediately: For maximum crunch, eat while hot; the exterior crisps up best right after frying.
Common mistakes and how to fix them
- FORGOT to heat oil enough → Use a thermometer to ensure 180°C (356°F).
- DUMPED the croquettes too early → Rest for 2 minutes before serving for better texture.
- OVER-TORCHED the first batch → Adjust heat immediately if exterior darkens too quickly.
- SKIPPED patting excess oil → Drain on paper towels to keep croquettes crispy and not greasy.
Quick fixes for perfect croquettes
- When oil shimmers, splash a tiny drop of water—if it crackles, it’s ready for croquettes.
- If croquettes stick to the pan, patch with more oil and gently loosen with a spatula.
- Splash a little lemon juice in the oil for a bright aroma if the frying smells too greasy.
- DUMPED in too many at once? Rescue by frying in smaller batches for even cooking.
- When croquettes are too pale, swap to a hotter oil or extend frying time for golden perfection.
Prep, store, and reheat tips
- You can shape the croquettes up to 2 hours ahead; keep them chilled in the fridge to firm up. The colder, the better for frying without falling apart.
- Store cooked croquettes in an airtight container in the fridge for up to 24 hours. Reheat in a hot oven or air fryer until crispy, about 5-7 minutes. The aroma of fried potatoes will rekindle as they crisp up again.
- Frozen croquettes are best kept for no more than a month. Freeze on a baking sheet first, then transfer to a bag. Fry directly from frozen, adding a minute or two for extra crispness.
- Reheating will soften the texture if not reheated properly. For the best crunch, reheat in a 200°C (390°F) oven or air fryer. Expect a slightly less lively crackle but still a satisfying crunch.
- Avoid reheating in the microwave, as it makes the exterior soggy and ruins that delicate crunch. Instead, opt for oven or air fryer to revive crispiness.
Potato Croquettes FAQs
1. What potatoes work best for croquettes?
Use starchy potatoes like Russets for a fluffy interior that holds shape well. Yukon Golds can be a good substitute if you prefer a creamier texture.
2. Should I chill the croquettes before frying?
Chill the shaped croquettes in the fridge for at least 15 minutes before frying to help them keep their shape and prevent falling apart.
3. How do I know when the oil is ready?
Maintain oil temperature at around 180°C (356°F). Too hot and they burn; too cold and they turn greasy and soggy.
4. Can I fry all croquettes at once?
Fry in small batches to keep the oil temperature steady. Overcrowding causes sogginess and uneven cooking.
5. What kind of breadcrumbs should I use?
Use panko or regular breadcrumbs, toasted lightly for extra crunch. They create that crispy shell that contrasts with the soft inside.
6. Why do my croquettes fall apart?
If croquettes fall apart, check your mash for enough binding ingredients like eggs and butter. Chill the mixture if too soft.
7. How do I reheat croquettes?
Reheat in the oven or air fryer at 200°C (390°F) for 5-7 minutes until crispy. Microwaving makes them soggy.
8. How can I tell if the oil is the right temperature?
Use a thermometer to keep oil steady. A slight crackle when dropping in the croquettes indicates proper temperature.
9. When are croquettes done?
Fry until golden brown and crispy, with a crackling exterior. Inside should be hot and tender when tested with a fork.
10. Can I make these dairy-free?
For a dairy-free version, replace butter with plant-based margarine and breadcrumbs with crushed gluten-free crackers. Expect slightly different flavor and crunch.
Potato croquettes might seem straightforward, but getting that perfect balance of crispy exterior and tender inside takes a bit of patience and attention. When they come out just right, with that satisfying crackle and warm, fluffy interior, it’s a small victory worth savoring. Sometimes, it’s the simple things—done well—that remind us why we cook in the first place.
In the end, these croquettes are more than just a snack; they’re a reminder to slow down and enjoy the process. Whether you’re sharing with friends or savoring alone, there’s something quietly comforting about that golden, crispy shell giving way to soft potato goodness. That moment of crispy crunch and warm interior? It’s worth every minute.

I’m Mahek Manchanda, the curious heart behind Dramatically Stirring. Before this space existed, my life revolved around kitchens that were loud, demanding, and endlessly alive. I didn’t arrive at cooking through a single dramatic moment.
