Holiday parties are chaotic enough without worrying if your snack will hold up or fall flat. This dish started as a mishmash of leftovers, creamy cheese, ripe pears, crunchy nuts, and somehow turned into a crowd favorite.
It’s the kind of recipe that feels comforting yet unexpected, perfect for breaking out during the festive chaos.
It’s a surprise every time; the smoky-sweet combo is oddly addictive. Plus, it’s so easy to adapt, more spice, different nuts, seasonal fruits, making it a versatile crowd pleaser.
For an equally cozy pairing, the Classic Pecan Pie and the Roasted Squash Salad both complement these flavors beautifully.
How This Tart Idea Came Together
The inspiration came from pairing warm winter spices with seasonal fruit. By layering spiced cream cheese beneath thinly sliced pears, the tart creates contrast and richness that tastes far more complex than the ingredient list suggests. This is a crustless tart-style bake, designed to be scooped or sliced and served with bread or crackers.
Why I Love This Recipe
- Uses Simple, Everyday Ingredients
- Beautiful Presentation With Minimal Work
- Sweet, Savory, And Smoky Flavors In One Bite
- Ready In Under 30 Minutes
- Great For Parties, Snacking, Or Holiday Platters
- Delicious Warm Or Room Temperature
Helpful Tips Before You Start
- Use Firm Pears So They Slice Neatly
- Thin Slices Bake More Evenly
- Brush Pears With Oil To Enhance Browning
- Add Honey Only After Baking For Best Shine
- Toast Walnuts Before Adding For Extra Flavor
Tools You’ll Need
- Shallow baking dish
- Mixing bowl
- Knife and cutting board
- Pastry brush or paper towel
- Oven
Ingredients You’ll Need
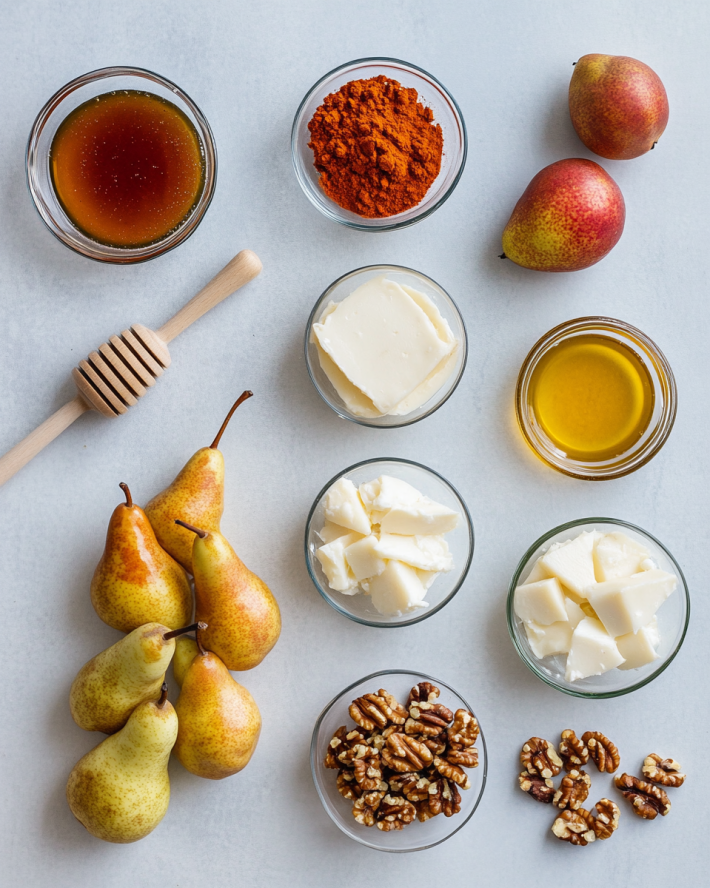
- 8 oz cream cheese softened
- 1 teaspoon smoked paprika
- 1/4 teaspoon cayenne optional, for heat
- 2 medium pears firm, sliced thin
- 1/2 cup chopped walnuts
- 2 tablespoons honey optional, for drizzle
- 1 tablespoon olive oil for brushing pears
Ingredient Substitutions
- Add A Pinch Of Cinnamon If You Want Warmth Instead Of Heat
- Swap Pears For Apples If Needed
- Replace Walnuts With Pecans Or Almonds
- Use Ricotta Instead Of Cream Cheese For A Lighter Tart
- Substitute Maple Syrup For Honey
Step-By-Step Instructions
- Preheat your oven to 180°C (355°F) and lightly grease your shallow baking dish to prevent sticking.
- In a mixing bowl, combine the softened cream cheese with smoked paprika and cayenne, mixing until the spices are evenly incorporated and the mixture is smooth and creamy.
- Spread the cheese mixture evenly across the bottom of your prepared baking dish, creating a smooth, even layer.
- Thinly slice the pears and arrange the slices over the cheese layer, overlapping them slightly for a layered look.
- Sprinkle the chopped walnuts evenly over the pears for crunch and nutty flavor.
- Using a pastry brush or a paper towel, lightly brush the pear slices with olive oil to help them roast evenly and develop a slight caramelization.
- Bake the tart in the preheated oven for 15-20 minutes until the edges are bubbling, the top is golden, and the pears are tender to the touch.
- Remove the tart from the oven and let it cool for a few minutes, allowing the flavors to meld and the cheese to set slightly.
- If desired, drizzle honey over the top for added sweetness and shine before serving.
- Slice into squares and serve this warm or at room temperature, enjoying the harmony of smoky cheese, sweet pears, and crunchy nuts.
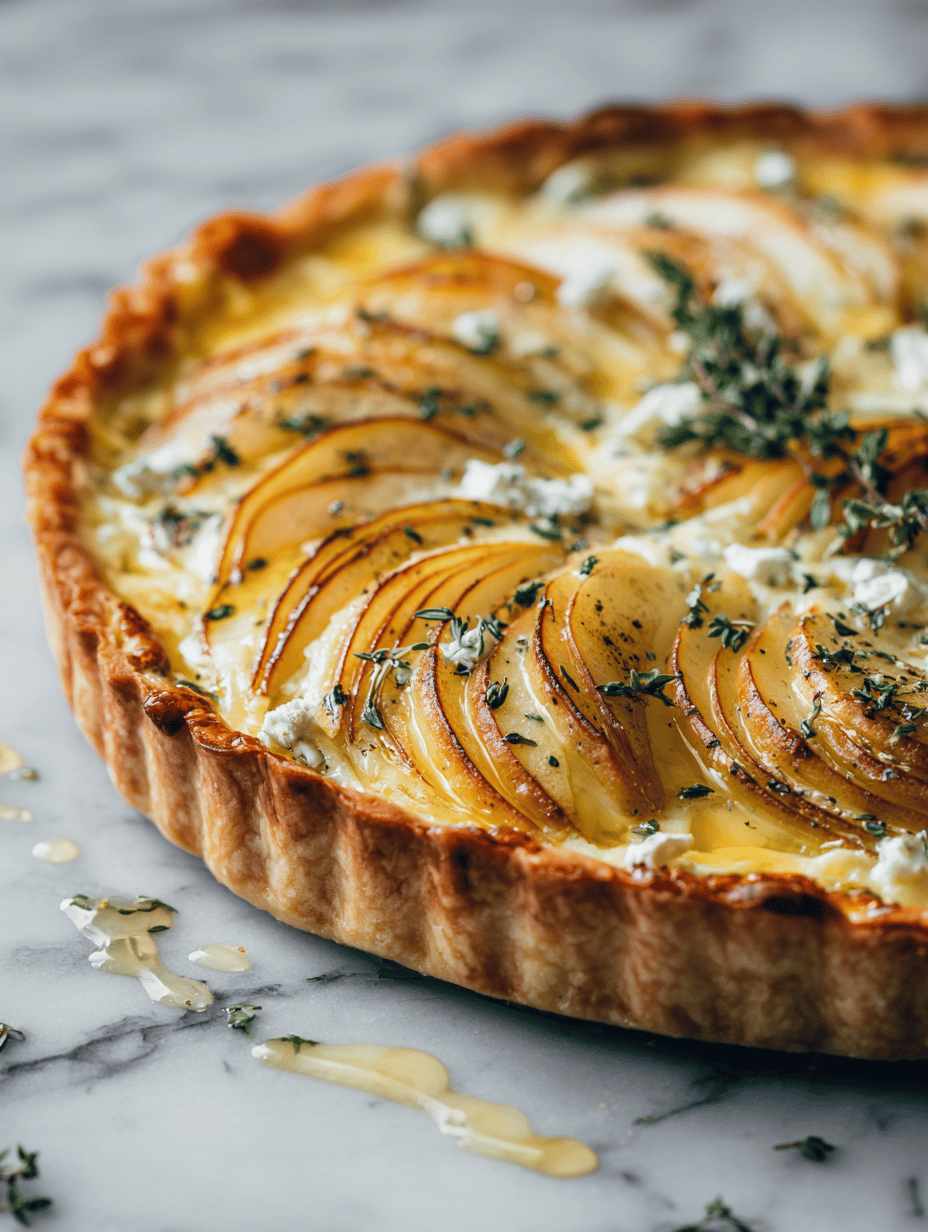
Festive Cheese and Pear Tart
Ingredients
Equipment
Method
- Preheat your oven to 180°C (355°F) and lightly grease your shallow baking dish to prevent sticking.
- In a mixing bowl, combine the softened cream cheese with smoked paprika and cayenne, mixing until the spices are evenly incorporated and the mixture is smooth and creamy.
- Spread the cheese mixture evenly across the bottom of your prepared baking dish, creating a smooth, even layer.
- Thinly slice the pears and arrange the slices over the cheese layer, overlapping them slightly for a layered look.
- Sprinkle the chopped walnuts evenly over the pears for crunch and nutty flavor.
- Using a pastry brush or a paper towel, lightly brush the pear slices with olive oil to help them roast evenly and develop a slight caramelization.
- Bake the tart in the preheated oven for 15-20 minutes until the edges are bubbling, the top is golden, and the pears are tender to the touch.
- Remove the tart from the oven and let it cool for a few minutes, allowing the flavors to meld and the cheese to set slightly.
- If desired, drizzle honey over the top for added sweetness and shine before serving.
- Slice into squares and serve this warm or at room temperature, enjoying the harmony of smoky cheese, sweet pears, and crunchy nuts.
Notes
What You Should See After Baking
- Golden edges with gentle bubbling
- Pears softened and lightly caramelized
- Walnuts toasted and aromatic
- Cream cheese layer set but still creamy
Texture Tips
- Use room-temp cream cheese for smoother spreading
- Thin pear slices ensure tenderness without overbaking
- Allow resting time so the tart slices neatly
Common Mistakes To Avoid
- Pears cut too thick, they won’t soften properly
- Skipping oil, pears won’t caramelize
- Too much cayenne, can overpower sweetness
- Serving immediately, cheese layer needs settling time
Nutrition Snapshot
- Serves: 4
- Calories Per Serving: 250 (Depending On Honey)
- Rich In: Healthy Fats, Fiber, Antioxidants
Storage And Reheating
- Store in fridge up to 3 days
- Reheat in oven for crisp edges
- Avoid microwaving, softens pears too much
What to Serve With It
- Simple Salad
- Roasted Walnuts or Pecans
- Honey-Drizzled Fresh Figs or Grapes
- Light Vegetable Soup
- Sparkling Wine or Apple Cider
Variations You Can Try
- Apple Cinnamon Walnut Tart
- Pear And Blue Cheese Tart
- Cranberry Pecan Holiday Tart
- Ricotta Honey Pear Tart
- Spiced Maple Almond Version
Frequently Asked Questions
- Can I make it ahead? Yes, assemble and bake later.
- Can I use canned pears? No, they’re too soft.
- Can I skip walnuts? Yes or replace with seeds.
- Should the cream cheese be soft? Absolutely.
- Does the tart need a crust? No, this is crustless.
- How sweet is it? Mild, adjust honey as desired.
- Can I use vegan cream cheese? Yes.
- What pears work best? Bosc, Anjou, or Bartlett.
- Can I add herbs? Thyme works beautifully.
- Is it kid-friendly? Yes, just skip cayenne.
Once out of the oven, this snack offers a sweet, smoky aroma that invites everyone to dig in. It’s perfect for when you want something different but still cozy.
Feel free to swap out the pears for apples or figs, or add a drizzle of honey on top for extra sweetness. It’s a simple, honest dish that surprises and satisfies.

I’m Mahek Manchanda, the curious heart behind Dramatically Stirring. Before this space existed, my life revolved around kitchens that were loud, demanding, and endlessly alive. I didn’t arrive at cooking through a single dramatic moment.
