These mini flatbread bites are my answer to all the dietary quirks at the table. I love how easy it is to adapt them—gluten-free, vegan, or loaded with cheese—whatever the occasion demands. They’re not just snacks; they’re blank canvases that invite everyone to customize their own little flavor explosion.
I remember the first time I whipped up a batch, tossing toppings on like a mad chef. The aroma of toasted bread mingling with savory herbs and melting cheese always pulls me back to those carefree kitchen moments. It’s such a simple thing, but the flexibility makes it feel like culinary magic.
What I really appreciate is how these bites turn a plain snack into a social affair. Everyone gets to assemble their own, making it a fun, interactive, almost party-like experience. Plus, they’re so quick to put together, you can whip up a batch during a last-minute get-together or a cozy night in.
Focusing on how these tiny flatbread bites can be customized for different dietary needs and flavor preferences, making them not just a snack but a versatile, inclusive treat.
Customizable Flatbread Bites
- These flatbread bites remind me of lazy weekend mornings, when the smell of warm bread fills the kitchen and everyone gathers around for a quick snack.
- I love how customizing these bites can turn a simple appetizer into a memorable part of any gathering, making everyone feel a little more at home.
- There’s a quiet pride in watching someone craft their perfect bite—like a tiny, edible canvas—especially when it’s packed with flavors they love.
The story behind this recipe
- This recipe was born out of a messy dinner party where I wanted something quick, customizable, and crowd-friendly. Watching everyone grab their own little bites, I realized how much joy there is in simple, shared foods that feel personal. It’s like giving everyone a tiny blank slate to top as they please, and that spark of creativity keeps things lively.
- One night, I was experimenting with different toppings—figs, prosciutto, even sweet spreads—and I saw how these tiny flatbreads could transform from snack to appetizer, or even a light dinner. The best part is how forgiving they are; a little cheese, some herbs, or a splash of hot sauce and they’re suddenly elevated.
- heading
- story_type
Trivia and Origins
- Mini flatbread bites originated as a creative way to repurpose leftover bread and toppings, turning them into snack-sized treats.
- Their small size makes them a popular choice in Mediterranean and Middle Eastern cuisines, where sharing small plates is traditional.
- These bites gained popularity in modern brunches and tapas menus for their versatility and ability to be customized on the spot.
Ingredient breakdown: key components
- All-purpose flour: I prefer a neutral base that crisps up nicely; if you want gluten-free, swap in almond or rice flour—just expect a slightly different texture and flavor.
- Yeast: I use active dry yeast for that subtle yeasty aroma and soft rise. For quicker prep, a pinch of baking powder can work, but the texture shifts a bit.
- Olive oil: I love the fruity, rich scent it adds. For a milder taste, swap with avocado oil—less pronounced but still smooth and lush.
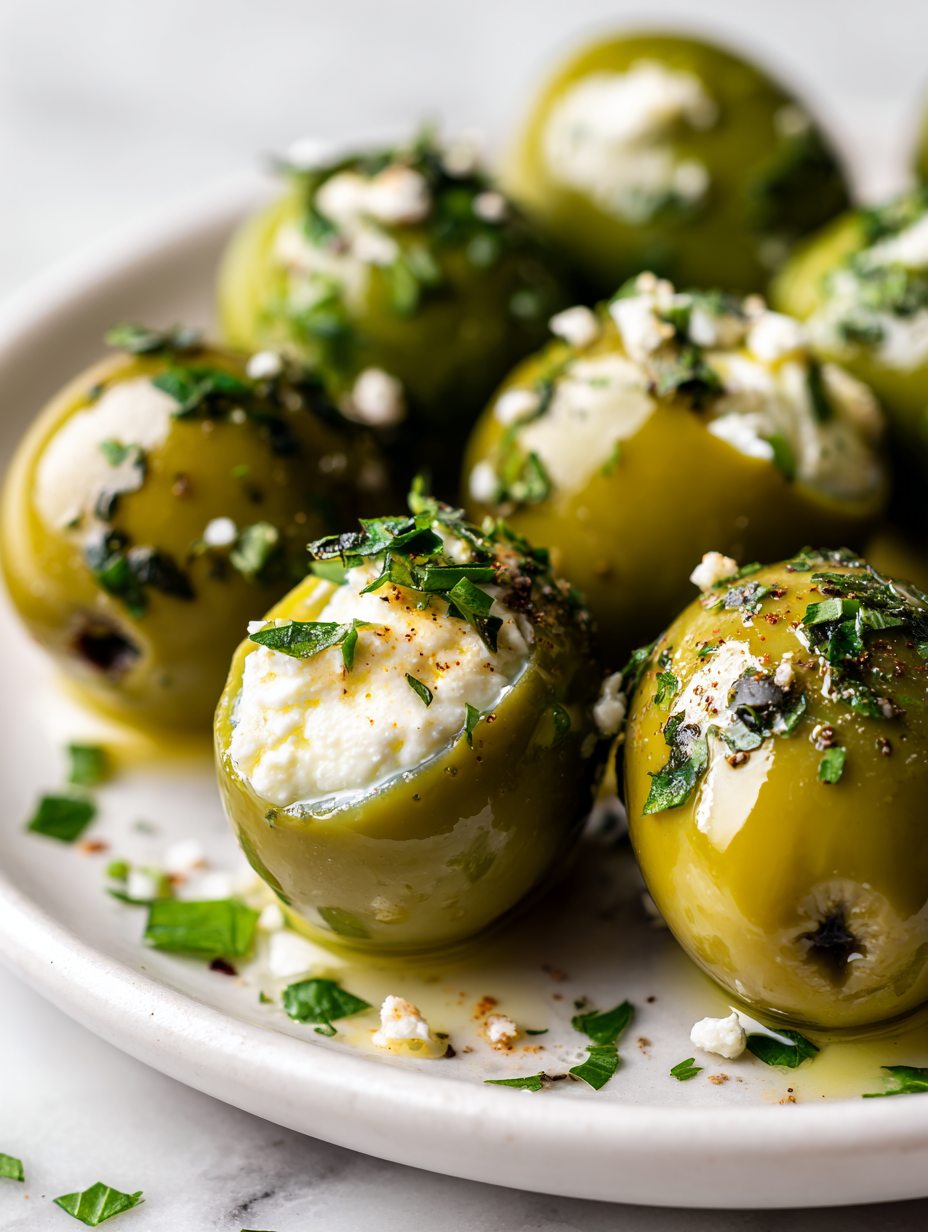
- Toppings: I keep it simple with herbs and cheese, but a sprinkle of smoked paprika or chili flakes adds smoky heat or spicy zing. Use fresh herbs for brightness, dried if you want a more concentrated flavor.
- Sea salt: I prefer flaky sea salt for that crunch and burst of saltiness, but kosher salt works well, just remember to adjust the quantity to avoid over-salting.
- Water: Warm water helps activate the yeast, and I always test the temperature—lukewarm, not hot—so the yeast wakes up without dying. Cold water won’t activate the yeast properly.
- Optional toppings: From sliced olives to caramelized onions, I recommend prepping everything ahead so assembly is quick, especially if serving hot or fresh.
Spotlight on key ingredients
Flour & Yeast:
- All-purpose flour: I prefer a neutral base that crisps up nicely; if you want gluten-free, swap in almond or rice flour—just expect a slightly different texture and flavor.
- Yeast: I use active dry yeast for that subtle yeasty aroma and soft rise. For quicker prep, a pinch of baking powder can work, but the texture shifts a bit.
- Olive oil: I love the fruity, rich scent it adds. For a milder taste, swap with avocado oil—less pronounced but still smooth and lush.
Toppings & Seasonings:
- Toppings: I keep it simple with herbs and cheese, but a sprinkle of smoked paprika or chili flakes adds smoky heat or spicy zing. Use fresh herbs for brightness, dried if you want a more concentrated flavor.
- Sea salt: I prefer flaky sea salt for that crunch and burst of saltiness, but kosher salt works well, just remember to adjust the quantity to avoid over-salting.
- Water: Warm water helps activate the yeast, and I always test the temperature—lukewarm, not hot—so the yeast wakes up without dying. Cold water won’t activate the yeast properly.
Notes for ingredient swaps
- Dairy-Free: Swap cheese for nutritional yeast or vegan cheese; the flavor shifts to savory and a bit more umami.
- Gluten-Free: Use a blend of almond and rice flour instead of all-purpose; expect a slightly denser, nuttier bite.
- Oil Choices: Replace olive oil with avocado or sesame oil for different aromatic profiles—less fruity, more punchy.
- Herbs & Spices: Fresh herbs like basil or cilantro brighten the bites; dried herbs offer concentrated flavor but less vibrancy.
- Water: Warm water is best to activate yeast, but cold water can be used in a pinch—just expect a slower rise.
- Toppings: Fresh tomatoes, peppers, or caramelized onions—prep ahead, but adjust quantities to avoid sogginess.
- Salt: Flaky sea salt adds crunch and burst; table salt is fine but less nuanced in texture.
Equipment & Tools
- Rolling pin: Evenly flatten the dough to uniform thickness.
- Baking sheet: Bake the flatbreads evenly in the oven.
- Pastry brush: Apply olive oil for a golden, crispy surface.
- Sharp knife: Cut dough into bite-sized pieces.
Step-by-step guide to flatbread bites
- Equipment & Tools: Gather a rolling pin (for even dough), a small baking sheet (for baking), a pastry brush (for oil), and a sharp knife (for slicing).
- Mix 250g all-purpose flour, 1 tsp instant yeast, 1/2 tsp salt in a bowl. Add 150ml warm water and 2 tbsp olive oil. Stir until a shaggy dough forms.
- Knead on a floured surface for about 5 minutes until smooth. Cover with a damp cloth and let rise for 30 minutes at room temp (around 22°C/72°F). The dough should puff slightly.
- Preheat oven to 220°C/430°F. Lightly oil your baking sheet. Punch down the dough gently, then roll out to about 0.5cm thickness. Cut into small rounds or squares—about 2-inch pieces.
- Place dough pieces on the baking sheet, leaving space. Brush tops lightly with olive oil. Bake for 10-12 minutes until golden and slightly blistered, with edges crisp and puffed.
- While baking, prepare toppings—chopped herbs, grated cheese, or your favorite spreads. Keep everything within reach for quick assembly.
- Once baked, transfer flatbreads to a wire rack. Let rest for 2 minutes to cool slightly. Top with herbs, cheese, or other toppings while still warm. Serve immediately or at room temperature.
- For a crispier finish, broil for 1-2 minutes—watch carefully to avoid burning. Check for a golden hue and a fragrant aroma.
- Resting & Finishing: Let the bites sit for a minute to settle flavors. Arrange on a platter, sprinkle with flaky sea salt for extra crunch, and serve warm or at room temp.
- Checkpoints & How to Know It’s Done: The flatbread should be golden and blistered, with a crispy edge, and toppings should be bubbling or fragrant. It should feel firm but tender when gently pressed. The aroma should be nutty and toasted.
Let the baked flatbreads rest for 2 minutes on a wire rack. Top with fresh herbs or cheese while warm, then serve immediately or at room temperature, ensuring they remain crispy and fragrant.
How to Know It’s Done
- Golden, blistered surface with slightly puffed edges.
- Aromatic smell of toasted dough and herbs.
- Crispy edges with a tender crumb inside.

Customizable Flatbread Bites
Ingredients
Equipment
Method
- In a mixing bowl, combine the flour, yeast, and sea salt. Add the warm water and olive oil, then stir until a shaggy dough forms.
- Turn the dough onto a floured surface and knead for about 5 minutes until it becomes smooth and elastic. Cover with a damp cloth and let it rest for 30 minutes, allowing it to puff slightly.
- Preheat your oven to 220°C (430°F). Lightly oil your baking sheet to prevent sticking. Punch down the dough gently, then roll it out to about 0.5cm thickness with a rolling pin.
- Use a sharp knife to cut the dough into small rounds or squares roughly 2 inches wide. Place these pieces on the prepared baking sheet, leaving a little space between each.
- Brush the tops of the flatbreads lightly with olive oil for a golden, crispy finish. Bake in the oven for 10-12 minutes until they are golden brown and slightly blistered around the edges.
- While the flatbreads bake, prepare your toppings—chopped herbs, grated cheese, or sliced vegetables—so they’re ready for quick assembly.
- Once baked, transfer the flatbreads to a wire rack and let them cool for a minute. Top each with your chosen toppings while they are still warm, allowing cheese to melt if used.
- Finish by sprinkling with flaky sea salt or additional herbs for extra flavor and crunch. Serve immediately for best crispness, or at room temperature.
Notes
Top Tips for Perfect Flatbread Bites
- Use a hot oven to quickly crisp the flatbreads—preheat at least 15 minutes beforehand for even heat.
- Roll the dough evenly to about 0.5cm—uneven thickness can cause some bites to burn while others stay soft.
- Brush with olive oil just before baking—this creates a beautiful, golden crust with a slight sheen.
- Keep toppings light and prep everything ahead—overloading causes sogginess and uneven baking.
- Broil for that perfect blistered top—watch closely to prevent burning and get those smoky char marks.
- Rest the baked bites on a wire rack for 2 minutes—this helps keep them crispy and prevents sogginess.
- If flatbreads puff too much in the oven, gently flatten with a spatula—this keeps them uniformly crisp.
Common mistakes and how to fix them
- FORGOT to preheat oven → Always preheat to ensure even baking and crispness.
- DUMPED ingredients too quickly → Mix ingredients gently to avoid dense flatbreads.
- OVER-TORCHED flatbreads → Watch closely during broiling; remove when golden and fragrant.
- UNDERESTIMATED resting time → Let baked bites rest for 2 minutes to settle flavors and crisp up.
Quick kitchen fixes
- When flatbreads are undercooked, splash a little water on the edges and bake for 2 more minutes.
- If toppings slide off, patch with a dab of hummus or a squeeze of lemon to hold them in place.
- Splash a few drops of water on dry, cracked dough before baking for a softer texture.
- Dumped too much salt? Rinse toppings quickly with a damp cloth and add fresh herbs for brightness.
- When the oven shimmers or smokes, shield the baking sheet with foil and lower the heat slightly.
Prep, store, and reheat tips
- Prepare the dough and let it rise in advance; it can be refrigerated for up to 24 hours, developing a deeper flavor and easier handling.
- Assemble toppings ahead of time, storing herbs and chopped ingredients in airtight containers in the fridge for up to 2 days—freshness and brightness will stay intact.
- Store baked flatbread bites in an airtight container at room temperature for up to 2 hours if serving soon; for longer storage, refrigerate for up to 2 days, reheating to regain crispness.
- Reheat in a hot oven at 180°C/355°F for 5-7 minutes until crispy and fragrant; avoid microwave reheating to preserve texture and prevent sogginess.
Top questions about mini flatbread bites
1. Can I make these gluten-free?
Yes, you can use gluten-free flour blends, but expect a different texture—more crumbly or dense, depending on the mix.
2. Are these vegan-friendly?
Absolutely. Swap in vegan cheese or skip cheese altogether, and use plant-based toppings for a fully vegan version.
3. Can I use cold water instead of warm?
Warm water helps activate the yeast and create a soft, airy dough. Cold water won’t give the same rise.
4. How long do they last?
Yes, these are best enjoyed fresh, but you can store leftovers in an airtight container for a day or two and reheat in the oven.
5. Can I prepare these ahead?
Pre-bake the flatbreads, then top and serve. Alternatively, assemble toppings on baked bites and warm briefly for melty cheese.
6. What if they burn or get too crispy?
If they turn out too crispy or burnt, cover with foil and lower the oven temperature slightly for a gentler bake.
7. How do I know when they’re done?
Use a hot oven (around 220°C/430°F) for a crispy crust. Baking times are about 10-12 minutes, watch for golden edges.
8. Can I customize toppings?
Yes, feel free to experiment with toppings like caramelized onions, olives, or spicy peppers—just prep ahead to avoid sogginess.
9. What salt should I use?
Use flaky sea salt or kosher salt for that burst of flavor and crunch. Adjust quantity to prevent over-salting.
10. Should I brush the flatbreads with oil?
Yes, brushing with olive oil before baking gives a lovely golden, crispy surface and enhances flavor.
These flatbread bites are a little reminder that simple ingredients can create something special. When the warm, toasted aroma hits the room, it’s like a cozy nod to lazy weekends or spontaneous gatherings. They’re imperfect, quick, and endlessly adaptable, which is exactly what I need right now.
Sharing these bites always sparks a bit of joy—watching someone customize their own or discovering a new topping combo. In a world that feels a little chaotic, they remind me that the best moments often come from straightforward, honest food enjoyed together.

Hi, I am Elias William Carter! The cook, writer, and self-proclaimed flavor enthusiast behind Dramatically Stirring. Food has always been my love language- my way of showing care, curiosity, and creativity all at once. I grew up in the heart of North Carolina, in a house where the kitchen was always alive with noise and aroma


Leave a Reply