Making this no-bake cheesecake means dealing with a sticky, crumbly crust that fights back when you press it into the pan. You’ll be scooping, pressing, and smoothing with your fingers, feeling the texture give way under your touch.
The filling gets poured in with a gentle, almost lazy wobble, then smoothed out with a spatula. No oven heat means you’re mostly waiting—watching it set in the fridge while the creamy mixture firms up slowly.
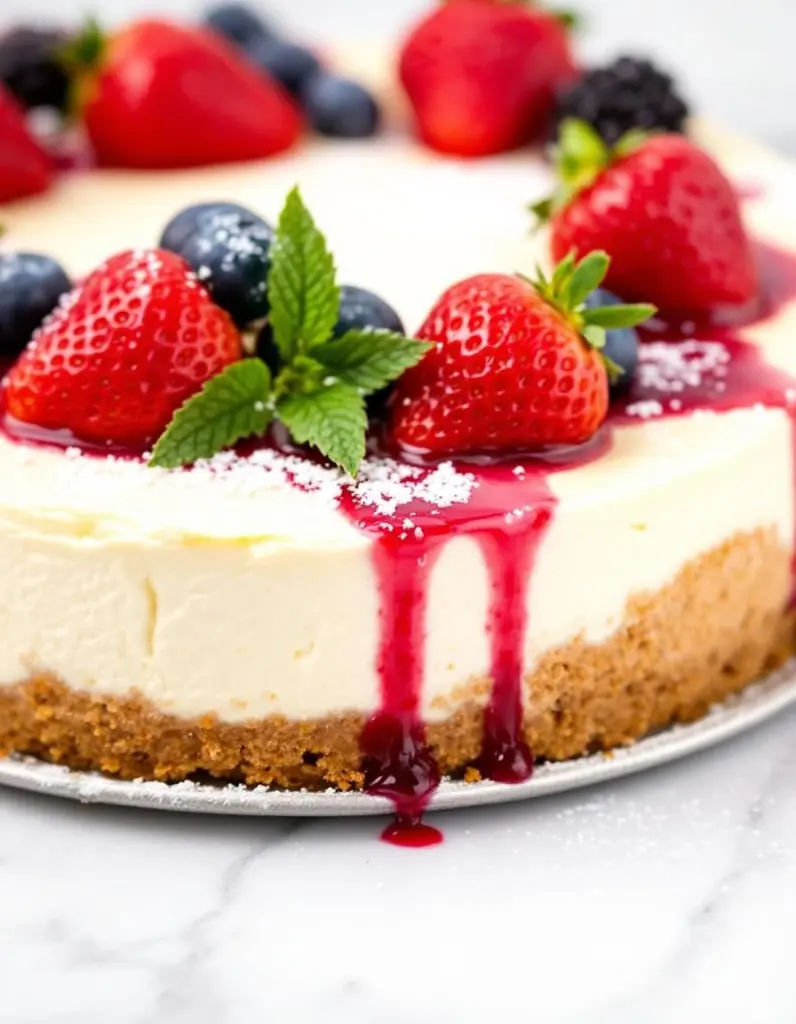
The way the crust crumbles under your fingers, releasing a faint, buttery scent before the creamy filling takes over.
What goes into this dish
- Cream cheese: I prefer full-fat, it’s silky and rich, melts in your mouth with a slight tang; low-fat versions tend to be grainy when chilled. Skip the reduced-fat if you want that luscious texture.
- Graham cracker crumbs: I crush my own for a fresher, crunchier crust—those smoky, sweet bits add depth. But if pressed for time, store-bought works fine, just mix with butter until it clumps nicely.
- Butter: I melt it until it’s bubbling softly, smells like toasted nuts. Use unsalted for control, or salted if you like a hint of savory contrast in the crust. Skip if dairy-free, substitute with coconut oil for a subtle flavor shift.
- Sugar: I use granulated, just enough to counterbalance the tang—about ¼ cup. For a more nuanced taste, try brown sugar; skip if you want a less sweet, more tart bite.
- Lemon juice: I add a splash for brightness, it wakes up the cream cheese with a faint citrus aroma. Lime works well too, or skip entirely if you prefer a more neutral flavor in the filling.
- Heavy cream: Whipped until soft peaks, it gives the filling a light, airy texture. For a dairy-free version, coconut cream can mimic the richness, though it adds a subtle coconut note.
- Vanilla extract: I splash in a teaspoon for warmth and depth. If you’re out, vanilla bean paste adds flecks of flavor—skip if you want a more neutral palate.

No-Bake Cheesecake
Ingredients
Equipment
Method
- Begin by crushing the graham crackers into fine crumbs if making your own, or use store-bought crumbs. Place them in a mixing bowl and pour in the melted butter and sugar. Mix until the crumbs are evenly coated and clump together slightly.
- Press the crumb mixture firmly into the bottom of a 9-inch springform pan using your fingers or the back of a spatula. Once evenly spread, set aside to firm up as you prepare the filling.
- In a large mixing bowl, beat the softened cream cheese with an electric mixer or whisk until smooth and creamy, about 2-3 minutes. The mixture should look fluffy and free of lumps.
- Add lemon juice, vanilla extract, and continue mixing to incorporate. Then, gradually add the sugar and mix until well combined.
- In a separate bowl, whip the chilled heavy cream until soft peaks form, meaning it holds gentle peaks when the whisk is lifted.
- Gently fold the whipped cream into the cream cheese mixture using a spatula, incorporating it slowly to keep the filling light and airy.
- Pour the smooth filling over the prepared crust in the pan, then use a spatula to gently spread and smooth the top for an even surface.
- Cover the cheesecake with plastic wrap and place it in the fridge. Chill for at least 4 hours, preferably overnight, until the filling is firm and set.
- Once set, remove the cheesecake from the fridge and run a knife around the edges before unclasping the springform pan. Slice and serve your beautiful, creamy dessert.
Common mistakes and how to fix them
- FORGOT to chill the cream cheese beforehand? Warm cheese melts the crust and makes mixing tough. Chill it for at least an hour.
- DUMPED in all the sugar at once? Add gradually, taste as you go—too sweet ruins the creamy balance.
- OVER-TORCHED the crust in the oven? Keep an eye on it; burnt crumbs taste bitter and ruin the texture.
- MIXED the filling too vigorously? Overmixing introduces air, causing cracks or a grainy texture when set.
Make-Ahead and Storage Tips
- Prepare the crust mixture and press it into the pan the day before; it firms up better overnight.
- Chill the assembled cheesecake in the fridge for at least 4 hours, preferably overnight, to set fully.
- Filling flavors deepen with time; the next day, it tastes richer and more cohesive.
- You can freeze the cheesecake for up to a month, wrapped tightly; let it thaw in the fridge for several hours before serving.
- Refrigerate leftovers for up to 3 days; the texture may soften slightly but still delicious.
- Reheat slices briefly in the microwave if needed—watch for melting or cracking, aim for just warm, not hot.
FAQs
1. How should the crust feel when pressed?
The crust can feel a bit gritty or crumbly, especially if not pressed firmly. It’s supposed to be sturdy but tender enough to bite through easily.
2. What’s the right texture for the filling?
Cheesecake can be slightly softer right after chilling, but it firms up as it sits. A gentle press reveals a creamy, stable texture—no wobble that’s too loose.
3. Why does my cheesecake crack?
If it cracks on top, it’s probably been overmixed or chilled too quickly. Smooth the surface gently and let it sit at room temp before refrigerating again.
4. How long can I store it?
Storing it covered in the fridge keeps it fresh for up to 3 days. For longer, freeze it wrapped tightly for up to a month, thaw in fridge overnight.
5. Can I reheat leftovers?
Reheat slices briefly in the microwave on low power—just enough to take the chill off without melting or making it soggy. Watch for a gentle warmth and a slight aroma of baked cream cheese.

I’m Mahek Manchanda, the curious heart behind Dramatically Stirring. Before this space existed, my life revolved around kitchens that were loud, demanding, and endlessly alive. I didn’t arrive at cooking through a single dramatic moment.