Author: Elias Carter

  • Irish Vegetable Potato Leek Soup: The Unexpected Comfort of Garden Soil and Frying Pan Memories

    Irish Vegetable Potato Leek Soup: The Unexpected Comfort of Garden Soil and Frying Pan Memories

    A Taste of Sods and Sunspots

    This soup isn’t about the fancy ingredients, or some curated superfood lineup. It’s about the smell, really. The sharp, earthy tang of fresh leeks cooking down, mingling with the warm sweetness of roasted potatoes. I didn’t realize how much those smells remind me of digging in grandma’s garden—mud stains and all, the kind that gets in your nails and stays there.

    Right now, the world’s a little too serious to ignore how simple things can be enough. A pot of leek and potato, simmering slow, makes things feel possible again. No fuss, just the kind of food that’s made to sit in the bowl and wait for you to notice the tiny, perfect bits of caramelized leek sticking to the spoon.

    Why Now?

    With freezing mornings and daylight slipping threadedly through the window, this soup feels like the softest way to say, ‘Hey, I get it. We’re all just trying to hold onto the little bits of warmth and memory’.

    Leek and Potato Soup

    This creamy soup is made by slowly simmering chopped leeks and peeled potatoes in broth until tender. The ingredients are blended to a smooth, velvety consistency, resulting in a warming, rustic dish with a gentle, earthy flavor and a slightly thickened texture.
    Prep Time 10 minutes
    Cook Time 30 minutes
    Total Time 40 minutes
    Servings: 4
    Course: Main Course
    Cuisine: Comfort Food
    Calories: 180

    Ingredients
      

    • 3 large leeks trimmed and cleaned
    • 3 medium potatoes peeled and diced
    • 4 cups vegetable or chicken broth
    • 2 tablespoons unsalted butter optional, for added richness
    • Salt and pepper to taste

    Equipment

    • Saucepan or heavy-bottomed pot
    • Chef’s knife

    Method
     

    1. Slice the cleaned leeks thinly, exposing the light green and white parts. Rinse thoroughly under cold water to remove any dirt or grit, then drain and set aside.
    2. Heat the saucepan over medium heat and melt the butter until it begins to foam and turn lightly golden. Add the sliced leeks and cook, stirring occasionally, until they soften and turn translucent, about 5-7 minutes. The leeks should develop a slight caramelization around the edges.
    3. Add the diced potatoes to the pot with the leeks, stirring to coat for 1-2 minutes. Pour in the broth, bringing the mixture to a gentle simmer. Cover the pot partially and cook until the potatoes are tender, about 15 minutes. You should see the broth bubbling gently, and the potatoes becoming easily pierced with a fork.
    4. Once the potatoes are tender, use an immersion blender to puree the soup directly in the pot until smooth and velvety. Alternatively, transfer the mixture in batches to a blender, then return to the pot. The soup should have a uniform, creamy texture with no visible chunks.
    5. Taste the soup and season with salt and freshly ground pepper as desired. If the soup appears too thick, add a little more broth or water to achieve your preferred consistency. Warm the soup through on low heat for a few minutes, allowing flavors to meld.
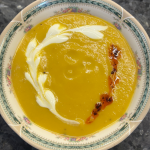
    6. Serve hot in bowls, garnished with a sprinkle of freshly chopped herbs or a drizzle of olive oil if desired. The finished dish is smooth, pale greenish-white, and has a silky texture with a delicate leek onion flavor.

    Sometimes I think the best recipes are the ones that make you pause—real quiet—before you spoon the next bite. It’s not about a big story, just that quiet reminder. That the simple stuff tends to stick around longest.

  • The Strawberry Pie That Close Your Kitchen Door for Minutes

    The Strawberry Pie That Close Your Kitchen Door for Minutes

    Why I Make This When Everything Else Feels Off

    There’s an odd rush you get when a pie fills the room with this bright, almost electric smell of fresh strawberries and warm butter. It’s like the fruit’s fighting the rest of the world. I don’t make this to impress anyone. It’s because sometimes, the simplest fix is layering sweet strawberries over a flaky crust and pretending that the world paused for a moment. No fancy tricks, no gadgets, just a spatula and a moment of silence. When the strawberries start to die down and turn into jam-like pools in the pie, I forget whatever I thought mattered before. During these months, making this feels like reclaiming a little bit of normal. Trust me, the secret is in the juice. Once that starts to bubble, it’s kind of like a little rebellion.

    Strawberry Pie

    This strawberry pie features a flaky pie crust filled with fresh, sliced strawberries that release their juices as they cook. The filling transforms into a jam-like consistency with a glossy, vibrant appearance, surrounded by a tender crust that cradles the fruit. The dish is assembled with simple techniques, highlighting the bright flavor and juicy texture of the strawberries.
    Prep Time 30 minutes
    Cook Time 40 minutes
    Total Time 1 hour 10 minutes
    Servings: 8
    Course: Main Course
    Cuisine: American
    Calories: 250

    Ingredients
      

    • 1 pre-made or homemade pie crust thawed if frozen
    • 4 cups fresh strawberries hulled and sliced
    • 1 cup granulated sugar
    • 2 tablespoons cornstarch
    • 1 tablespoon fresh lemon juice
    • 1 egg egg yolk beaten, for brushing crust

    Equipment

    • Rolling pin
    • Pie dish
    • Mixing bowls
    • Saucepan
    • Spatula
    • Knife

    Method
     

    1. Preheat the oven to 375°F (190°C). Roll out the pie crust on a lightly floured surface and fit it into a 9-inch pie dish. Trim excess crust and prick the bottom with a fork. Bake blind with pie weights for 15 minutes until lightly golden, then remove weights and set aside.
    2. While the crust bakes, prepare the strawberry filling. In a mixing bowl, combine sliced strawberries with sugar, cornstarch, and lemon juice. Toss gently until all strawberries are coated evenly. Let sit for 10 minutes to allow juices to release.
      1 pre-made or homemade pie crust
    3. Pour the strawberry mixture into a saucepan and cook over medium heat. As the mixture heats, stir continuously with a spatula until the juices thicken and begin to boil softly. Watch for the mixture to become glossy and jam-like, about 5-7 minutes.
      1 pre-made or homemade pie crust
    4. Remove the saucepan from heat and let the filling cool for 10 minutes. Once cooled slightly, pour the filling into the pre-baked pie crust, spreading it evenly to fill the shell completely. Chill in the refrigerator for at least 30 minutes to set.
      1 pre-made or homemade pie crust
    5. Preheat the oven to 400°F (200°C). Brush the exposed crust edges with the beaten egg yolk for a golden finish. Bake the assembled pie for 15-20 minutes until the crust is golden brown and the filling is bubbling around the edges. Remove from oven and cool before serving.
      1 pre-made or homemade pie crust
    6. Slice and serve the strawberry pie with fresh cream or ice cream if desired. The filling should be glossy and thick, with a vibrant red color, and the crust tender but crisp.

    Why bother with store-bought when this comes together in so few steps? I think that’s part of it. It’s a reminder that simple things, real things, still matter. The scent alone might convince you it’s too easy, but then again, that’s probably the point—something worth stealing a quiet afternoon for.

  • The Surprising Charm of Cranberry Apple Galette in November

    The Surprising Charm of Cranberry Apple Galette in November

    Why I Keep Coming Back to This One

    I never thought I’d get this excited about a dish that looks like a rustic mess. But the sharpness of the cranberries, the sweet-tart bites of apples, all wrapped in flaky, slightly salted pastry—something about the way the smell hits you as it bakes is addictive. And no, it’s not just about aesthetics. It’s about that crackly crust giving way to juicy fruit, the burst of acidity that sneaks up and surprises you. It feels like summer’s last hurrah, and winter’s quiet promise, all in one slice. Honestly, I keep making it because it tastes like honesty—simple ingredients, honest flavors, no fuss, no pretenses. It kind of reminds me that sometimes, what’s most special is what feels familiar but somehow manages to be new again.

    Cranberry Apple Pie

    This dessert features a flaky, golden pastry crust filled with a mixture of tart cranberries and sweet apples. The pie is characterized by its crispy exterior and juicy, fruit-filled interior with a vibrant, slightly tart flavor profile.
    Prep Time 30 minutes
    Cook Time 45 minutes
    Total Time 1 minute
    Servings: 8
    Course: Main Course
    Cuisine: American
    Calories: 350

    Ingredients
      

    • 2 1/2 cups all-purpose flour for pastry crust
    • 1 teaspoon salt
    • 1 cup cold unsalted butter cut into small pieces
    • 4-5 tablespoons ice water add gradually to form dough
    • 2 cups fresh cranberries washed
    • 3 large apples peeled, cored, and sliced
    • 1/2 cup granulated sugar
    • 2 tablespoons cornstarch to thicken filling
    • 1 teaspoon ground cinnamon
    • 1 egg beaten for brushing crust
    • 1 tablespoon sugar for sprinkling on crust

    Equipment

    • Rolling pin
    • 9-inch Pie Dish
    • Mixing bowls
    • Saucepan
    • Pastry brush
    • Oven

    Method
     

    1. Place the flour and salt in a large mixing bowl. Add the cold, cubed butter and cut it into the flour with a pastry cutter or fork until the mixture resembles coarse crumbs with pea-sized bits. Gradually add ice water, one tablespoon at a time, mixing with a fork until the dough begins to come together and is crumbly but holds when pressed.
      2 1/2 cups all-purpose flour, 1 teaspoon salt, 1 cup cold unsalted butter, 4-5 tablespoons ice water
    2. Turn the dough onto a floured surface and gently knead it into a flat disc. Wrap in plastic wrap and refrigerate for at least 30 minutes to chill.
    3. Preheat the oven to 375°F (190°C). Roll out the chilled dough on a lightly floured surface to fit a 9-inch pie dish. Transfer the crust to the pie dish and trim excess dough, then crimp edges as desired.
    4. In a saucepan, combine cranberries, sliced apples, sugar, cornstarch, and cinnamon. Cook over medium heat, stirring frequently, until the mixture thickens and the cranberries start to burst, about 10 minutes. Remove from heat and let cool slightly.
      2 cups fresh cranberries, 3 large apples, 1/2 cup granulated sugar, 2 tablespoons cornstarch, 1 teaspoon ground cinnamon
    5. Pour the warm fruit filling into the prepared pie crust, spreading evenly. Brush the crust edges with the beaten egg and sprinkle with sugar. Cover with lattice or top crust if desired, seal edges, and cut small slits for steam release.
      1 egg beaten, 1 tablespoon sugar
    6. Bake the pie in the preheated oven for 45 minutes, or until the crust is golden brown and syrup is bubbling through the slits. Remove from oven and let cool slightly before serving.

    Notes

    Ensure fruit filling is slightly cooled before pouring into crust to prevent sogginess. Adjust baking time if crust edges brown too quickly.

    Maybe it’s because I made it during a week I needed a reminder that things can be cozy and bright at the same time. Or maybe I just like how it tastes when the edges get caramelized and the tartness lingers after the last bite. Either way, it’s a small thing—one more reason I’ll keep turning to this humble galette when I want to feel a little more alive inside.

  • The Fourth of July Snack Board You Never Knew You Needed

    The Fourth of July Snack Board You Never Knew You Needed

    So, I didn’t plan to write about snack boards today. I just wanted to clear some space in the fridge, constantly trying to jam little jars and half-eaten packs into every nook and cranny. Midway, I realized I’d laid out a messy, oddly satisfying terrain of cherry tomatoes that smell like summer mornings, sharp cheddar blocks with their crumbly edges, and a handful of pretzels that crunch like tiny explosions. It hit me — this isn’t just a snack board, it’s a snapshot of what we crave in July: fresh, salty, sweet, and just a little chaotic.

    This is the kind of thing that feels perfect when you’re craving something not so serious but still totally festive. It’s not about perfect presentation, just the smell of basil, the tang of loaded dips, the unexpected happiness of a few watermelon slices right next to spicy cheddar cubes. Basically, a historical snapshot of what snack time really feels like. Maybe I’ll add some blueberries next time, or maybe I’ll just leave it be and hope the neighbors show up.

    Snack Board

    A snack board assembled with fresh cherry tomatoes, sharp cheddar blocks, pretzels, basil, and loaded dips, offering a mix of textures and flavors. The ingredients are arranged in a casual, layered manner to create an inviting and colorful presentation. This dish emphasizes raw, assembled components without cooking, highlighting freshness and variety.
    Prep Time 10 minutes
    Total Time 10 minutes
    Servings: 4
    Course: Main Course
    Cuisine: casual
    Calories: 150

    Ingredients
      

    • 1 pint cup cherry tomatoes preferably ripe and fragrant
    • 200 g sharp cheddar cut into small cubes or blocks
    • 1 cup pretzels small or mini pretzels
    • handful fresh basil leaves whole or torn
    • 0.5 cup loaded dips such as hummus, tapenade, or cheese spreads
    • 2 cups watermelon slices optional, for added sweetness

    Equipment

    • Serving platter or board
    • Small bowls for dips
    • Knife
    • Cutting board

    Method
     

    1. Arrange the cherry tomatoes evenly across one side of the serving platter, allowing their vibrant red color to stand out.
    2. Place the sharp cheddar blocks or cubes next to the tomatoes, creating a contrasting color and texture. Ensure they are accessible for easy serving.
    3. Scatter pretzels around the cheese and tomatoes, filling in gaps with their crunchy shape to add variety and texture to the board.
    4. Add small bunches or torn pieces of fresh basil leaves atop or around the arrangement, providing aromatic freshness.
    5. Spoon or dollop loaded dips into small bowls and place them on the platter, ensuring easy access for dipping.
    6. If using, intersperse slices of watermelon around the board for a colorful, sweet addition, creating a visual balance with the savory ingredients.

    Some days, I think the best part of July 4th isn’t the fireworks but the way a good snack board makes everyone lean in closer, whispering about what’s next and stealing a slice of cheese. No rules, no stress, just what we want — crisp, fresh, a little wild. Sometimes a snack board is just a reason to gather around stuff that’s already in your fridge, with no need for fancy plating or Pinterest approval. That’s the real summer magic.

  • Why I Keep a Jar of Caramelized Apples in the Freezer (And You Should Too)

    Why I Keep a Jar of Caramelized Apples in the Freezer (And You Should Too)

    I started doing this years ago, after a messy apple picking trip gone wrong. Instead of tossing half-eaten apples, I’d slice them thin, sprinkle a little cinnamon, sugar, and a pinch of salt, then bake until they turn golden and smell like fall in a jar. Now, I keep a small stash tucked in the freezer. Graze your spoon through it and it’s like biting into a baked apple with a whisper of warmth and a jammy sweetness.

    This season’s about leaning into comfort, even if it’s just a simple crumble. No fancy ingredients needed. Just those frozen caramelized slices, a crumble topping, and vanilla ice cream that hits all your soft, rich notes. It’s honest, it’s straightforward, and honestly–it’s better than I expected. Still, every time I think I’ve nailed the perfect scoop, I remember how much I love turning my “mistakes” into something I can’t wait to eat.

    Caramelized Apple Slice Crumble

    This dessert features thinly sliced, caramelized apples that are frozen for convenience, then baked with a crumbly topping until golden. The finished dish has a warm, tender apple base with a crunchy, buttery topping, served alongside vanilla ice cream for added richness.
    Prep Time 10 minutes
    Cook Time 25 minutes
    Total Time 35 minutes
    Servings: 4
    Course: Main Course
    Cuisine: American
    Calories: 320

    Ingredients
      

    • 3 cups frozen apple slices thinly sliced and caramelized
    • 1 teaspoon ground cinnamon
    • 2 tablespoons granulated sugar
    • 1 pinch salt
    • 1 cup all-purpose flour for crumble topping
    • 1/2 cup unsalted butter cold and cubed
    • 1/2 cup brown sugar for crumble topping
    • vanilla ice cream for serving

    Equipment

    • Baking sheet
    • Mixing bowls
    • Knife
    • Cutting board
    • Spatula
    • Oven

    Method
     

    1. Preheat the oven to 375°F (190°C). Line a baking sheet with parchment paper. Spread the frozen apple slices evenly over the sheet, then sprinkle with cinnamon, sugar, and salt. Bake for 10-12 minutes until the edges are golden and caramelized, then remove and let cool slightly.
      3 cups frozen apple slices, 1 teaspoon ground cinnamon, 2 tablespoons granulated sugar, 1 pinch salt
    2. While the apples cool, prepare the crumble topping. In a mixing bowl, combine flour, brown sugar, and cold cubed butter. Use a pastry cutter or your fingers to work the butter into the dry ingredients until the mixture resembles coarse crumbs with some pea-sized pieces.
      1 cup all-purpose flour, 1/2 cup unsalted butter, 1/2 cup brown sugar
    3. Spoon the caramelized apple slices into a baking dish, spreading them out evenly. Cover the apples with the prepared crumble mixture, pressing lightly to adhere.
      3 cups frozen apple slices, 1 cup all-purpose flour, 1/2 cup unsalted butter, 1/2 cup brown sugar
    4. Bake the assembled crumble at 375°F (190°C) for 20-25 minutes, or until the topping is golden brown and the mixture is bubbling around the edges.
    5. Remove from oven and let rest for 5 minutes. Serve warm, topped with a scoop of vanilla ice cream. Observe the contrast between the crispy topping and soft, jammy apples.
      vanilla ice cream for serving

    Sometimes, I wonder what it’d be like if I just baked the apples straight from the freezer without defrosting. Probably a mess, but maybe not. Either way, this has become my go-to for a quick treat that feels indulgent but is really just smart planning. Might have to put that jar on the counter now, see if it calls to me again tomorrow.

  • The Quiet Miracle of a Pendulum Swing: Pecan Pie Turns Personal

    The Quiet Miracle of a Pendulum Swing: Pecan Pie Turns Personal

    Why I’m Thinking About Pecan Pie Differently

    Ever notice how some memories sneak up on you just as you’re rolling out pie dough? Last week, I caught a whiff of roasted pecans — that sweet, nutty aroma mixed with a hint of caramel—and it really took me somewhere. Pecan pie isn’t just about Thanksgiving or dessert bars. Today, I realized, it’s about the little moments you forget to cherish—like that sticky, crunchy top crackling under your spoon or the way the filling stays warm on your tongue long after you’ve swallowed. It’s not trendy or fancy; it’s about that quiet, perfect balance between the toasted nuts, the butter-rich filling, and that *sharp* burst of vanilla. Right now, I think pecan pie matters because it’s honesty in a crust—simple, real, baked memories. And honestly, sometimes that’s all I really want from a slice.

    Classic Pecan Pie

    Pecan pie is a baked dessert featuring a flaky crust filled with a sweet, sticky mixture of pecans, eggs, sugar, and butter. The filling sets into a rich, caramelized consistency with a crunchy, toasted pecan topping. The finished pie has a golden-brown crust and a glossy, nut-studded surface that is both inviting and indulgent.
    Prep Time 20 minutes
    Cook Time 50 minutes
    Total Time 1 hour 10 minutes
    Servings: 8
    Course: Main Course
    Cuisine: American
    Calories: 550

    Ingredients
      

    • 1 pre-made Pie crust store-bought or homemade
    • 1 cup granulated sugar
    • 1 cup light corn syrup
    • 4 large eggs beaten lightly
    • 4 tbsp unsalted butter melted
    • 1.5 cups raw pecan halves
    • 1 tsp vanilla extract
    • 1/4 tsp salt

    Equipment

    • 9-inch Pie Pan
    • Mixing bowls
    • Whisk
    • Saucepan
    • Rolling pin
    • Oven

    Method
     

    1. Preheat the oven to 350°F (175°C). Roll out the pie crust on a floured surface and fit it into a 9-inch pie pan, trimming the edges as needed. Crimp the edges decoratively and set aside.
    2. In a mixing bowl, combine sugar, corn syrup, and salt. Whisk together until fully blended, creating a smooth, lucent mixture.
    3. Add the eggs, one at a time, to the sugar mixture, whisking after each addition until the mixture becomes thick and slightly frothy.
    4. Stir in the melted butter, vanilla extract, and a pinch of salt; mix until the filling is smooth and shiny.
    5. Sprinkle half of the pecan halves evenly over the bottom of the pie crust. Pour the filling gently over the pecans, spreading to distribute evenly.
    6. Arrange the remaining pecan halves on top of the filling in a decorative pattern. Place the pie on the middle rack and bake for 50 minutes, or until the filling is set and the top is golden brown with toasted pecans.

    Maybe it’s strange to tie so much feeling to something as small as a dessert, but that’s how a good pie sneaks into your day. It’s not always about making it look perfect, just about how it tastes and sticks with you a little longer than expected.

  • Asparagus Tart: The Unexpected Hero of Spring Brunch

    Asparagus Tart: The Unexpected Hero of Spring Brunch

    I never thought a tart made with just a handful of fresh asparagus could make me stop mid-slice. The way the green spears stand tall against buttery pastry, especially when the oven makes the whole house smell like roasted hillsides, is kind of weirdly comforting. This isn’t about fancy ingredients or blowing up your to-do list. It’s about the small, quiet joy of something that feels both simple and somehow, enough.

    I made this on a Sunday morning when I had no clear plans, just a fridge full of leftover cheese and a brain that needed distraction. The crunch of the pastry, the snap of the asparagus—like biting into spring itself—kind of feels like that secret. Just a little thing that reminds you, yeah, this moment is enough. And maybe that’s what I’ve been craving.

    Asparagus Tart

    This asparagus tart features fresh green spears baked atop a buttery pastry crust, resulting in a crisp base with tender, roasted asparagus. The dish highlights simple ingredients prepared through baking and roasting, culminating in a visually appealing, golden-brown tart with vibrant green spears standing tall.
    Prep Time 15 minutes
    Cook Time 30 minutes
    Total Time 45 minutes
    Servings: 4
    Course: Main Course
    Cuisine: French
    Calories: 320

    Ingredients
      

    • 1 sheet store-bought or homemade pastry dough preferably refrigerated
    • 1 bunch fresh asparagus trimmed
    • 1/2 cup grated cheese cheddar, Gruyère, or a mix
    • 2 tablespoons olive oil for brushing
    • 1 clove garlic minced
    • to taste salt and pepper

    Equipment

    • Mixing Bowl
    • Rolling pin
    • Baking sheet
    • Pastry brush
    • Knife
    • Piercing fork
    • Parchment paper

    Method
     

    1. Place the pastry dough on a lightly floured surface and roll it out to about 1/8 inch thickness with a rolling pin. Transfer the rolled dough to a parchment-lined baking sheet. Use a fork to pierce the crust evenly across the surface to prevent bubbling in the oven.
    2. Trim the tough ends off the asparagus and halve the bunch lengthwise if desired. Spread the minced garlic over the prepared pastry crust. Arrange the asparagus spears evenly across the crust, leaving a small border around the edges.
      1 sheet store-bought or homemade pastry dough
    3. Brush the exposed edges of the pastry with olive oil using a pastry brush and sprinkle grated cheese evenly over the asparagus and crust. Season with salt and pepper to taste.
      1 sheet store-bought or homemade pastry dough
    4. Preheat the oven to 400°F (200°C). Bake the tart on the middle rack for 20-25 minutes or until the crust is golden brown and the cheese is bubbly. Lightly baste the asparagus with additional olive oil halfway through baking if desired.
    5. Remove the tart from the oven and let it rest for 5 minutes. The asparagus should be tender with slightly roasted tips, and the crust crisp along the edges. Slice and serve warm or at room temperature.

    Sometimes, I think about how these tiny seasonal rituals sneak into your day. No big announcement, just a crisp bite and a flicker of appreciation for the fleeting. It’s mundane, sure. But I’ll probably keep making this until asparagus goes out of style or I forget the recipe, whichever comes first.

  • Unexpectedly Simple New Year’s Eve Appetizers That Actually Survive the Party

    Unexpectedly Simple New Year’s Eve Appetizers That Actually Survive the Party

    I Don’t Own a Fancy Platter

    Well, not really. I’ve got a collection of battered, mismatched bowls and some cardboard trays I found in the back of a cabinet. That’s what makes these apps work. They’re not polished or perfect. They’re quick, sloppy, thrown-together. Which is exactly what you want mid-restaurant chaos or a bunch of friends who’d rather be drinking than waiting for the perfect presentation.

    When I think of New Year’s Eve, I think about the smell of burnt popcorn, the click of the clocks, and how sometimes the best moments are just about what’s inside the bowl. These apps matter now because they can slip in, burden-free, and stay delicious without a whole setup. No fancy toothpicks needed, no elaborate plating. Just real, messy, flavorful bites that remind us why we bother with parties at all.

    Messy Snack Appetizers

    This dish consists of a variety of finger foods assembled in mismatched bowls and trays, embracing an informal and spontaneous presentation style. Main ingredients include cheeses, cured meats, nuts, and vegetables, combined to create flavorful, textured bites with a rustic appearance. It emphasizes quick assembly and relaxed serving, perfect for casual gatherings.
    Prep Time 15 minutes
    Cook Time 10 minutes
    Total Time 25 minutes
    Servings: 8
    Course: Main Course
    Cuisine: casual
    Calories: 300

    Ingredients
      

    • 200 g cheddar cheese cut into small cubes
    • 150 g cured meats (salami, ham) sliced into strips
    • 1 cup mixed nuts
    • 1 cup cherry tomatoes halved
    • 1 cup cucumbers sliced into rounds
    • to taste salt and pepper

    Equipment

    • Knife
    • Cutting board
    • Serving bowls or trays
    • Small mixing bowl
    • Spoons or tongs

    Method
     

    1. Chop the cheese into small cubes using a sharp knife on the cutting board. Arrange them in a small bowl or scattered on a tray for easy access.
      200 g cheddar cheese
    2. Slice the cured meats into strips and place them in another bowl or tray, allowing for quick grabbing.
      150 g cured meats (salami, ham)
    3. Measure out mixed nuts and place them into a small serving bowl, ensuring some variety in texture and flavor.
      1 cup mixed nuts
    4. Halve the cherry tomatoes and slice the cucumbers into rounds. Arrange them in a shallow dish or on a tray to add freshness and color.
      1 cup cherry tomatoes, 1 cup cucumbers
    5. Season the vegetables with salt and pepper to enhance flavor, then give everything a gentle toss to combine.
      1 cup cherry tomatoes, 1 cup cucumbers, to taste salt and pepper
    6. Assemble all components in mismatched bowls or trays with no elaborate presentation, emphasizing a casual, thrown-together aesthetic. Serve immediately with spoons or tongs for easy access.

    Notes

    Can be customized with other items like olives, pickles, or different cheeses. Best served at room temperature.

    No need to stress about them looking perfect. Nobody’s judging your snack game. Or maybe they are, but don’t care. Just keep the drinks cold and keep the bites coming. That’s the real secret anyway.

  • Cinnamon Tea: The Unexpected Reminder of Morning Haze and Quiet Moments

    Cinnamon Tea: The Unexpected Reminder of Morning Haze and Quiet Moments

    Made this on a whim, no morning plans, just wanted to see if I could find something calming but not syrupy sweet. Turned out the secret was how the cinnamon sticks crackle slightly as they steep—like tiny fires burning quietly in the mug. No fancy spices, no complex ingredients, just that dry, woody smell and a faint hint of bitter bark. It’s weird but somehow, this feels like what I need right now — simple, honest, unpretentious. I think I was missing that. The kind of drink that sneaks into those quiet corners of your day with no fanfare, just the warmth unfolding without fuss. Not sure how long this will stick around but for now, it’s enough to make me forget about overproduced lattes and the usual afternoon rush.

    Simple Cinnamon Infusion Drink

    This beverage involves steeping cinnamon sticks in hot water to extract their woody aroma and subtle bitterness, resulting in a clear, light-colored infusion. The final drink has a delicate, slightly textured appearance with a warm, comforting aroma, served hot without additional sweeteners or spices.
    Prep Time 5 minutes
    Cook Time 10 minutes
    Total Time 15 minutes
    Servings: 1
    Course: Main Course
    Cuisine: none

    Ingredients
      

    • 1-2 sticks cinnamon sticks preferably dry and intact
    • 1 cup water

    Equipment

    • Kettle or pot
    • Mug
    • Strainer or spoon for removing cinnamon sticks

    Method
     

    1. Place the cinnamon sticks in a small saucepan or kettle with the water.
    2. Bring the water to a gentle simmer over medium heat, observing small bubbles forming around the cinnamon sticks.
    3. Simmer for approximately 8-10 minutes until the cinnamon sticks release their woody aroma and the water develops a light brown tint.
    4. Remove from heat and strain the infusion into a mug to separate out the cinnamon sticks.
    5. Serve hot, allowing the drink to cool slightly before sipping. The liquid should be clear with a faint brown hue and release a woody, spicy aroma.

    It’s funny how something so basic can feel so grounding. Maybe that’s all I needed — a small pause, a sip of something that reminds me what real comfort tastes like, no frills, no hype. Might just be my new go-to for those in-between moments. Or maybe I’ll forget about it next week. Who knows.

  • Espresso Chai Cookies: When Coffee Meets Spiced Comfort

    Espresso Chai Cookies: When Coffee Meets Spiced Comfort

    I’ve been thinking about how mornings sometimes feel like a quiet war. Coffee? Tea? Both? Neither? I crave something that can hold its own against that chaos but still feels like a secret escape.

    Enter these cookies — not just any cookie, but a little rebellion in bakery form. They smell like a blend of roasted espresso beans and warm chai spices, those notes swirling in the air long before your first bite. The texture is chewy but a little grainy; it’s like scooping up a secret handshake of sugar, butter, and caffeine. 

    This isn’t just a treat; it’s a tiny ritual for those mornings when even your favorite mug isn’t enough. Because right now, it’s about craving something grounded — an unexpected, quiet little moment to themselves in a world that never stops.

    Espresso Chai Cookies

    These cookies combine the bold flavors of roasted espresso and warm chai spices, baked until chewy with a slightly grainy texture. The dough involves creaming butter and sugar, then mixing in flavoring ingredients before shaping and baking. They have a rustic appearance with uneven edges and a golden-brown surface, offering a chewy bite with audible crispness on the edges.
    Prep Time 15 minutes
    Cook Time 12 minutes
    Total Time 27 minutes
    Servings: 12
    Course: Main Course
    Calories: 220

    Ingredients
      

    • 1 cup unsalted butter softened
    • 1 cup granulated sugar
    • 1 large egg
    • 2 teaspoons vanilla extract
    • 2 tablespoons instant espresso powder dissolved in 1 tablespoon hot water
    • 1 1/2 cups all-purpose flour
    • 1/2 cup chai spice blend can be a mix of cinnamon, cardamom, ginger, cloves
    • 1/2 cup rolled oats adds texture and chewiness

    Equipment

    • Mixing bowls
    • Electric mixer or whisk
    • Baking sheet
    • Parchment paper
    • Cookie scoop or spoon
    • Cooling rack

    Method
     

    1. Preheat your oven to 350°F (175°C). Line a baking sheet with parchment paper for easy removal of cookies.
    2. In a large mixing bowl, cream together the softened butter and granulated sugar using an electric mixer or whisk until the mixture is light and fluffy, about 2-3 minutes. Look for a pale, airy consistency with no visible lumps of butter.
    3. Add the egg, vanilla extract, and the dissolved espresso powder to the creamed mixture. Mix on medium speed until well combined, and the mixture looks smooth and slightly increased in volume, with a fragrant aroma of coffee and spices.
    4. In a separate bowl, whisk together the all-purpose flour, chai spice blend, and rolled oats. Gradually add this dry mixture to the wet ingredients, mixing on low speed or folding until just combined. The dough should be crumbly but hold together when pressed.
    5. Use a cookie scoop or teaspoon to portion out the dough onto the prepared baking sheet, spacing cookies about 2 inches apart. Slightly flatten each cookie with the back of a spoon or your fingers for even baking.
    6. Bake in the preheated oven for 10-12 minutes, until the edges are golden brown and the surface is set but still slightly chewy. The cookies will have a rustic, uneven appearance with a slightly cracked surface. Remove from the oven and allow to cool on the baking sheet for 5 minutes before transferring to a cooling rack.

    Some days, I think about how food is just a way to keep going, little bursts of flavor and comfort that sneak up when you least expect it. Maybe that’s all these cookies are — a reminder to take a pause, breathe, and enjoy the weird little harmony of coffee and spice.