Category: Main Course

  • Reclaiming the Taco Bell Mexican Pizza: A Midweek Rebel

    Reclaiming the Taco Bell Mexican Pizza: A Midweek Rebel

    Ever notice how we forget how to truly enjoy a simple thing? Like, remember the crackle of that tortilla shell—a perfect snap right before the cheesy, sauce-dripping chaos erupts? That’s what I miss most. Not some fancy spin or gourmet upgrade, just the raw, unfiltered snack that’s been in my head since childhood, sitting in my front seat, hoping I didn’t spill it on the dashboard.

    Today, I decided to ignore the gimmicks and just build my own. No preservatives, no sadness, just layers of crispy tortilla, seasoned ground beef, and melted cheese. It’s not that this dish was ever fancy, but right now, it feels like a small act of rebellion—reclaiming a guilty pleasure that’s become a relic in the age of avocado toast and quinoa bowls.

    Classic Beef and Cheese Quesadilla

    A quesadilla consists of a flour tortilla filled with seasoned ground beef and melted cheese, then crisped on a skillet until golden brown. The final product has a crispy exterior with gooey, melted cheese and savory beef inside, often with visible char marks and a warm, inviting appearance.
    Prep Time 10 minutes
    Cook Time 10 minutes
    Total Time 20 minutes
    Servings: 4
    Course: Main Course
    Cuisine: Mexican
    Calories: 350

    Ingredients
      

    • 1 lb ground beef preferably lean
    • 1 tsp cumin ground
    • 1 tsp chili powder optional for spice
    • 1/2 tsp salt
    • 1/4 tsp black pepper
    • 1 cup shredded cheese cheddar or Mexican blend
    • 4 small flour tortillas
    • 1 tbsp vegetable oil for cooking

    Equipment

    • Skillet or flat griddle
    • Spatula
    • Cutting board
    • Chef’s knife
    • Measuring spoons
    • Grater (for cheese)

    Method
     

    1. Heat a skillet over medium-high heat and add the vegetable oil. Once shimmering, add the ground beef, breaking it apart with a spatula. Cook until browned and cooked through, about 5-7 minutes. Drain excess fat if necessary.
    2. Add cumin, chili powder, salt, and black pepper to the cooked beef. Stir well and cook for 1-2 more minutes until fragrant. Remove from heat and set aside.
    3. Grate the cheese and set aside. Prepare the tortillas by laying them flat on a clean surface.
    4. Spread a quarter of the seasoned beef evenly over half of a tortilla, then sprinkle with a quarter of the cheese. Fold the tortilla in half to enclose the filling, creating a half-moon shape.
    5. Place one assembled quesadilla into the hot skillet. Cook for 2-3 minutes until the underside is golden brown and crispy, then flip using a spatula and cook the other side until equally crispy and the cheese has melted.
    6. Remove the cooked quesadilla from the skillet and let it rest for 1 minute. Slice into wedges with a sharp knife and serve warm.

    Some nights, I just need that familiar crunch. Call it nostalgia, call it stubbornness—I call it a win. Most of all, I think about how these tiny pockets of flavor hold a strange kind of comfort. Maybe I am a little obsessed, but then again, maybe that’s what makes it worth revisiting.

  • Lobster Alfredo with a Twist — the secret ingredient you never saw coming

    Lobster Alfredo with a Twist — the secret ingredient you never saw coming

    Cooking lobster doesn’t usually involve secretly sneaking in a splash of soy sauce. But hear me out.

    I recently realized how that umami-rich, slightly salty note could cut through the richness of the Alfredo sauce like a secret handshake between flavors. It’s not traditional, but that’s what I love about this version. It’s like pulling apart a cozy classic only to find a sharp little surprise underneath.

    Right now, with most meals feeling a little too predictable, I was craving something unexpectedly daring but still familiar—something I could throw together quickly, yet make everyone stop and ask, “What is that?” You want to taste that strange, irresistible combo—the sweet lobster paired with a subtle, almost smoky punch from the soy. It’s weirdly addictive. Honestly, I didn’t plan for that to happen. But I’m glad it did.

    Lobster Alfredo with Soy Sauce Twist

    This dish features lobster meat cooked in a creamy Alfredo sauce infused with a splash of soy sauce. The lobster is briefly sautéed to maintain tenderness, while the sauce combines butter, garlic, and cheese for a rich texture. The final presentation showcases a glossy, thick sauce coating tender lobster pieces with a hint of umami flavor.
    Prep Time 15 minutes
    Cook Time 20 minutes
    Total Time 35 minutes
    Servings: 4
    Course: Main Course
    Cuisine: Fusion
    Calories: 620

    Ingredients
      

    • 12 ounces fresh lobster meat, chopped preferably cooked and shelled
    • 8 ounces fettuccine or pasta of choice cooked al dente
    • 4 cloves garlic, minced
    • 4 tablespoons unsalted butter
    • 1 cup heavy cream
    • 1/4 cup grated Parmesan cheese
    • 1 tablespoon soy sauce adds umami and subtle saltiness
    • Salt and pepper to taste seasoning

    Equipment

    • Large pot for boiling pasta
    • Sharp chef’s knife
    • Cutting board
    • Large skillet or frying pan
    • Wooden spoon or spatula
    • Measuring cups and spoons
    • Whisk

    Method
     

    1. Bring a large pot of salted water to a boil. Once boiling, add the pasta and cook until al dente, about 8-10 minutes. Drain and set aside.
      12 ounces fresh lobster meat, chopped
    2. Heat a large skillet over medium heat. Add the butter and let it melt completely, bubbling gently and turning golden at the edges.
      12 ounces fresh lobster meat, chopped
    3. Add minced garlic to the skillet and sauté for about 30 seconds until fragrant, with small bubbles forming around the cloves and a golden aroma being released.
      12 ounces fresh lobster meat, chopped
    4. Add the chopped lobster meat to the skillet and cook, stirring gently, for about 2-3 minutes until heated through and beginning to brown slightly around the edges.
      12 ounces fresh lobster meat, chopped
    5. Pour in the heavy cream and add the grated Parmesan cheese. Whisk continuously until the sauce thickens slightly and becomes smooth, about 4-5 minutes. Then, stir in the soy sauce and season with salt and pepper to taste. The sauce should be glossy and slightly viscous.
      12 ounces fresh lobster meat, chopped
    6. Combine the cooked pasta with the sauce, tossing gently to coat evenly. Cook for an additional 1-2 minutes to allow flavors to meld and the pasta to absorb some of the sauce.
      12 ounces fresh lobster meat, chopped
    7. Serve immediately, garnished with extra Parmesan and a drizzle of soy sauce if desired. The dish should be hot, glossy, and have a creamy, flavorful coating on the lobster and pasta.

    Sometimes, I think the best recipes are born from curious accidents, right? I’ll probably keep this one on repeat—maybe add a little more garlic next time or switch out the pasta for something chewy. Or maybe just keep it simple and see how long I can resist spooning it straight from the pot. Either way, it’s a reminder that a little mistake can turn into something worth eating a second plate of.

  • Garlic Chicken Gnocchi Skillet — The One-Pan Wonder I Didn’t Know I Needed

    Garlic Chicken Gnocchi Skillet — The One-Pan Wonder I Didn’t Know I Needed

    Why I Couldn’t Stop Stirring

    This isn’t just about browned chicken and pillowy gnocchi. It’s about that moment when the garlic hits the pan, and I realize I’m already craving seconds. No fancy tricks, just good ingredients kissed by heat, but there’s a weird comfort in how simple it feels. No chopping for hours, no fuss—just a handful of garlic, a skillet, and the kind of smell that makes everything else outside just fade away for a bit.

    It’s trending right now probably because everybody’s tired of complicated. It all comes together faster than you can say “dinner’s ready,” and somehow that makes it feel like you’re hacking your own dinner routine. Sometimes I think that’s what I love most about these dishes. They’re easy enough to forget about, then suddenly they’re the lunch I look forward to. Also, I swear to god, that crispy chicken skin mixed with the garlicky gnocchi? Absolute madness.

    Crispy Chicken with Garlicky Gnocchi

    This dish features pan-seared, golden-brown chicken skin paired with soft, pillowy gnocchi cooked in a fragrant garlic butter sauce. The final dish combines crispy textures with tender pasta, enhanced by the savory aroma of garlic and the crispy edges of browned chicken.
    Prep Time 15 minutes
    Cook Time 20 minutes
    Total Time 35 minutes
    Servings: 4
    Course: Main Course
    Cuisine: Western
    Calories: 550

    Ingredients
      

    • 4 pieces skin-on chicken thighs preferably bone-in for more flavor
    • 1 pound gnocchi store-bought or homemade
    • 4 cloves garlic minced
    • 3 tablespoons unsalted butter
    • to taste salt and pepper
    • 2 tablespoons olive oil

    Equipment

    • Skillet or frying pan
    • Pot for boiling gnocchi
    • Kitchen tongs
    • Cookware thermometer (optional)

    Method
     

    1. Season the chicken thighs generously on both sides with salt and pepper. Heat a tablespoon of olive oil in a skillet over medium-high heat. Once hot, place the chicken skin-side down and cook without moving for about 6-8 minutes until the skin is deep golden brown and crispy. Flip the chicken and cook for another 6-8 minutes until fully cooked through, with an internal temperature of 165°F. Remove and set aside.
      4 pieces skin-on chicken thighs
    2. Meanwhile, bring a large pot of salted water to a boil. Add the gnocchi and cook according to package instructions until they float and are tender, about 2-3 minutes. Drain and set aside.
      4 pieces skin-on chicken thighs
    3. Reduce the skillet heat to medium. Add the butter to the rendered chicken fat and melt it, then add the minced garlic. Sauté for about 30 seconds until fragrant, watching for bubbling and a golden hue.
      4 pieces skin-on chicken thighs
    4. Immediately add the cooked gnocchi to the skillet with the garlic butter. Toss to coat evenly and cook for an additional 2-3 minutes, allowing the gnocchi to absorb flavors and develop light crispy edges. Observe for slight browning and aroma of garlic.
      4 pieces skin-on chicken thighs
    5. Slice the cooked chicken thighs and arrange them on plates. Spoon the garlicky gnocchi alongside the chicken, ensuring some crispy pieces and garlic bits are visible for texture. Serve hot, garnished if desired.
      4 pieces skin-on chicken thighs

    Notes

    Ensure chicken skin is dry before searing for maximum crispiness. Adjust cooking times based on chicken thickness.

    Figuring out ways to make dinner feel like a tiny victory—this hits the spot. Nothing fancy, no fuss, just a skillet full of stuff I’d happily eat for breakfast or midnight snacks. That’s all I need right now.

  • The Secret Layer That Turns a Sandwich Into a Memory

    The Secret Layer That Turns a Sandwich Into a Memory

    I’ve made a lot of sandwiches in my life, but nothing prepared me for how a simple addition—something I almost never thought of—can transform an ordinary Italian grinder. It’s not just about the meat or cheese. It’s that tiny smear of roasted garlic mayo, the way the bread crackles with every chew, the faint sizzle of peppers still warm from the skillet. There’s a specific moment when all those textures collide. You bite into it and suddenly, it’s not just lunch. It’s a piece of a memory you didn’t know you had — a street corner in Naples, a conversation overheard in a crowded deli, a moment of quiet after a hectic morning. No fancy tricks, no complicated steps. Just a sandwich that makes you stop, really taste, really feel something. That’s why I keep coming back to this one.

    Italian Grinder Sandwich with Roasted Garlic Mayo

    This sandwich features layers of cured meats, cheese, and sautéed peppers encased in crusty bread, complemented by a roasted garlic mayonnaise. It has a crispy exterior with a tender interior, showcasing a variety of textures from crunchy bread to warm, savory fillings, with distinct flavor enhancements from the garlic mayo.
    Prep Time 15 minutes
    Cook Time 10 minutes
    Total Time 25 minutes
    Servings: 2
    Course: Main Course
    Cuisine: Italian
    Calories: 520

    Ingredients
      

    • 1/2 cup mayonnaise plain or store-bought
    • 4 cloves garlic small cloves
    • 1 large bell pepper any color, sliced thin
    • 2 slices Italian bread rolls split lengthwise
    • 2 oz prosciutto or other cured meat optional
    • 2 oz mozzarella cheese sliced
    • 1 tbsp olive oil for sautéing peppers
    • to taste salt and pepper

    Equipment

    • Chef’s knife
    • Cutting board
    • Skillet or sauté pan
    • Toothpick or small spatula
    • Kitchen brush

    Method
     

    1. Peel the garlic cloves and mash them into a smooth paste using a knife or mortar and pestle. Mix the garlic paste into the mayonnaise until fully combined. Set aside to let flavors meld.
      4 cloves garlic
    2. Slice the bell pepper thinly and heat a skillet over medium heat. Add olive oil and sauté the peppers until they are soft and slightly caramelized, about 5-7 minutes. Season with salt and pepper to taste.
      4 cloves garlic
    3. Preheat a grill or griddle to medium-high heat. Lightly toast the split bread rolls until the crust is golden and crisp, about 2-3 minutes per side.
      4 cloves garlic
    4. Layer the sliced mozzarella on the bottom halves of the toasted bread. Top with the sautéed peppers, optional cured meats, and then close the sandwiches with the top halves of the bread.
      4 cloves garlic
    5. Optionally, press the sandwiches briefly on the grill or in a panini press until the cheese melts slightly and the bread is crispy, about 2-3 minutes per side. Remove and let rest for a minute.
    6. Spread the roasted garlic mayo generously on the cut sides of the bread. Serve the sandwich warm, sliced in half if desired, with the garlic mayo visible as a creamy spread.
      4 cloves garlic

    Notes

    Adjust the amount of roasted garlic in the mayo to taste. For a spicier version, add sliced chili peppers during sautéing.

    This isn’t just another hoagie. It’s a little reminder that sometimes, the simplest things are the hardest to forget. Anyway, I’ve probably eaten enough for now. That smell of roasting peppers keeps calling me back. Might have to make it again tonight, just to see if it’s still as good as I remember.

  • Garlic Butter Chicken Alfredo Stuffed Shells — The Lazy Gourmet’s Win

    Garlic Butter Chicken Alfredo Stuffed Shells — The Lazy Gourmet’s Win

    Why I’m obsessed with this dish right now

    I used to shell out money for takeout — so much creamy, garlicky goodness in those plastic containers. Then I remembered how I hate cleaning up. Making this at home? Way more satisfying. Plus, it’s a total cheat. You just boil shells, stuff them with shredded chicken and ricotta, spoon that garlic butter Alfredo over everything, bake it till bubbly. Sounds simple, but I swear, it’s the smell of butter melting and garlic waking up in the oven that makes me pause. It feels like comfort and rebellion wrapped in one dish. Yeah, it’s not fancy. Is it practical? Absolutely. This is the kind of meal that makes a weekday feel like a tiny celebration. Because honestly, sometimes, all I need is a pile of pasta, melted cheese, and garlic in the air. That’s enough to make me happy—no explanations required.

    Baked Chicken and Ricotta Stuffed Pasta Shells

    This dish involves boiling large pasta shells until al dente, then stuffing them with shredded chicken mixed with ricotta cheese. The shells are arranged in a baking dish topped with garlic butter Alfredo sauce and baked until bubbly and golden, resulting in a creamy, cheesy casserole with a tender texture and inviting appearance.
    Prep Time 20 minutes
    Cook Time 30 minutes
    Total Time 50 minutes
    Servings: 4
    Course: Main Course
    Cuisine: Italian-inspired
    Calories: 550

    Ingredients
      

    • 12 large pasta shells uncooked
    • 2 cups shredded cooked chicken alternatively, cooked shredded turkey
    • 1 cup ricotta cheese
    • 4 cloves garlic minced
    • 1/2 cup unsalted butter for garlic butter
    • 2 cups alfredo sauce store-bought or homemade
    • 1 salt to taste
    • 1/2 teaspoon black pepper
    • 1/4 cup grated Parmesan cheese for topping

    Equipment

    • Large pot for boiling pasta
    • Mixing Bowl
    • Baking Dish
    • Spoon or piping bag for stuffing
    • Saucepan for Alfredo sauce

    Method
     

    1. Bring a large pot of water to a rolling boil over high heat. Add the pasta shells and cook until al dente, about 10 minutes. Drain and set aside to cool slightly.
    2. While the pasta cooks, melt the butter in a saucepan over medium heat. Add the minced garlic and cook until fragrant, about 1-2 minutes. Remove from heat and set aside.
      12 large pasta shells
    3. In a mixing bowl, combine the shredded chicken and ricotta cheese. Season with salt and black pepper, then mix until well blended. Use a spoon or piping bag to fill each cooked shell with the chicken and ricotta mixture.
      12 large pasta shells
    4. Preheat your oven to 375°F (190°C). Spread a thin layer of Alfredo sauce on the bottom of the baking dish. Arrange the stuffed shells in a single layer over the sauce. Pour the remaining Alfredo sauce evenly over the shells. Drizzle the garlic butter from the saucepan over the top.
      12 large pasta shells
    5. Sprinkle grated Parmesan cheese over the assembled dish. Bake in the preheated oven until bubbling and golden on top, about 20-25 minutes. Remove from oven and let rest for 5 minutes before serving.
      12 large pasta shells

    Notes

    You can substitute turkey or vegetables for the shredded chicken. For a creamier sauce, add a splash of heavy cream to the Alfredo sauce before baking.

    Sometimes I wonder if I’m overthinking the perfect dinner. Or maybe I just like the idea of a dish that’s more than the sum of its parts. Regardless, this one’s staying in the rotation. Easy, cheesy, and all about garlic—what’s not to love?

  • Calamari Puttanesca: When Sea Meets Salsa in a Pan

    Calamari Puttanesca: When Sea Meets Salsa in a Pan

    The Unexpected Love of Winy Brine and Hot Spice

    I used to think calamari was only good when battered and fried, maybe topped with lemon. But lately, I’ve been thinking about how the ocean’s salty kiss might actually work with a spicy, tangy puttanesca sauce. Not many mix squid with anchovies, capers, and olives all in one bite like this. The smell of garlic sizzling in olive oil, the sharpness of black olives, the briny pop of capers, and that lemony punch coming from the sauce—it’s wild how these flavors collide. It’s the kind of dish that feels paradoxical: tender squid holding up to bold, salty, almost rebellious sauce. It reminds me of that moment when you stumble on a new favorite and think, why did I wait so long? Just real food, really unpolished, and surprisingly comforting.

    Winy Brine and Hot Spice Squid

    This dish features tender squid cooked in a spicy puttanesca-style sauce made with anchovies, capers, black olives, garlic, and lemon. The squid is lightly sautéed to develop a slight browning before being combined with the tangy, salty sauce, resulting in a dish that balances oceanic flavors with bold acidity and spice, with a tender texture and vibrant appearance.
    Prep Time 15 minutes
    Cook Time 15 minutes
    Total Time 30 minutes
    Servings: 4
    Course: Main Course
    Cuisine: Mediterranean
    Calories: 290

    Ingredients
      

    • 1 lb calamari (squid), cleaned and sliced into rings
    • 3 cloves garlic, minced
    • 2 anchovy fillets anchovy fillets, chopped
    • 1 tablespoon olive oil
    • 1/4 cup black olives, pitted and sliced
    • 2 tablespoons capers, drained
    • 1 cup canned crushed tomatoes
    • 1 lemon lemon, zested and juiced
    • Salt to taste salt
    • Freshly ground black pepper to taste black pepper

    Equipment

    • Chef’s knife
    • Large skillet or frying pan
    • Wooden spoon or spatula
    • Measuring cups and spoons
    • Cutting board

    Method
     

    1. Set a large skillet over medium heat and add 1 tablespoon of olive oil. Once shimmering, add the minced garlic and chopped anchovies. Sauté for about 1-2 minutes, until the garlic becomes fragrant and the anchovies dissolve into the oil, creating a spicy, aromatic base.
      2 anchovy fillets anchovy fillets, chopped, 1 tablespoon olive oil
    2. Add the sliced calamari to the skillet. Cook for 2-3 minutes, stirring occasionally, until the squid turns opaque and is lightly browned around the edges. You should see a gentle bubbling and slight caramelization for visual cues of doneness.
      1 lb calamari (squid), cleaned and sliced into rings
    3. Pour in the crushed tomatoes, then stir in the sliced black olives, capers, lemon zest, and lemon juice. Increase the heat to bring the mixture to a gentle simmer. Cook for another 5-6 minutes, allowing flavors to meld and sauce to thicken slightly. Look for the sauce to coat the calamari evenly and see small bubbles around the edges.
      1 cup canned crushed tomatoes, 1/4 cup black olives, pitted and sliced, 2 tablespoons capers, drained, 1 lemon lemon, zested and juiced
    4. Taste and season with salt and freshly ground black pepper as needed. Continue to cook for 1-2 more minutes until the sauce has thickened slightly and all ingredients are heated through.
      3 cloves garlic, minced
    5. Transfer the calamari and sauce to a serving dish or plate. Garnish with additional lemon zest or chopped herbs if desired. Serve immediately, showcasing the tender squid coated in a vibrant, salty, and spicy sauce.

    Sometimes I think about how seafood gets a bad rap for being fancy or high-maintenance. But this? It’s simple, quick, and weirdly addictive. Plus, it’s perfect for the nights when I need something salty, spicy, and a little out of the ordinary. No fuss, just a plate that makes me stop and actually taste it for once.

  • Baked Miso Salmon: The Secret Ingredient I Never Knew I Needed

    Baked Miso Salmon: The Secret Ingredient I Never Knew I Needed

    Why I Started Making This

    It was a rainy Saturday and I needed something different. Not the usual pan-fry or grilled fish. I remembered how the smell of miso fermentation sneaks into your nose, kinda earthy, a little salty, with that umami punch. I thought, what if I let that essence soak into salmon? No fancy techniques, just a little marinade, then bake it. The kitchen fills with this rich, almost fermented aroma that makes you stop in your tracks.

    Cooking is weird sometimes. You chase flavors you don’t even know you wanted. This dish felt like that. It’s not trendy. It’s not perfect. But right now, it’s what I want to eat when the sky’s heavy, and I need comfort that tastes a little weird but satisfying.

    Miso-Marinated Baked Salmon

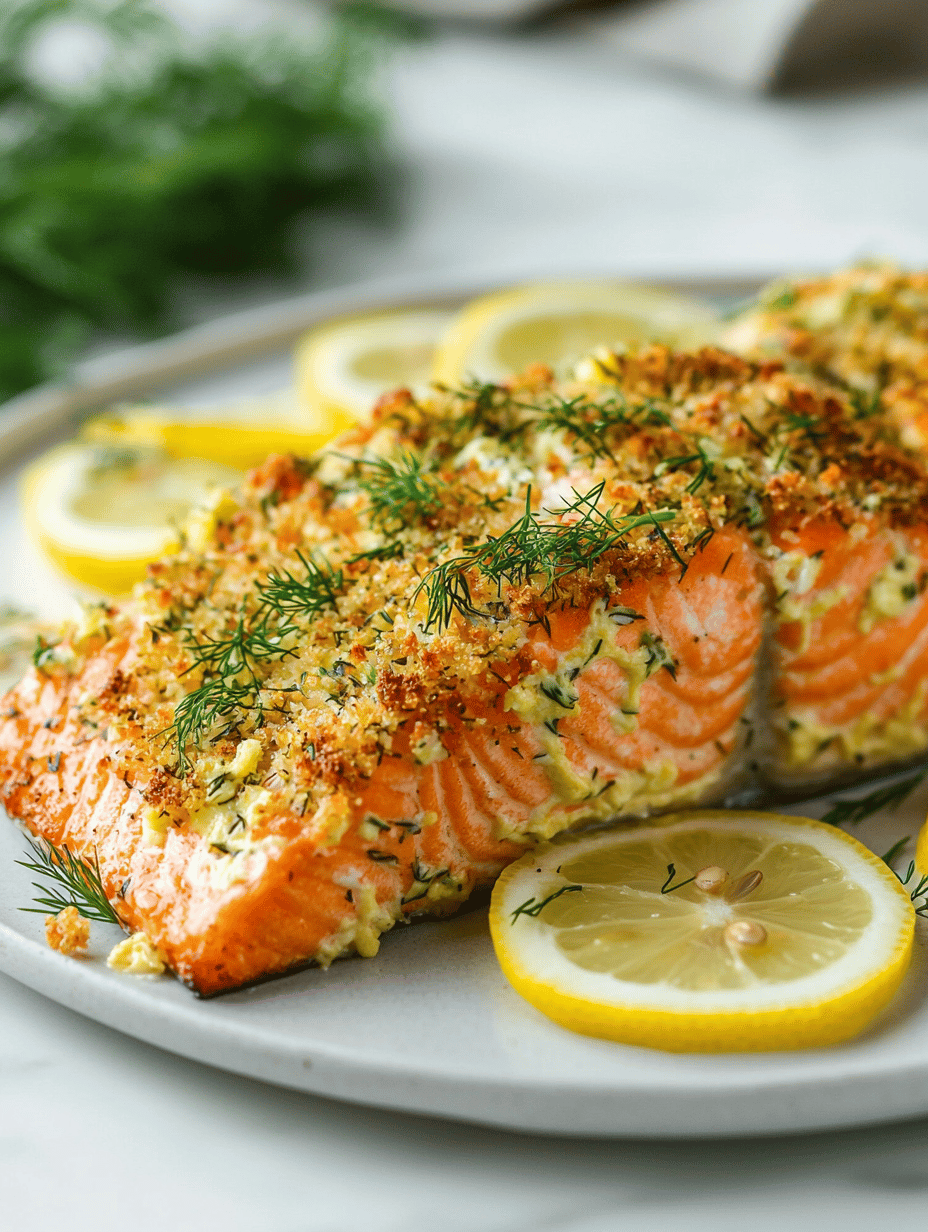
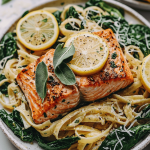
    This dish involves marinating salmon fillets in a miso-based mixture to absorb earthy umami flavors, followed by baking until the fish is tender and flaky. The final appearance showcases a slightly caramelized, glazed surface with a moist interior that flakes easily with a fork.
    Prep Time 15 minutes
    Cook Time 20 minutes
    Total Time 35 minutes
    Servings: 2
    Course: Main Course
    Cuisine: Japanese
    Calories: 350

    Ingredients
      

    • 2 fillets salmon fillets skin-on or skinless, as preferred
    • 3 tablespoons miso paste white or red miso
    • 1 tablespoon soy sauce
    • 1 tablespoon mirin sweet rice wine, optional for added flavor
    • 1 teaspoon sugar to balance saltiness
    • 1 tablespoon rice vinegar optional, for depth
    • 1 tablespoon vegetable oil for greasing and cooking

    Equipment

    • Baking sheet
    • Small mixing bowl
    • Brush or spoon for marinating
    • Aluminum foil or parchment paper

    Method
     

    1. Pat the salmon fillets dry with paper towels and place them on a plate or tray.
    2. In a small mixing bowl, whisk together miso paste, soy sauce, mirin, sugar, and rice vinegar until well combined and smooth.
    3. Using a brush or spoon, evenly spread the miso marinade over both sides of each salmon fillet, ensuring full coverage.
    4. Preheat your oven to 400°F (200°C). Line a baking sheet with aluminum foil or parchment paper and lightly brush with vegetable oil.
    5. Place the marinated salmon fillets on the prepared baking sheet, skin-side down if skin is present, and bake for 15-20 minutes, until the surface is caramelized and the fish is opaque and flaky.
    6. Remove the salmon from the oven, transfer to a serving plate, and garnish with a sprinkle of thinly sliced green onions if desired. Serve hot with your preferred side.

    Sometimes I think about all the recipes I’ll forget in ten years. But this one sticks around. Because it’s simple. It’s honest. And somehow, it feels like I’ve discovered a tiny secret in my own kitchen.

  • Olive Garden Inspired Ravioli Carbonara: A Surprise Twist That Feels Like Home

    Olive Garden Inspired Ravioli Carbonara: A Surprise Twist That Feels Like Home

    I never thought I’d say this, but I was craving a pasta that smells like Sunday mornings and feels like stealing seconds from dinner. Fair warning: the secret ingredient is more than just eggs and pancetta—it’s the whisper of Parmesan that crumbles just right, and the gooey, almost creamy texture of fresh ravioli that’s basically begging to be filled with something bold. I kept thinking about how Italian-American comfort food hits at the weirdest moments—like when you’re not sick or sad but just need that honest, straightforward bite. Today, I wanted to recreate that feeling. The one where you know exactly what’s in it but it still surprises you. And surprisingly? It’s not complicated. Just a little patience. And maybe a glass of white wine to keep you company as you mix those luscious, cheesy sauce into tender pasta pockets.

    Creamy Pancetta Ravioli

    This dish features fresh ravioli filled with a cheese mixture, cooked until tender in a salted boiling water. It is then combined with a savory sauce made from crispy pancetta, eggs, Parmesan, and pasta water, resulting in a creamy, velvety coating that clings to each piece, with a golden-brown garnish on top.
    Prep Time 15 minutes
    Cook Time 20 minutes
    Total Time 35 minutes
    Servings: 4
    Course: Main Course
    Cuisine: Italian-American
    Calories: 480

    Ingredients
      

    • 1 package fresh ravioli cheese-filled
    • 150 grams pancetta diced
    • 2 large eggs beaten
    • 50 grams Parmesan cheese freshly grated
    • 2 tablespoons olive oil
    • Salt to taste
    • Freshly ground black pepper to taste

    Equipment

    • Large pot for boiling
    • Frying pan
    • Slotted spoon
    • Whisk
    • Grater

    Method
     

    1. Bring a large pot of salted water to a boil. Add the fresh ravioli and cook until they float to the surface, approximately 3-4 minutes; then, use a slotted spoon to transfer them to a warm plate.
    2. Meanwhile, heat a frying pan over medium heat and add diced pancetta along with 1 tablespoon of olive oil. Cook until the pancetta becomes crispy and golden brown, about 5-7 minutes, stirring occasionally. Remove from heat and set aside.
      1 package fresh ravioli
    3. In a small bowl, whisk together the eggs, grated Parmesan, and a pinch of salt and black pepper to form a creamy mixture. Keep nearby for combining later.
      1 package fresh ravioli
    4. Return the cooked pancetta along with the rendered fat to the pan and add a few tablespoons of the reserved pasta water to loosen the mixture. Once simmering, reduce heat to low.
      1 package fresh ravioli
    5. Gradually pour the egg and Parmesan mixture into the pan, vigorously whisking to create a creamy sauce that coats the pancetta and melts slightly with the heat. Do not let it boil to prevent curdling. Continue whisking until the sauce thickens and reaches a silky consistency.
      1 package fresh ravioli
    6. Gently add the cooked ravioli to the pan, tossing carefully to evenly coat them in the creamy sauce. Finish with freshly ground black pepper and serve immediately, optionally garnished with extra Parmesan and crispy pancetta on top.
      1 package fresh ravioli

    Notes

    Ensure the sauce is whisked constantly to achieve a smooth, velvety texture. Do not overheat after adding the eggs to prevent curdling. Serve promptly for best texture and flavor.

    It’s funny how a meal can bring back more than just flavors. Sometimes it’s the smell—garlic, a hint of pepper, and that toasty pancetta aroma—filling the air and suddenly making everything feel more right. No fancy tricks, just a little ingenuity. Sometimes, that’s all I want—something familiar I can make in my own kitchen, no matter the day. And honestly, that’s enough.

  • Bobby Flay Inspired Salisbury Steak – But Make It**Unexpected**

    Bobby Flay Inspired Salisbury Steak – But Make It**Unexpected**

    Why this recipe now?

    Because of the smell. Not just the beef sizzling deep brown in the pan, but that tangy, sweet hint of Worcestershire that hits your nose before you even take a bite. It’s easy to forget how a certain smell can instantly tug you back, right? For me, it’s those nights when Mom used to make Salisbury steak, and the house was filled with this odd but comforting mix of caramelized onions and gravy. It’s nostalgic, but I’ve always wondered if I could lift it out of that dull comfort zone.

    And with all the talk about reinventing classics lately, I figured: Why not? This isn’t your purepa’s Salisbury steak. It’s got a little spice, a glossy gravy, and that perfect sear on the meat. It’s bold, but it’s familiar. Just what I needed for a slow week—something you don’t have to overthink, but still makes the house smell like a kitchen you want to live in.

    Salisbury Steak with Glossy Gravy

    This dish consists of seasoned ground beef patties pan-fried until browned and topped with a rich, savory gravy laced with caramelized onions and Worcestershire sauce. The final presentation features tender meat with a shiny, flavorful sauce that clings to the surface, creating a hearty and comforting main course.
    Prep Time 15 minutes
    Cook Time 20 minutes
    Total Time 35 minutes
    Servings: 4
    Course: Main Course
    Cuisine: American
    Calories: 460

    Ingredients
      

    • 1 ½ pounds ground beef 80% lean
    • 1 medium onion thinly sliced
    • 2 tablespoons Worcestershire sauce adds tang and depth
    • ½ cup beef broth for gravy
    • 2 teaspoons mustard ground or Dijon
    • 2 tablespoons oil for frying
    • to taste salt and pepper seasoning for beef

    Equipment

    • Skillet or frying pan
    • Spatula
    • Knife
    • Cutting board
    • Measuring cups and spoons

    Method
     

    1. Preheat the skillet over medium-high heat and add 1 tablespoon of oil. Once shimmering, form the ground beef into four equal-sized patties and place them in the skillet. Cook until golden brown on both sides, about 4-5 minutes per side, then remove and set aside.
    2. Reduce heat to medium. Add the sliced onions to the same skillet and cook, stirring occasionally, until they are soft and caramelized, about 8-10 minutes. The onions should turn a deep golden brown and release a sweet aroma.
    3. Add the Worcestershire sauce, mustard, and beef broth to the skillet with the onions. Stir well to combine and scrape up any browned bits from the bottom of the pan. Bring the mixture to a gentle simmer and cook until it slightly thickens, about 3-5 minutes.
    4. Return the browned beef patties to the skillet, spooning some of the gravy and onions over each. Reduce heat to low, cover loosely, and cook for an additional 5 minutes until the patties are heated through and coated with a glossy gravy.
    5. Remove from heat and plate the Salisbury steaks, spooning the onions and gravy generously over the top. Serve hot, allowing the glossy sauce to coat the tender meat.

    Whatever you do, don’t skip the last spoonful. There’s something satisfying about that thick gravy pool, soaking into the mashed potatoes or just sitting there waiting to be inhaled. I’ll probably have more tomorrow and pretend I’m still a kid. Or maybe I won’t—because honestly, I’m kind of surprised how good this turned out, thinking I’d mess it up. Guess that’s the charm with these old favorites, huh?

  • Marry Me Salmon: The One Dish That Makes You Forget Everything Else

    Marry Me Salmon: The One Dish That Makes You Forget Everything Else

    Why I Didn’t Believe in Love at First Bite

    I made this salmon more times than I can count lately. No fancy tricks, just a simple marinade with soy, ginger, a splash of honey. The smell hits your nose before it hits the pan—sweet, sharp, a little smoky. It’s always been my fallback, but recently I started noticing something strange.

    While I was cooking, I realized this dish somehow connects to what I crave when I want to forget the bad stuff. That soft flake, the slightly caramelized edges, the salty-sweet glaze—it makes me stop thinking, even if just for a moment. And right now, in the middle of all this chaos, that’s enough. It’s not trendy or gourmet, but it’s honest. The kind of thing I want to make, and keep making, long after the pictures fade.

    Soy-Ginger Honey Glazed Salmon

    This dish features salmon fillets marinated in a soy and ginger mixture with a touch of honey, then pan-seared until the edges are caramelized and the flesh is tender. The final presentation showcases a glossy, slightly caramelized surface with flaky meat inside, offering a sweet, salty, and savory flavor profile.
    Prep Time 10 minutes
    Cook Time 15 minutes
    Total Time 25 minutes
    Servings: 2
    Course: Main Course
    Cuisine: Asian
    Calories: 350

    Ingredients
      

    • 2 fillets salmon fillets skin-on preferred
    • 3 tablespoons soy sauce
    • 1 inch fresh ginger grated
    • 1 tablespoon honey
    • 1 tablespoon rice vinegar
    • 1 teaspoon sesame oil
    • 1 pinch black pepper

    Equipment

    • Skillet or Non-stick Pan
    • Measuring cups and spoons
    • Mixing Bowl
    • Tongs or spatula
    • Knife

    Method
     

    1. Combine soy sauce, grated ginger, honey, rice vinegar, sesame oil, and black pepper in a mixing bowl to create the marinade. Mix well until the honey dissolves and the ingredients are thoroughly combined.
      2 fillets salmon fillets
    2. Place the salmon fillets in a shallow dish or resealable plastic bag and pour the marinade over them. Ensure each piece is coated evenly. Marinate in the refrigerator for at least 10 minutes, turning once to evenly distribute the flavors.
      2 fillets salmon fillets
    3. Heat a skillet over medium-high heat. Once hot, remove the salmon from the marinade, allowing excess to drip off, and place the fillets skin-side down in the pan. Cook for about 4-5 minutes until the skin is crisp and golden brown, then flip the fillets.
      2 fillets salmon fillets
    4. Cook the second side for another 4-5 minutes, until the salmon is opaque and flakes easily with a fork. During the last minute, spoon some of the marinade over the fillets, allowing it to glaze and caramelize slightly.
      2 fillets salmon fillets
    5. Transfer the cooked salmon to a plate and let rest for a minute. Serve immediately, optionally garnished with sesame seeds or chopped scallions for added flavor and presentation.
      2 fillets salmon fillets

    Cooking it now feels like a quiet rebellion. Like saying, screw the fuss, I’ll have what comforts me. Maybe that’s all we’re really after—something real. Or maybe I just like the smell of seared fish in the middle of a Tuesday. Whatever. I’ll keep playing with the marinade, see if I can make it even better. That’s the plan anyway.