
Making vegetable sushi rolls is a hands-on process that involves a lot of prep work—cutting, julienning, and arranging. You’ll feel the coolness of the cucumber and the crisp snap of the carrots as you lay them out.
The sticky rice clings to your fingertips, and the nori crackles softly as you roll everything up, trying to keep the fillings tight without tearing the seaweed.
The gentle, sticky squish of the rice as you spread it onto the nori, feeling the slight resistance and soft plop with each layer.
What goes into this dish
- Cucumber: I like the cool crunch, especially when it’s freshly sliced; it adds a refreshing bite. Swap with zucchini if you want a softer texture, or skip for more focus on the other fillings.
- Carrots: Julienne them thin so they don’t overpower the roll’s delicate structure. Use daikon for a milder, slightly peppery flavor or shredded jicama for a sweeter crunch.
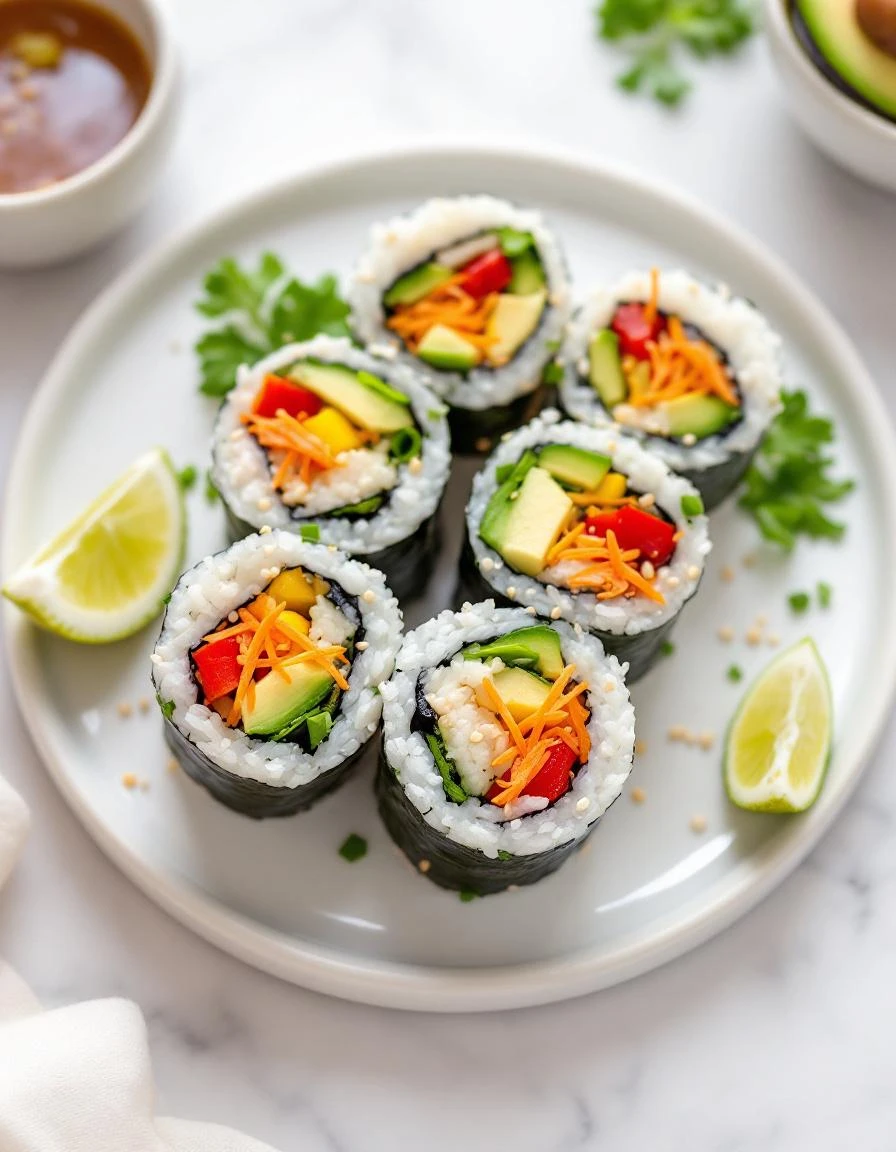
- Avocado: The creamy, almost buttery texture melts in your mouth. If you don’t like it, try thinly sliced bell peppers for color and crunch instead.
- Bell Peppers: Bright, crisp, and juicy—perfect for color and sharpness. Switch to thin strips of radish if you want a peppery zing, or omit if you prefer a milder bite.
- Nori Sheets: They hold everything together and add that signature sea flavor. You can try rice paper for a softer, less salty wrap, or toasted seaweed snacks for a smoky twist.
- Sushi Rice: Sticky, slightly vinegary, and with a subtle sweetness. If you’re out, short-grain rice works, but adding a splash of rice vinegar makes all the difference; skip the sugar if you prefer a less sweet taste.
Vegetable Sushi Rolls
Ingredients
Equipment
Method
- Rinse the sushi rice under cold water until the water runs clear, then cook it according to the package instructions. Once cooked, transfer to a large bowl and gently fold in rice vinegar if using, to season the rice. Allow it to cool slightly until it’s warm but manageable to handle.
- Lay a bamboo sushi mat on your work surface and place a sheet of nori shiny side down on top. Using wet hands, spread a thin, even layer of rice over the nori, leaving about an inch at the top edge free to seal the roll.
- Arrange strips of cucumber, julienned carrots, avocado, and bell pepper horizontally across the bottom third of the rice-covered nori. Feel the crunch and freshness of each vegetable as you lay them out carefully.
- Using the bamboo mat, gently lift the edge closest to you and begin to roll, pressing firmly but gently to keep the fillings tight and compact. Continue rolling until the seam is sealed at the top edge of the nori.
- Once rolled, use a sharp knife to slice the sushi roll into 6-8 even pieces. Wipe the knife with a damp cloth between cuts to achieve clean, smooth slices.
- Arrange the sliced sushi on a plate, showcasing the vibrant colors and textures of the vegetables inside. Serve immediately with soy sauce, pickled ginger, or wasabi if desired.
Common mistakes and how to fix them
- FORGOT to keep the rice moist; fix with a damp cloth over the bowl.
- DUMPED too much rice vinegar; cut back to avoid overly tangy rolls.
- OVER-TORCHED the nori; toast lightly and watch closely during roasting.
- MISSED the rolling tight enough; press firmly but don’t crush the fillings.
Make-Ahead and Storage Tips
- You can cook and chill the rice a day ahead; keep covered in the fridge for up to 24 hours. Re-fog the rice slightly before rolling.
- Julienne all vegetables in advance; store in airtight containers in the fridge for up to 2 days. Keep them crisp with a damp paper towel if needed.
- Assemble the rolls a few hours ahead, wrap tightly in plastic wrap, and store in the fridge. The flavors meld and the nori stays firm.
- Cut rolls just before serving for clean slices. If you need to re-store leftovers, wrap tightly and keep in the fridge for 1 day. Re-cut for presentation.
- Freezing is not recommended for the best texture, but if needed, tightly wrap individual rolls and freeze up to 1 month. Thaw in the fridge before slicing.
FAQs
1. How do I get clean slices?
Use a sharp knife and clean water between cuts. Feel the smooth glide and the crisp snap as each slice separates cleanly.
2. Why does my sushi stick to the knife?
Keep the knife moistened and the roll firm but gentle. Watch the fishy smell fade as you slice through the rice and vegetables.
3. Can I use warm rice?
Ensure your rice is cooled enough to handle, but still slightly sticky. Feel the cool, slightly damp rice between your fingers before rolling.
4. How soon should I serve the sushi after rolling?
Cut the rolls just before serving to keep the nori crisp and fillings fresh. Feel the smooth, cool surface of the cut edges, ready for plating.
5. How long will leftovers stay good?
Store leftovers tightly wrapped in plastic in the fridge for up to a day. The rice may firm up and lose some freshness, but it will still taste good when reheated gently.

I’m Mahek Manchanda, the curious heart behind Dramatically Stirring. Before this space existed, my life revolved around kitchens that were loud, demanding, and endlessly alive. I didn’t arrive at cooking through a single dramatic moment.