Fried bread rolls feel like a warm secret from childhood, a snack that’s both simple and utterly satisfying. There’s something about the crispy crunch combined with soft, cheesy fillings that makes these bites addictive. I keep coming back to them when I want a comfort food that’s quick to whip up but somehow feels like a treat.
The beauty of this recipe is how forgiving it is. You can stuff them with whatever you have—sweet or savory—and they still turn out golden and crispy. I love the way the smell of frying bread fills the kitchen, a nostalgic scent that instantly makes everything seem a little cozier. These little rolls are perfect for casual get-togethers or a lazy weekend snack.
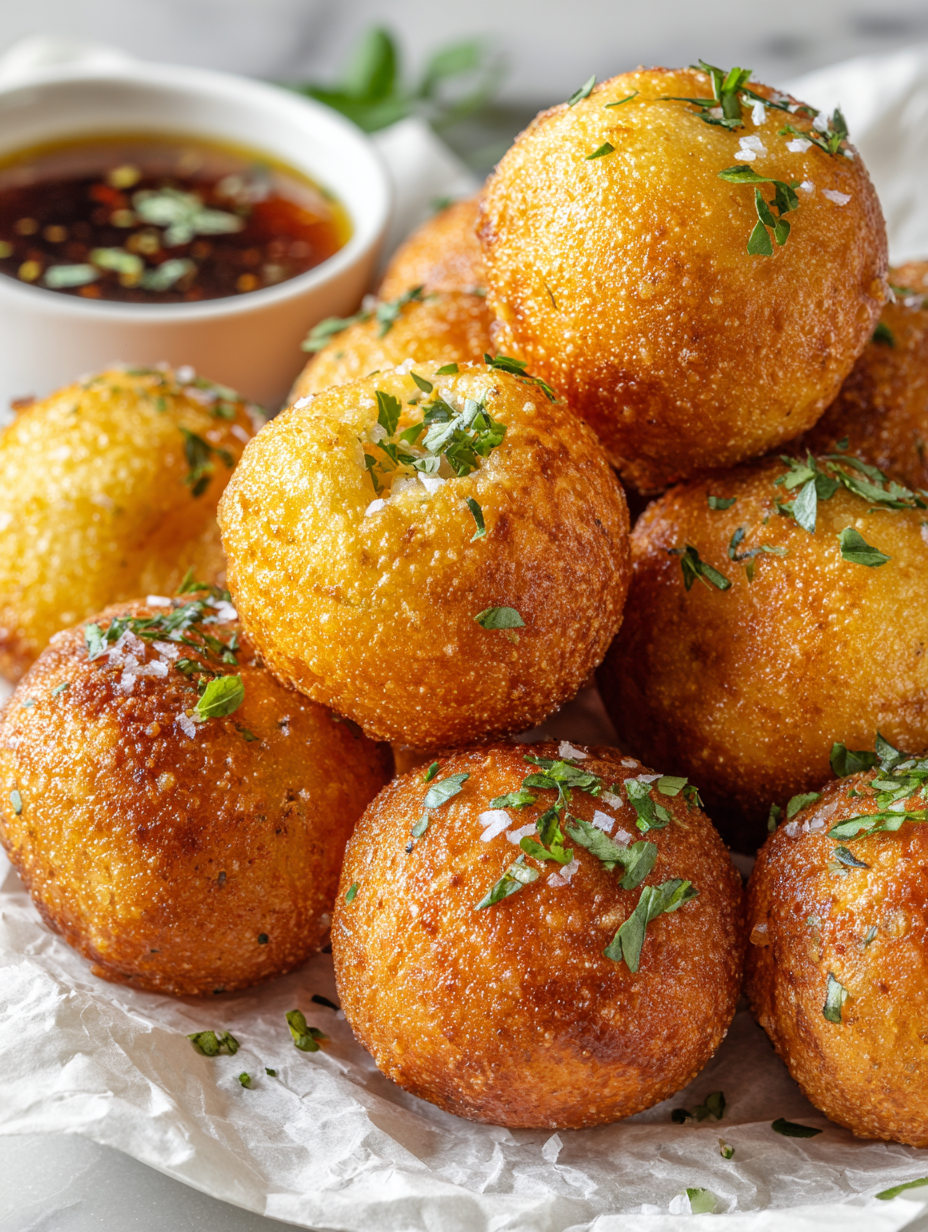
Focusing on the nostalgic comfort of childhood snacks, this recipe transforms simple bread and fillings into crispy, golden bites that evoke memories of weekend treats and lazy mornings. I love how these bread rolls turn a humble pantry staple into a warm, indulgent experience, perfect for sharing with loved ones or enjoying solo with a splash of soy sauce or a dash of chili.
Origins of the Fried Bread Rolls
This recipe came from a moment of craving something crispy and comforting, but with a twist. I remember experimenting in my kitchen, trying to replicate that childhood joy of biting into warm, fried bread filled with whatever was in the fridge. It’s funny how a simple idea can turn into a go-to snack that feels like a small victory every time. Now, I love how these bread rolls bring a bit of chaos and joy into my cooking, especially when I want something fast, satisfying, and a little bit nostalgic.
Ingredients Breakdown
- All-purpose flour: I like how it gives the rolls a sturdy, golden crust, but you could try bread flour for a chewier bite.
- Bread dough: Using day-old bread or slightly stale bread makes wrapping easier and adds a deeper flavor—don’t use fresh bread if you want less sogginess.
- Cheese filling: I prefer a melty cheese like mozzarella, but a sharp cheddar adds a nice tang and a bit more punch.
- Filling options: Whether sweet jam or savory meats, the filling makes each bite special—experiment based on your mood.
- Oil for frying: I use vegetable oil because it’s neutral and handles heat well—just keep it hot, around 180°C (350°F), for that perfect crisp.
- Egg wash: Brushed on before frying, it helps the crust turn beautifully shiny and golden—don’t skip it for that glossy finish.
- Seasonings: A pinch of salt or herbs in the dough can elevate the flavor—don’t be shy, a little goes a long way.
Spotlight on key ingredients
Flour & Cheese:
- All-purpose flour: I like how it gives the rolls a sturdy, golden crust, but you could try bread flour for a chewier bite.
- Bread dough: Using day-old bread or slightly stale bread makes wrapping easier and adds a deeper flavor—don’t use fresh bread if you want less sogginess.
- Cheese filling: I prefer a melty cheese like mozzarella, but a sharp cheddar adds a nice tang and a bit more punch.
Notes for ingredient swaps
- Dairy-Free: Swap cheese with mashed avocado or hummus for creaminess, but expect less melt and gooeyness.
- Gluten-Free: Use a blend of rice flour and tapioca starch instead of all-purpose flour—crispness might vary slightly.
- Vegan: Replace egg wash with a plant-based milk mixed with a teaspoon of maple syrup for shine and slight sweetness.
- Low-Oil: Use an air fryer or bake at 200°C (392°F) for a healthier version—crispiness may take a little longer.
- Sweet Fillings: Substitute cheese with sweet options like nut butter or fruit preserves—expect softer, less gooey results.
- Herbs & Spices: Add fresh chopped herbs or spices like paprika or cumin to the dough for extra flavor—be gentle to avoid overpowering.
- Oil Type: Use sesame or coconut oil for frying to add different aroma and flavor profiles—smoke point remains similar.
Equipment & Tools
- Frying pan or deep skillet: To fry the rolls evenly and get a crispy crust.
- Spatula or tongs: To flip and handle hot rolls safely.
- Pastry brush: To apply egg wash for glossy finish.
- Paper towels: To drain excess oil after frying.
- Rolling pin: To flatten dough into even rectangles.
Step-by-step guide to fried bread rolls
- Gather all your ingredients and tools. Have a clean workspace ready. Preheat your frying pan to medium-high heat, about 180°C (350°F).
- Mix flour, a pinch of salt, and a splash of water to make a sticky but manageable dough. Knead briefly until smooth, about 2 minutes.
- Let the dough rest for 10 minutes under a damp cloth. This relaxes the gluten and makes rolling easier.
- Divide dough into 4 equal portions. Roll each into a thin rectangle, roughly 15×20 cm (6×8 inches).
- Place a generous spoonful of filling (cheese, jam, or savory) near one edge of each rectangle. Be careful not to overfill.
- Fold the dough over the filling, then pinch edges firmly to seal. Use a little water if necessary to help seal the edges.
- Prepare your egg wash: beat one egg with a teaspoon of water. Brush the tops of each roll lightly with the wash for a shiny crust.
- Heat oil in a deep skillet or frying pan, enough to submerge the rolls, to about 180°C (350°F). Test with a small piece of bread; it should bubble and turn golden in 30 seconds.
- Carefully place the rolls seam-side down in the hot oil. Fry for 3-4 minutes per side, until golden brown and crispy. Adjust heat if they brown too fast or too slow.
- Flip gently with tongs or a slotted spoon. Use a spatula to press slightly for even contact. Listen for a crackling sound, indicating crispiness.
- Check for doneness: the rolls should be golden, crispy, and smell fragrant. The filling should be hot and gooey if cheese or jam is used.
- Remove from oil and drain on paper towels. Let them rest for 2 minutes before serving—this keeps them crispy and prevents burns.
- Serve warm, with your favorite dipping sauce or just as they are. The crisp exterior and warm filling make every bite satisfying.
Let the fried rolls rest on paper towels for 2 minutes. Serve immediately while crispy and hot—pair with dips or enjoy plain.
How to Know It’s Done
- Golden and crispy exterior, even browning.
- Filling hot and gooey or fragrant if sweet.
- No excess oil on surface after draining.
Fried Bread Rolls
Ingredients
Equipment
Method
- Mix the flour, salt, and water in a bowl until a sticky dough forms. Knead briefly until smooth, about 2 minutes.
- Cover the dough with a damp cloth and let it rest for 10 minutes. This relaxes the gluten and makes rolling easier.
- Divide the dough into 4 equal parts. Roll each into a thin rectangle, about 15x20 cm, using a rolling pin.
- Place a generous spoonful of cheese near one edge of each rectangle, keeping some space around the filling.
- Fold the dough over the filling and pinch the edges tightly to seal. Use a little water if needed to help seal.
- Beat the egg and brush the tops of each sealed roll with the egg wash using a pastry brush for a shiny, golden finish.
- Heat vegetable oil in a frying pan or deep skillet to 180°C (350°F). Test with a small piece of bread until it bubbles and turns golden.
- Carefully place the rolls seam-side down into the hot oil. Fry for about 3-4 minutes per side until golden brown and crispy, flipping gently with tongs or a spatula.
- Remove the rolls from the oil and drain on paper towels. Let them rest for 2 minutes to keep the crust crispy.
- Serve the crispy fried bread rolls warm, enjoying their crunchy exterior and melted cheese interior with your favorite dips or on their own.
Pro tips for perfect fried bread rolls
- Use a thermometer to keep oil at a steady 180°C (350°F) for consistent crispness.
- Keep the dough as cold as possible before rolling; it’s easier to handle and seals better.
- When frying, don’t overcrowd the pan—work in batches to maintain oil temperature and avoid sogginess.
- For an extra crispy crust, pat the rolls dry after draining excess oil before serving.
- Gently press the filling into the dough to prevent it from escaping during frying.
- Use a slotted spoon to flip the rolls—gentle, steady movements keep the seal intact and prevent splashes.
- To check doneness, tap the rolls lightly—if they sound hollow, they’re crispy and ready.
Common mistakes and how to fix them
- FORGOT to preheat oil → Oil was cold, rolls soaked up excess fat. Always preheat to 180°C (350°F).
- DUMPED too much filling → Overfilled rolls burst. Use a tablespoon and leave space to seal properly.
- OVER-TORCHED the crust → Burnt smell, dark color. Lower heat slightly after initial color develops.
- SKIPPED resting dough → Tough rolls. Rest dough 10 minutes for better elasticity and easier sealing.
Quick fixes and pantry swaps
- If oil smokes, splash in a small piece of bread—rescue in 5 seconds.
- When rolls are soggy, patch with a sprinkle of flour and fry again.
- Splash a little lemon juice if filling is bland for bright contrast.
- Shield delicate fillings with a thicker dough layer to prevent leaks.
- When stuck with stale bread, swap in fresh slices and toast lightly before filling.
Prep, store, and reheat tips
- Prepare the dough and fillable components a day in advance; keep covered in the fridge to prevent drying out, which helps maintain flexibility and freshness.
- Store cooked rolls in an airtight container in the fridge for up to 2 days; reheat in a hot oven or air fryer until crispy again, about 3-5 minutes, for that freshly fried feel.
- Unfried rolls can be frozen for up to a month; wrap them individually in plastic wrap, then in foil, and reheat directly from frozen for best crunch.
- Reheating will soften the crust slightly; crisp them up again by frying briefly in hot oil or baking at 200°C (392°F) until golden, releasing that familiar crackle and aroma.
FAQs about Fried Bread Rolls
1. How do I know when the oil is hot enough?
Use a thermometer to keep oil at 180°C (350°F); it ensures the rolls turn crispy and golden without burning.
2. Why did my bread rolls burst during frying?
If the rolls burst open, don’t overfill them. Use about a tablespoon of filling and seal edges tightly.
3. Why are my rolls too greasy or soggy?
Overcrowding the pan drops the oil temperature, making rolls soggy. Fry in small batches for best results.
4. My rolls are burning too fast on the outside?
If the crust is too dark before the filling heats, lower the heat slightly and fry for a bit longer at a gentler temperature.
5. Can I prepare these ahead of time?
Store unfried rolls in the fridge for up to 24 hours, covered tightly. Reheat in a hot oven or air fryer for crispiness.
6. Can I freeze these bread rolls?
From frozen, fry directly in hot oil for about 4-5 minutes until crispy. Thawing isn’t necessary but may extend cooking time.
7. Why does my filling leak out or escape?
If the filling leaks out during frying, chill the filled dough for 10 minutes first. It firms up the filling and helps seal better.
8. My rolls lost their crispness after cooling?
To fix soggy rolls, re-fry in hot oil for 1-2 minutes until the crust crisps up again and releases that crackle.
9. How do I handle the rolls safely during frying?
Use a slotted spoon to turn the rolls gently. This prevents breaking the seal and keeps the filling intact.
10. What if the oil starts smoking during frying?
If oil smokes, splash in a small piece of bread—this quick rescue reduces smoke and cools the oil slightly.
These fried bread rolls carry a nostalgic punch, bringing back lazy mornings and weekend treats in every crispy bite. They’re imperfect, forgiving, and best enjoyed hot with a little sauce or just plain—they remind me that simple pleasures are often the most satisfying.
Whenever I make them, I’m reminded how a few humble ingredients can turn into something memorable. They’re perfect for when you need a quick snack or a spontaneous gathering. Honestly, they’re just good enough to keep making, again and again.

I’m Mahek Manchanda, the curious heart behind Dramatically Stirring. Before this space existed, my life revolved around kitchens that were loud, demanding, and endlessly alive. I didn’t arrive at cooking through a single dramatic moment.