Fried chicken wings are often rushed through, but I’ve found that resting them after frying makes all the difference. It’s that quiet moment of patience that lets the juices redistribute and the skin crisp just a little more, locking in flavor. I used to skip this step, rushing to serve hot wings, only to find them a bit soggy or greasy.
Now, I actually plan for that break. It’s honestly where the magic happens. The wings settle into a perfect balance of crunch and tenderness, with the seasoning deepening as they sit. It’s a simple step, but it turns good wings into something you want to keep coming back to, bite after bite.
Focusing on the overlooked importance of the resting period after frying, and how it transforms the chicken wings’ texture and flavor.
The story behind this recipe
- I remember the first time I tried frying wings in my tiny apartment kitchen. The smell of sizzling skin, the crackle of the oil, and that rush of anticipation—everything about it felt like a small victory. It wasn’t perfect, but I was hooked on the process, on trying to get that crispy, golden crust just right.
- Over the years, I kept tweaking my approach—adding a dash of paprika here, adjusting the oil temperature there—until I found a rhythm that works for my own chaos of a kitchen. What I’ve learned is that fried wings aren’t just about the crunch or flavor; it’s about the messy, noisy joy of making something satisfying with your own hands. That messy, imperfect process is what keeps me coming back to this recipe.
- heading
- story_type
Ingredient breakdown
- Chicken wings: I choose fresh, plump wings with a bit of skin for that satisfying crackle—if yours are slim or defrosted, expect slightly less crunch.
- Flour and cornstarch: I mix these to get a light, crispy coating—skip the cornstarch if you prefer a slightly softer shell, but don’t expect the same crunch.
- Spices: I love a mix of smoked paprika and cayenne—adds depth and heat. Feel free to swap in garlic powder or onion powder for a different punch.
- Oil: I use neutral oil like vegetable or canola—smoky, clean, high-temp friendly. If you want a richer flavor, try peanut oil, but watch the smoke point.
- Vinegar or lemon juice: I add a splash to the marinade for brightness—skip it, and the wings might feel a tad flat on the palate, so consider a squeeze of lemon after frying.
- Salt: I season generously, but taste as you go—too much can make them overly salty, especially if your seasoning blend is already salty.
- Optional coating: I sometimes toss wings in hot sauce or honey after frying—think about your flavor goal, and don’t forget to balance heat with sweetness or acidity.
Spotlight on key ingredients
Chicken wings:
- I pick plump, fresh wings with a bit of skin for that satisfying crackle—if yours are slim or frozen, expect slightly less crunch.
- Flour and cornstarch: I mix these to create a light, crispy coating—skipping cornstarch yields a softer shell, but sacrifices some crunch.
Spices and oil:
- Oil: I prefer neutral oils like vegetable or canola—smoky, clean, high-temp friendly. For more flavor, try peanut oil, but watch the smoke point.
- Spices: I love smoked paprika and cayenne—adds depth and heat. Swap in garlic or onion powder for different flavor notes.
Notes for ingredient swaps
- Dairy-Free: Use a plant-based milk or omit altogether; it won’t affect the crispness but may slightly alter flavor.**
- Gluten-Free: Swap all-purpose flour for rice flour or gluten-free baking mix for a lighter, crisp coating.**
- Low-Sodium: Choose unsalted or low-sodium seasoning blends; you might need to add a pinch more salt afterward.**
- Vinegar Type: Replace white vinegar with apple cider vinegar for a milder, fruity tang or lemon juice for brightness.**
- Oil Choice: Use avocado or light olive oil for a subtle flavor boost and high smoke point; avoid extra virgin.**
- Spice Variations: Swap cayenne for smoked paprika or chipotle powder for a smoky, deeper heat.**
- Sweeteners: Add honey or maple syrup post-fry for a glossy, sweet glaze; skip for savory, spicy wings.
Equipment & Tools
- Heavy-bottomed pot or deep fryer: Ensure even heat and safe frying.
- Wire rack: Allow excess oil to drain and keep wings crispy.
- Thermometer: Maintain correct oil temperature.
- Tongs: Handle hot wings safely.
- Paper towels: Absorb excess oil.
Step-by-step guide to frying wings
- Equipment & Tools: Gather a heavy-bottomed pot or deep fryer, a wire rack, a thermometer, tongs, and paper towels.
- Pat the chicken wings dry with paper towels. Dry skin crisps better and reduces splatter.
- Mix flour, cornstarch, and your chosen spices in a large bowl. Aim for a light, even coating.
- Dredge each wing in the seasoned flour mix, pressing gently to adhere. Shake off excess.
- Heat oil to 175°C (347°F). Use the thermometer to maintain steady temperature; too hot burns, too cold soggy.
- Fry wings in batches, 8-10 minutes per batch. Turn occasionally until golden and crispy, with a crackling sound.
- Use tongs to transfer wings to a wire rack lined with paper towels. Do not pile them; allow air circulation.
- Rest wings for 5 minutes. This redistributes juices and crisps the skin further.
- Check doneness: wings should jiggle slightly, smell fragrant, and have a deep golden color. The interior should reach 75°C (165°F).
- Serve immediately or toss in your favorite sauce. Plate with a sprinkle of flaky sea salt for extra punch.
Let the wings rest on a wire rack for 5 minutes. Serve immediately for maximum crunch and flavor. For extra flavor, toss in sauce or herbs just before plating.
How to Know It’s Done
- Color: wings should be deep golden, not pale or burnt.
- Sound: crackling noise during frying signals proper crispness.
- Temperature: internal temp of 75°C (165°F) confirms doneness.
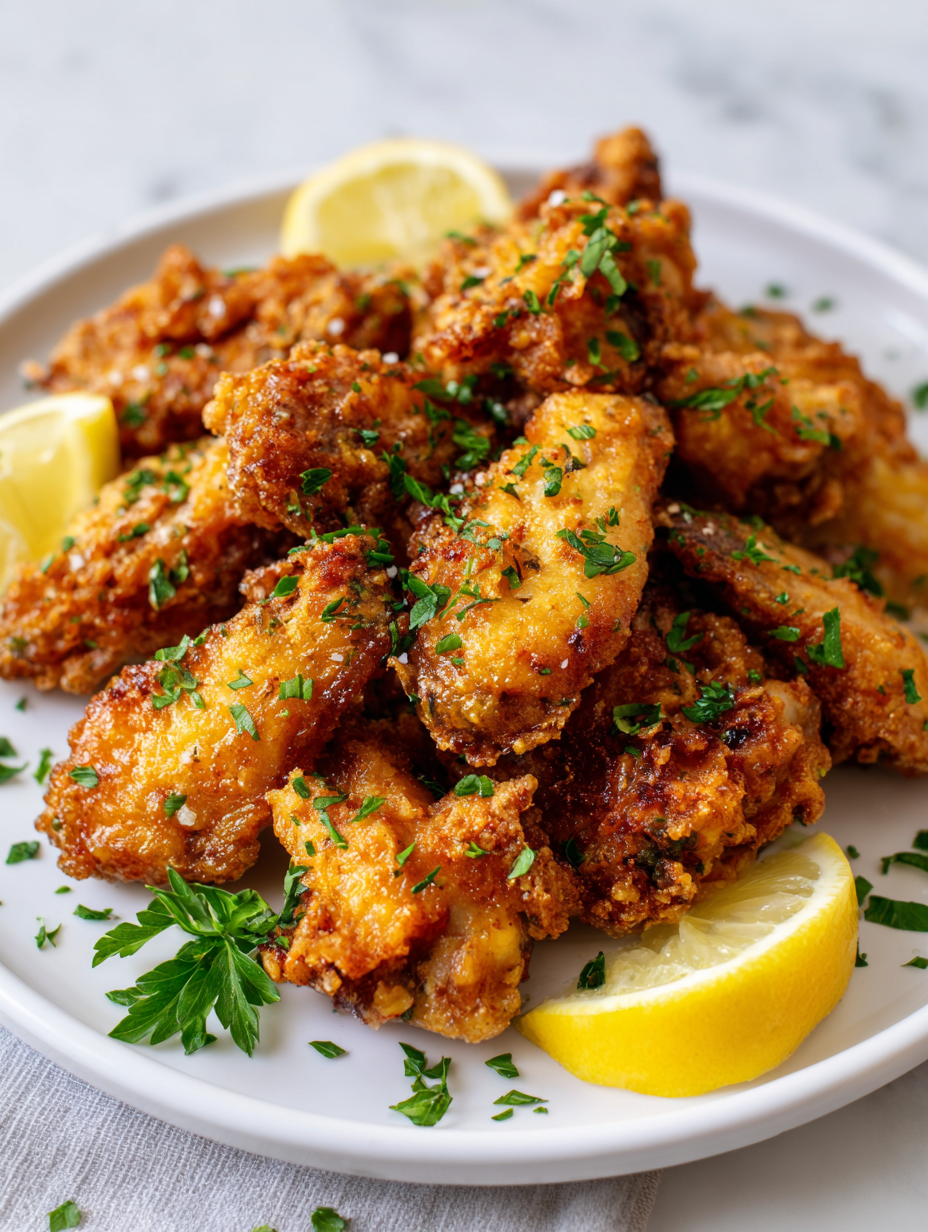
Crispy Rested Fried Chicken Wings
Ingredients
Equipment
Method
- Pat the chicken wings dry with paper towels to remove excess moisture, which helps achieve crispiness during frying.
- In a large bowl, combine flour, cornstarch, smoked paprika, cayenne pepper, and a generous pinch of salt. Mix well until evenly blended.
- Dredge each wing in the seasoned flour mixture, pressing gently to ensure the coating adheres evenly. Shake off any excess flour.
- Heat the oil in a heavy-bottomed pot or deep fryer to 175°C (347°F). Use a thermometer to maintain a steady temperature.
- Carefully lower the coated wings into the hot oil in batches, avoiding overcrowding. Fry each batch for about 8-10 minutes, turning occasionally, until the wings are deep golden and crispy with a crackling sound.
- Use tongs to transfer the fried wings onto a wire rack lined with paper towels. Let them rest for 5 minutes to allow the skin to crisp further and the juices to redistribute inside.
- After resting, check that wings are cooked through (internal temperature should reach 75°C / 165°F). Enjoy immediately, perhaps tossed in your favorite sauce or served plain to appreciate the crispy texture.
Pro tips for perfect fried wings
- Cold wings: Keep wings chilled until ready to fry for maximum crispness—warm wings release moisture, leading to sogginess.
- Consistent oil temp: Use a thermometer and maintain 175°C (347°F); fluctuating heat causes uneven cooking and soggy spots.
- Batch frying: Don’t overcrowd the pan; fry in small batches to keep oil temperature stable and wings crispy.
- Rest after frying: Let wings sit on a wire rack for 5 minutes; this redistributes juices and crisps the skin further.
- Proper seasoning: Salt wings before frying and adjust after; seasoned wings have more flavor and better texture.
- Use a cooling rack: Drain excess oil on a wire rack instead of paper towels for crisper skin and less sogginess.
- Final toss: After resting, toss wings in sauce or seasoning while still hot for maximum flavor absorption.
Common mistakes and how to fix them
- FORGOT to dry wings: They won’t crisp well—pat thoroughly with paper towels before frying.
- DUMPED too much oil: Overcrowding lowers temperature—fry in batches for crispy results.
- OVER-TORCHED wings: Burnt skin ruins flavor—monitor oil temp and adjust heat as needed.
- MISSED resting step: Skipping resting makes wings soggy—rest for 5 minutes to crisp and juice.
Quick fixes and pantry swaps
- When wings stick to the pan, splash a little hot oil to loosen them.
- If oil shimmers too much, reduce heat immediately to prevent burning.
- Patch soggy wings with a quick 30-second fry at 190°C (374°F).
- Shield burnt spots with a little lemon juice to brighten flavor and mask scorch.
- When in doubt, swap flour for rice flour for lighter, crispier coating.
Prep, store, and reheat tips
- Prepping the wings: Pat them dry and coat with seasoning a few hours ahead to deepen flavor—refrigerate uncovered for best crispness.
- Batter or coating prep: Mix your flour and spice blend the night before; keep in an airtight container to save time.
- Storage of fried wings: Keep leftovers in an airtight container in the fridge for up to 3 days; reheat for crispness, not sogginess.
- Reheating: Oven at 180°C (356°F) for 10 minutes or air fryer for 5-7 minutes preserves crunch; expect a slight loss of freshness.
- Sensory note: Wings reheat with a crackle, aroma of seasoned oil, and a warm, inviting smell that hints at freshness lost but still satisfying.
FAQs about Fried Chicken Wings
1. How do I choose the best chicken wings?
Look for wings with firm, plump flesh and a bit of skin; avoid slim, defrosted, or discolored pieces.
2. Can I use different oils for frying?
Use neutral oils like vegetable or canola for a clean, high-temp fry; peanut oil adds flavor but watch the smoke point.
3. How many wings should I fry at once?
Fry in small batches at 175°C (347°F); too many wings at once drops the oil temperature and results in soggy wings.
4. Why do I need to rest the wings after frying?
Rest the fried wings on a wire rack for 5 minutes to crisp the skin further and let juices redistribute.
5. How do I know when the wings are cooked through?
Check for deep golden color, a crackling sound during frying, and an internal temp of 75°C (165°F) to ensure doneness.
6. Are there good substitutes for regular flour?
You can swap flour for rice flour or gluten-free baking mix for a lighter, crispy coating, but expect slight texture differences.
7. Can I omit the vinegar or lemon juice?
Adding a splash of vinegar or lemon juice brightens the flavor; skip if you prefer a milder taste.
8. Can I prepare the wings ahead of time?
Pre-season the wings and refrigerate uncovered for a few hours; reheat in the oven or air fryer for best crispness.
9. How do I fix soggy reheated wings?
If wings are soggy upon reheating, give them a quick blast in the oven or air fryer to restore crunch.
10. What are quick fixes for common frying issues?
Splash hot oil to loosen stuck wings, reduce heat if oil shimmers too much, or patch burnt spots with lemon.
Fried chicken wings are more than just a snack; they’re a messy, satisfying reminder of good, honest cooking. Each crispy bite holds stories of patience, oil splatters, and that perfect golden crunch we chase after. No matter how many times I make them, they still feel like a small celebration in my kitchen.
In the end, it’s the simple act of resting the wings and embracing the chaos that elevates this dish. It’s a reminder that good food isn’t about perfection, but about the joy of the process and the flavors that linger long after the plate is empty.

I’m Mahek Manchanda, the curious heart behind Dramatically Stirring. Before this space existed, my life revolved around kitchens that were loud, demanding, and endlessly alive. I didn’t arrive at cooking through a single dramatic moment.