Focusing on the overlooked art of achieving the perfect crispiness in fried spring rolls, this recipe dives into the subtle techniques that make each bite satisfyingly crunchy without turning greasy. It’s about balancing the oil temperature, choosing the right wrapper, and mastering the delicate fry to get that golden, crackly exterior that’s often elusive but highly rewarding.
Getting that ideal crunch is like a small victory in the kitchen, especially when you’re trying to impress friends or just satisfy a snack craving that demands texture as much as flavor. I’ve tweaked my approach over the years, learning how to keep the oil steady and the rolls from bursting or turning soggy. It’s messy but worth it—crispy, hot, and just the right amount of oily in the best way.
Focusing on the overlooked art of achieving the perfect crispiness in fried spring rolls, this recipe dives into the subtle techniques that make each bite satisfyingly crunchy without turning greasy. It’s about balancing the oil temperature, choosing the right wrapper, and mastering the delicate fry to get that golden, crackly exterior that’s often elusive but highly rewarding.
The story behind this recipe
I first started making these spring rolls during a chaotic family gathering. Watching everyone gather around the table, eagerly awaiting that first crispy bite, made me realize how much joy a simple dish can bring. Over the years, I kept tweaking the filling and frying process, chasing that perfect crunch without excess oil. Now, it’s become a little ritual—something I turn to when I need comfort or a quick burst of nostalgia.
Ingredient breakdown: key components
- Spring roll wrappers: I love the thin, delicate texture—they get crispy and golden, but if yours are too thick, they won’t crisp well. Try to find the ultra-thin ones or thin them out with a gentle stretch.
- Vegetable filling: I prefer a mix of cabbage, carrots, and bean sprouts for crunch and freshness. If your filling feels too wet, toss it in a little cornstarch—helps crisp up the roll and keeps it from sogging.
- Oil for frying: I use a neutral oil like canola or sunflower. When it shimmers at 180°C (350°F), you know it’s ready. If the oil smokes, turn down the heat, or you’ll end up with a greasy mess.
- Egg wash (optional): I sometimes brush the edges with a beaten egg for extra sealing power. Skip it if you want a vegan version, but expect slightly less cohesion on the seal.
- Seasonings: I keep it simple—soy sauce, garlic, and a splash of sesame oil. If you want a smoky kick, add a dash of smoked paprika. Watch out—too much soy can make the filling soggy if overused.
- Cooking oil temperature: Maintaining a steady 180°C (350°F) is key. If it drops, rolls soak up oil and get greasy; if too hot, they burn fast before crisping through.
- Serving: I like to serve these immediately, with a tangy dipping sauce—sweet chili or soy-lime—that cuts through the oil and enhances the crunch.
Spotlight on key ingredients
Spring roll wrappers:
- I love the thin, delicate texture—they get crispy and golden, but if yours are too thick, they won’t crisp well. Try to find the ultra-thin ones or thin them out with a gentle stretch.
- Vegetable filling: I prefer a mix of cabbage, carrots, and bean sprouts for crunch and freshness. If your filling feels too wet, toss it in a little cornstarch—helps crisp up the roll and keeps it from sogging.
Oil and egg wash:
- Oil for frying: I use a neutral oil like canola or sunflower. When it shimmers at 180°C (350°F), you know it’s ready. If the oil smokes, turn down the heat, or you’ll end up with a greasy mess.
- Egg wash (optional): I sometimes brush the edges with a beaten egg for extra sealing power. Skip it if you want a vegan version, but expect slightly less cohesion on the seal.
Notes for ingredient swaps
- Vegetarian: Use mushroom or tofu instead of meat. It adds umami without the meatiness, but expect a softer texture.
- Gluten-Free: Rice paper wrappers can replace traditional spring roll wrappers. Keep in mind, they’re more delicate and less crispy.
- Low-Sodium: Swap soy sauce for coconut aminos. It’s less salty and adds a subtle sweetness, but may alter the savory punch.
- Vegan: Skip the egg wash and choose vegan-friendly wrappers. You might need to seal edges with a little water or cornstarch slurry.
- Spicy: Add finely chopped chili or a dash of hot sauce to the filling. It amps up the heat but can overpower delicate flavors.
- Oil choice: Use sesame or peanut oil for a nuttier flavor. These oils have lower smoke points, so watch the heat carefully.
- Sweet dipping: Replace soy or chili sauce with hoisin or a honey-soy mix. It’s more viscous and sweet, balancing the crunch with a touch of sweetness.
Equipment & Tools
- Deep-fry thermometer: Monitor oil temperature precisely
- Wide heavy-bottomed pot or wok: Ensure even heat and enough oil for frying
- Tongs: Gently lower and turn the rolls
- Slotted spoon: Remove fried rolls and drain excess oil
- Paper towels: Drain and rest the fried rolls
Step-by-step guide to frying spring rolls
- Gather your equipment: a deep-fry thermometer, a wide heavy-bottomed pot or wok, tongs, a slotted spoon, and paper towels for draining.
- Prepare the filling: mix shredded cabbage, carrots, bean sprouts, minced garlic, soy sauce, and sesame oil. Set aside.
- Wrap the rolls: place a spring roll wrapper on a clean surface, spoon about 2 tablespoons of filling near the corner, fold in the sides, then roll tightly from the corner to seal. Use a dab of water to seal edges if needed.
- Heat the oil: fill your pot about 5cm deep with neutral oil. Heat over medium-high heat until the thermometer reads 180°C (350°F). The oil should shimmer but not smoke.
- Fry the spring rolls: carefully lower 3-4 rolls into the hot oil using tongs. Fry for about 3-4 minutes, turning occasionally, until golden and crispy. Listen for a steady crackle. If oil bubbles excessively, lower heat slightly.
- Check for doneness: the rolls should be golden brown, crispy, and firm to the touch. The filling should be hot and slightly bubbling out of the wrapper.
- Drain and rest: remove with tongs, place on paper towels, and let drain for 1-2 minutes. Rest briefly before serving to avoid sogginess.
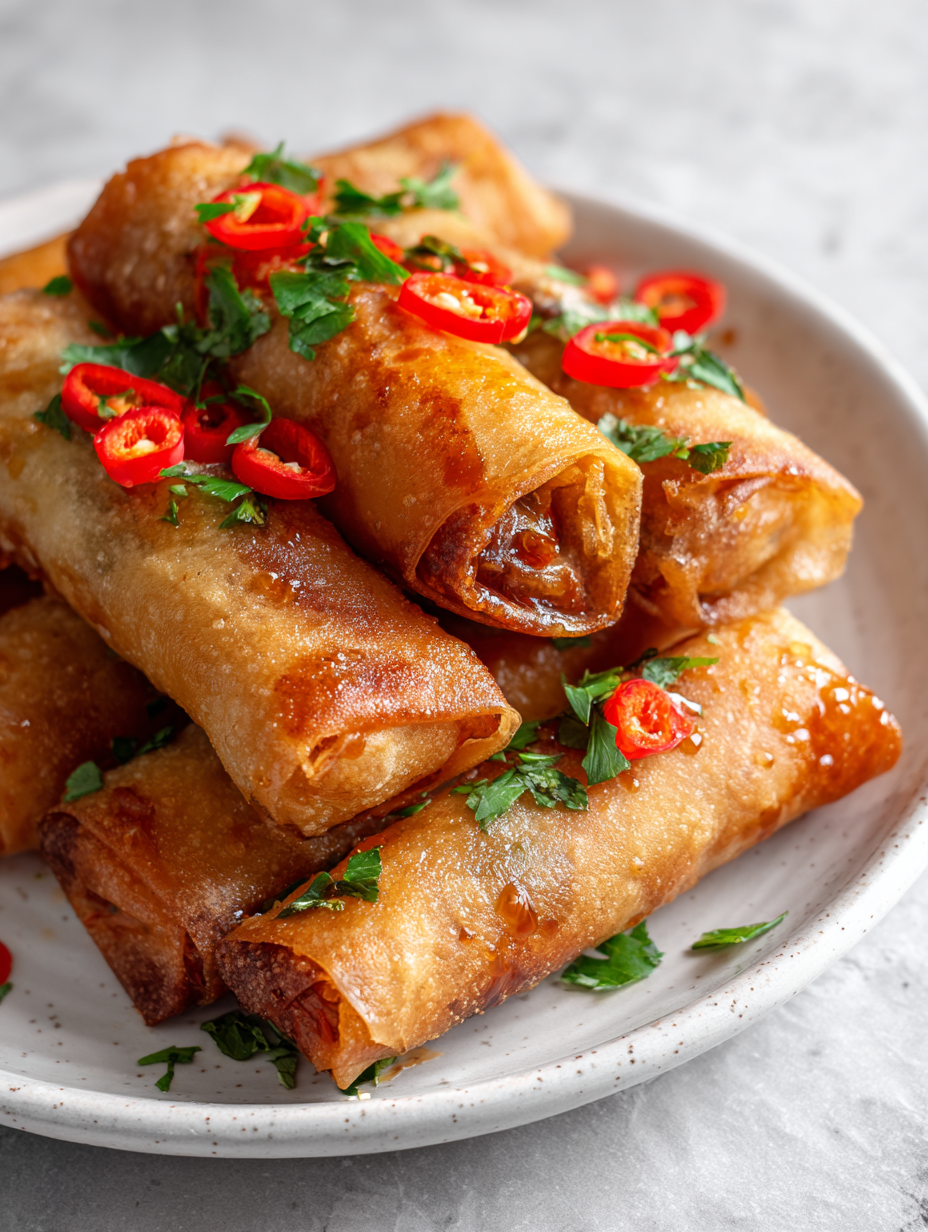
- Serve hot: with dipping sauces like sweet chili or soy-lime. Serve immediately for maximum crunch.
Serve the fried spring rolls immediately while hot and crispy. Rest briefly on paper towels to drain excess oil. Present on a plate with your favorite dipping sauces for contrast.
How to Know It’s Done
- Oil temperature steady at 180°C (350°F) during frying.
- Spring rolls turn golden and crispy within 3-4 minutes.
- Filling is hot and slightly bubbling out of the wrapper.
Crispy Fried Spring Rolls
Ingredients
Equipment
Method
- Start by preparing the filling: in a mixing bowl, combine shredded cabbage, grated carrots, bean sprouts, minced garlic, soy sauce, and sesame oil. Mix well until evenly coated and set aside.
- If your filling feels wet, toss it with a tablespoon of cornstarch to help it crisp up during frying.
- Lay a spring roll wrapper on a clean surface, and spoon about 2 tablespoons of filling near one corner, leaving space at the edges.
- Fold the sides of the wrapper inward over the filling, then roll tightly from the corner to enclose the filling completely. Use a dab of beaten egg or water along the edge to seal the roll.
- Repeat the wrapping process with the remaining wrappers and filling, ensuring each roll is tightly sealed and ready for frying.
- Heat the neutral oil in a wide heavy-bottomed pot or wok over medium-high heat. Attach a deep-fry thermometer and wait until the oil reaches 180°C (350°F), where it should shimmer gently.
- Carefully lower 3-4 spring rolls into the hot oil using tongs, making sure not to overcrowd the pan. Fry for about 3-4 minutes, turning occasionally, until the rolls are golden brown and crispy.
- Once golden and crisp, use a slotted spoon to remove the rolls and drain excess oil on paper towels. Continue frying in batches until all are cooked.
- Serve the spring rolls immediately while hot and crunchy, with your favorite dipping sauce like sweet chili or soy-lime.
Notes
Pro tips for perfect spring rolls
- Keep oil at steady 180°C (350°F) for even crispiness and prevent sogginess.
- Use a gentle, consistent heat; too high and rolls burn, too low and they absorb oil.
- Fry in small batches; overcrowding drops temperature and results in greasy rolls.
- Turn the rolls gently during frying; this ensures even browning and crackly texture.
- Drain on paper towels immediately after frying to preserve crunch and avoid excess oil.
- For extra sealing, brush edges with a little beaten egg or water before rolling.
- Serve hot right out of the oil for maximum crunch; they dull quickly as they cool.
Common mistakes and how to fix them
- FORGOT to monitor oil temperature → use a deep-fry thermometer for steady heat.
- DUMPED too many rolls in at once → fry in small batches to prevent sogginess.
- OVER-TORCHED the rolls → keep an eye on color; golden is perfect, dark is burnt.
- FAILED to drain excess oil → place on paper towels immediately after frying.
Quick fixes and pantry swaps
- When oil shimmers, splash in a tiny piece of bread—if it sizzles, you’re ready.
- If rolls stick together, patch with a little water and gently separate during frying.
- Splash a bit of vinegar in the oil to tame persistent smoke or smell.
- When rolls are unevenly colored, shield lighter parts with a piece of foil while finishing.
- If a roll bursts, rescue with a slotted spoon, drain excess oil, and check oil temp before retrying.
Prep, store, and reheat tips
- Prepare the filling and assemble the rolls ahead of time; keep covered in the fridge for up to a day. The flavors meld and the filling stays fresh.
- Fried spring rolls are best eaten immediately, but can be stored in an airtight container in the fridge for up to 2 days. Reheat in a hot oven or air fryer until crispy—about 5-7 minutes at 180°C (350°F)—to regain crunch.
- Cold storage dulls the crispiness, so reheating is key. Expect a softer texture, but the flavors remain bright and satisfying.
- Avoid freezing raw or cooked rolls, as moisture ruins the crisp exterior. If freezing cooked rolls, reheat directly from frozen in the oven to preserve some crunch.
Top questions about fried spring rolls
1. How do I choose the right wrappers?
Look for wrappers that are thin and delicate; thick ones don’t crisp up well and can turn soggy.
2. What’s the ideal frying temperature?
Keep the oil at a steady 180°C (350°F). Too hot, and they burn; too cold, and they absorb oil.
3. How many rolls can I fry at once?
Fry in small batches—about 3-4 rolls at a time—to prevent crowding and sogginess.
4. How do I keep the rolls crispy after frying?
Drain on paper towels immediately after frying to remove excess oil and keep them crispy.
5. My rolls are burning too fast, what should I do?
If the oil smokes or the rolls burn quickly, lower the heat and check the temperature with a thermometer.
6. When should I serve the fried spring rolls?
Serve the rolls hot out of the oil for maximum crunch and flavor. Reheat in an oven or air fryer for best results.
7. What oil should I use for frying?
Use neutral oils like canola or sunflower for frying; they won’t interfere with the delicate flavor.
8. How do I seal the spring rolls properly?
Make sure to seal the edges well with water or an egg wash to prevent filling from leaking out.
9. How can I prevent soggy filling?
If your filling feels too wet, toss it with a little cornstarch before assembling to help crisp the exterior.
10. Can I prepare the filling ahead of time?
Filling can be prepared a day ahead; keep covered in the fridge to let flavors meld and stay fresh.
Fried spring rolls remind me of bustling street markets, where the sizzling sound and smoky aroma draw everyone in. They’re messy to make, but that crackly crunch and warm filling are worth every splatter and wobble. It’s one of those dishes that tastes like a small celebration in every bite.
Whenever I make these, I’m transported back to those lively streets, and I’m reminded how simple ingredients can come together into something truly satisfying. They’re perfect for sharing, especially when you’re craving that crispy, hot snack that’s just a little rebellious but deeply comforting.

I’m Mahek Manchanda, the curious heart behind Dramatically Stirring. Before this space existed, my life revolved around kitchens that were loud, demanding, and endlessly alive. I didn’t arrive at cooking through a single dramatic moment.